
kinetic sculpture
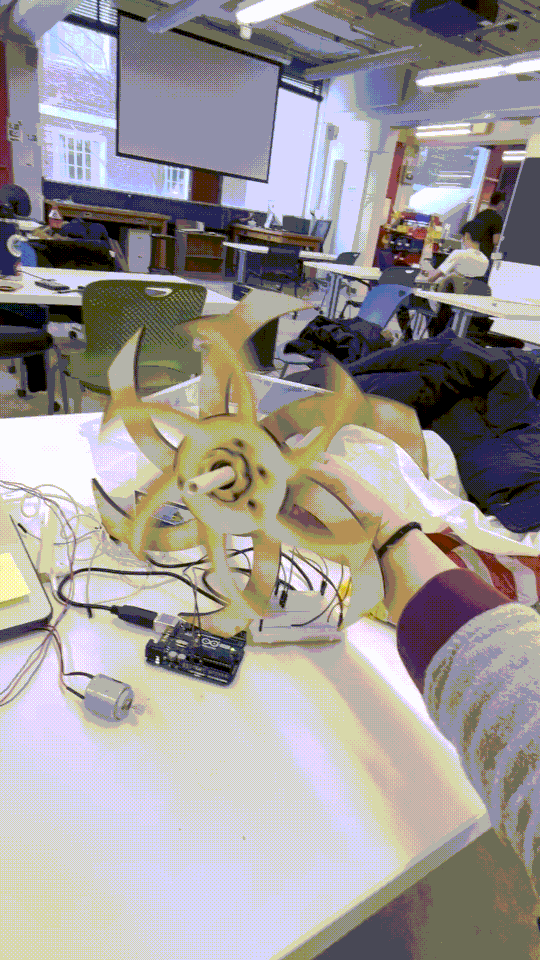
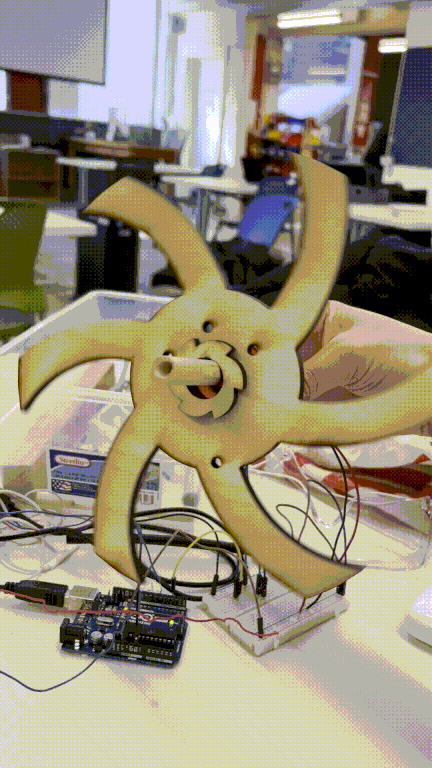
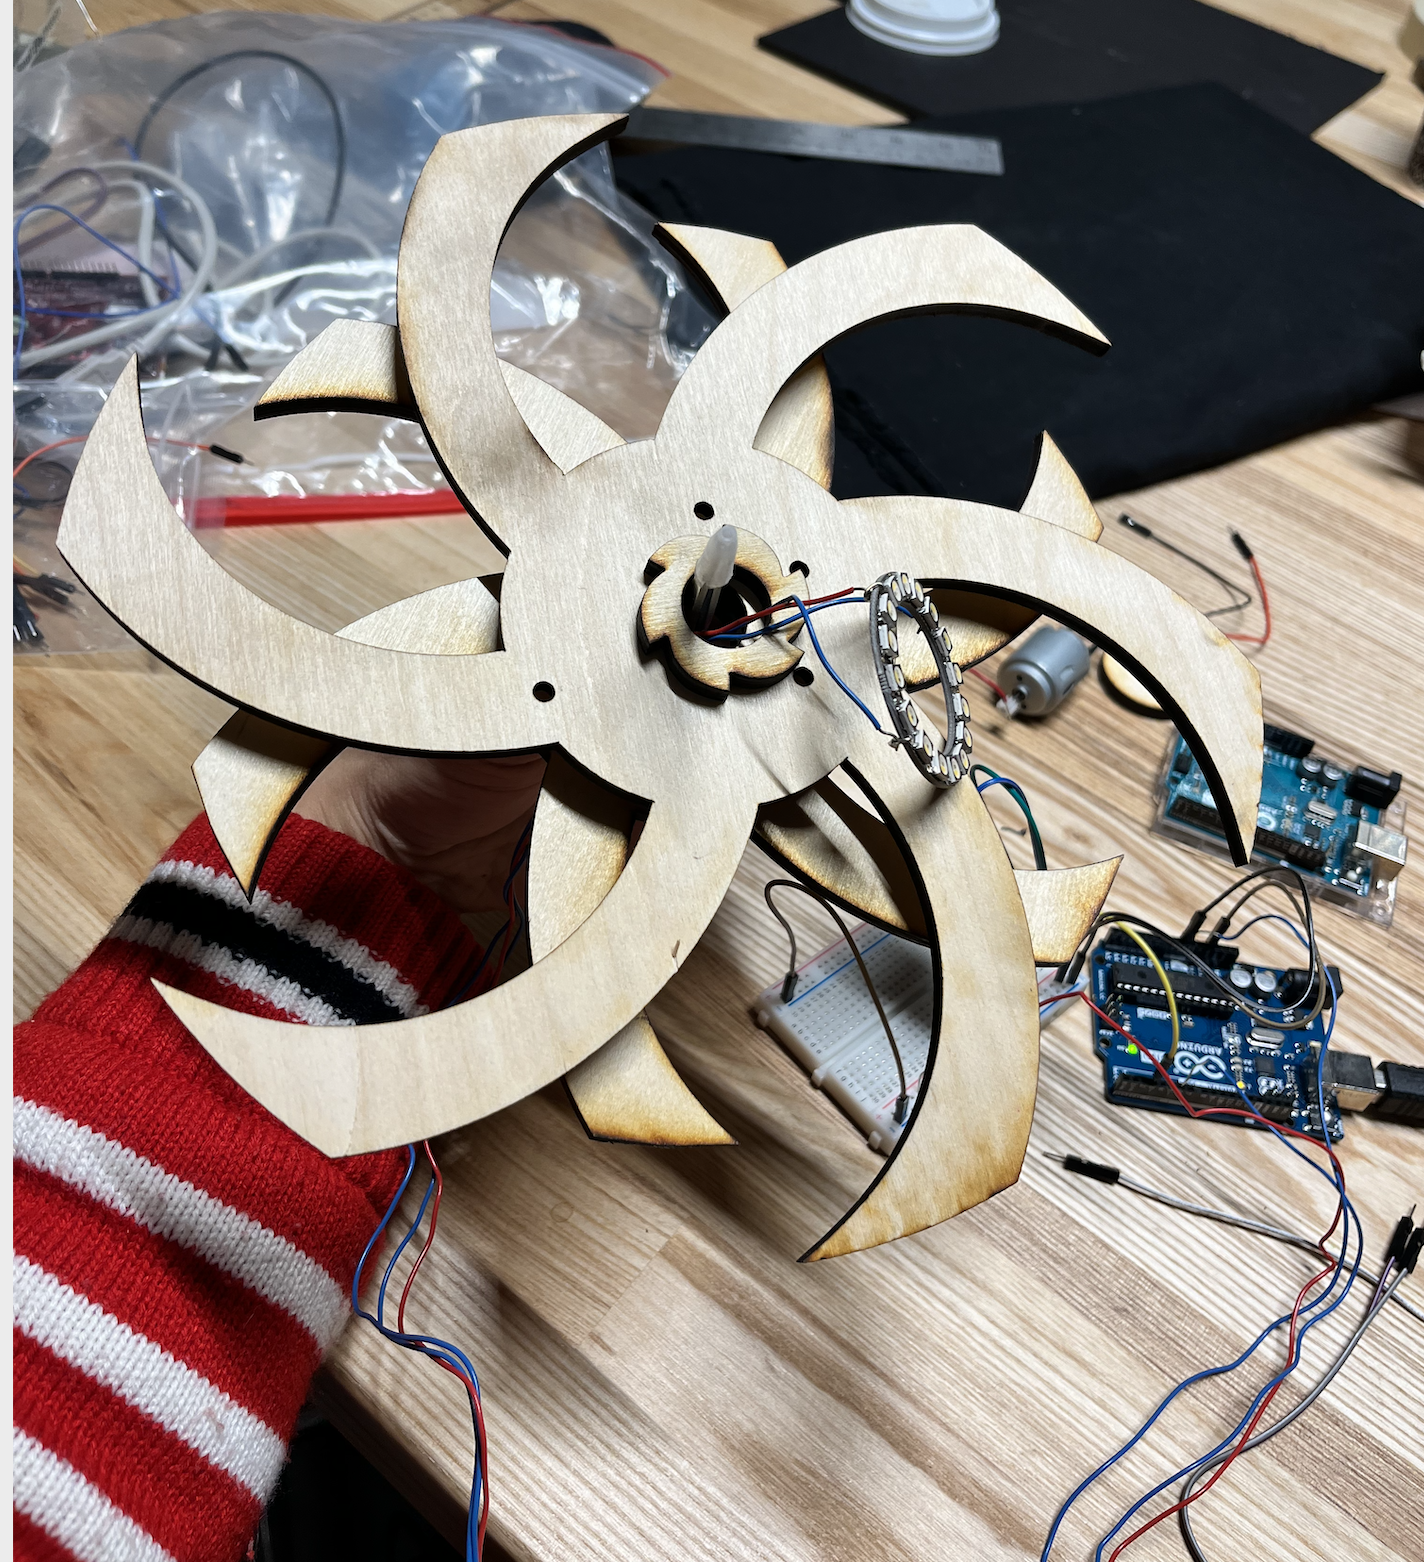
Inspired by the spinning wheel, I want to create a similar one. This is how the end product looked like.Due to the thickness and heavy weight from the parts, the motor wasn't able to hold all the parts together. So I can only move the part with motor, without the LED lights on. Then with the LED lights on part, I need to make it move manually.
Final product with motor on.
Final product with lights on.
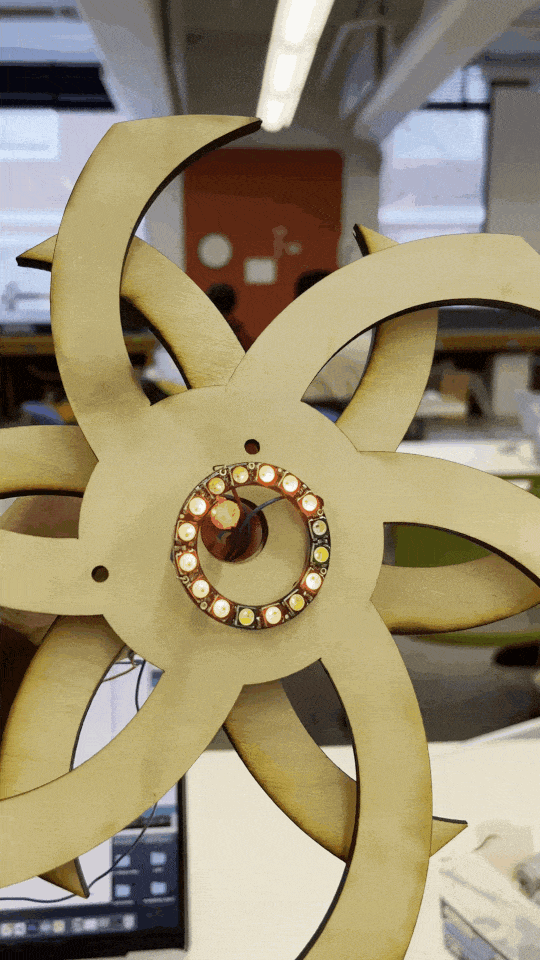
LED lights + part of the whole sculpture
Process
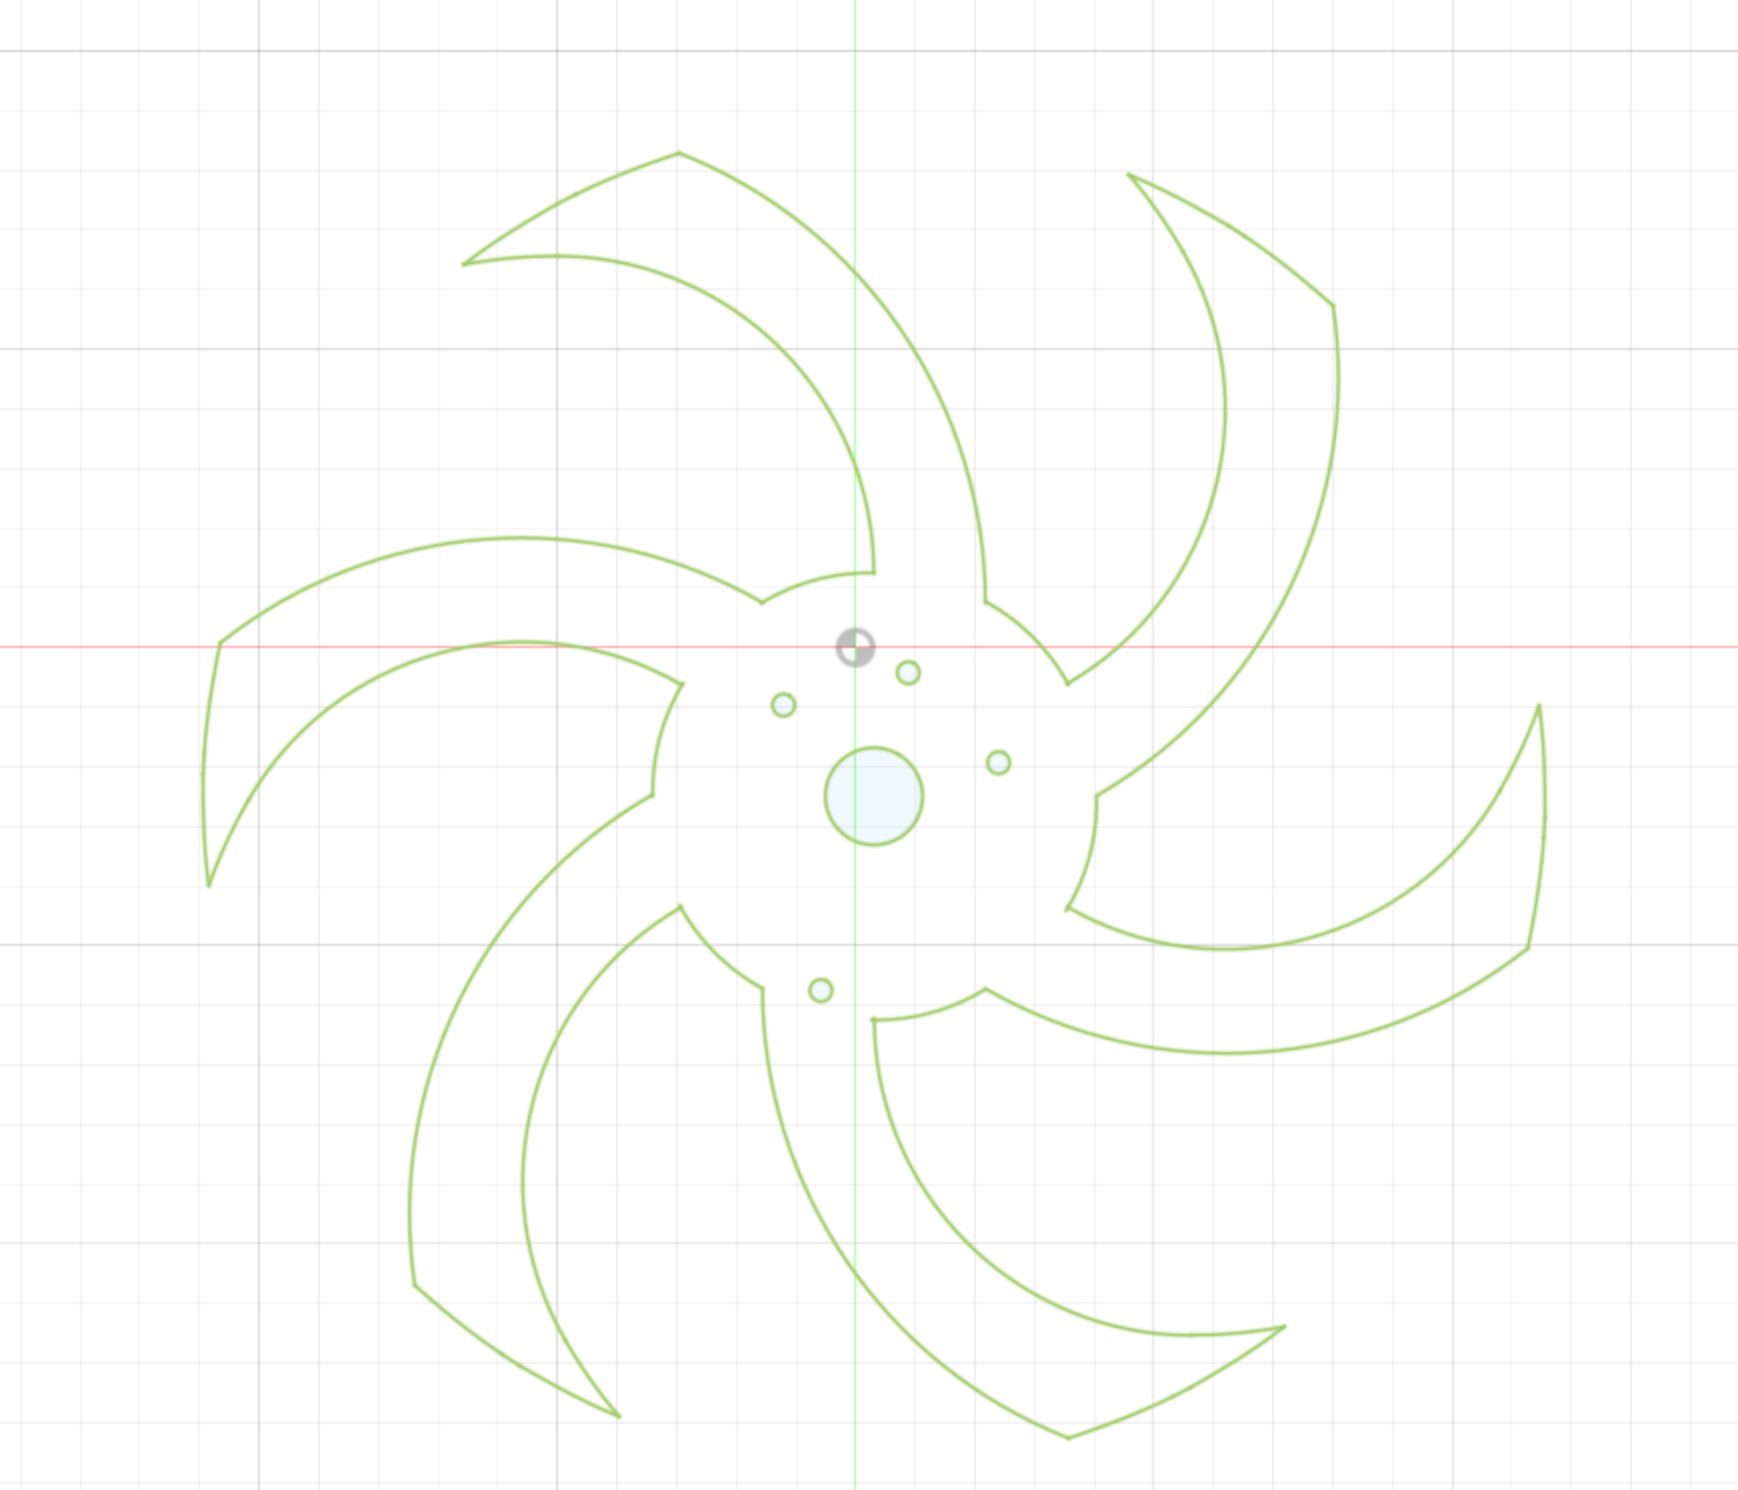
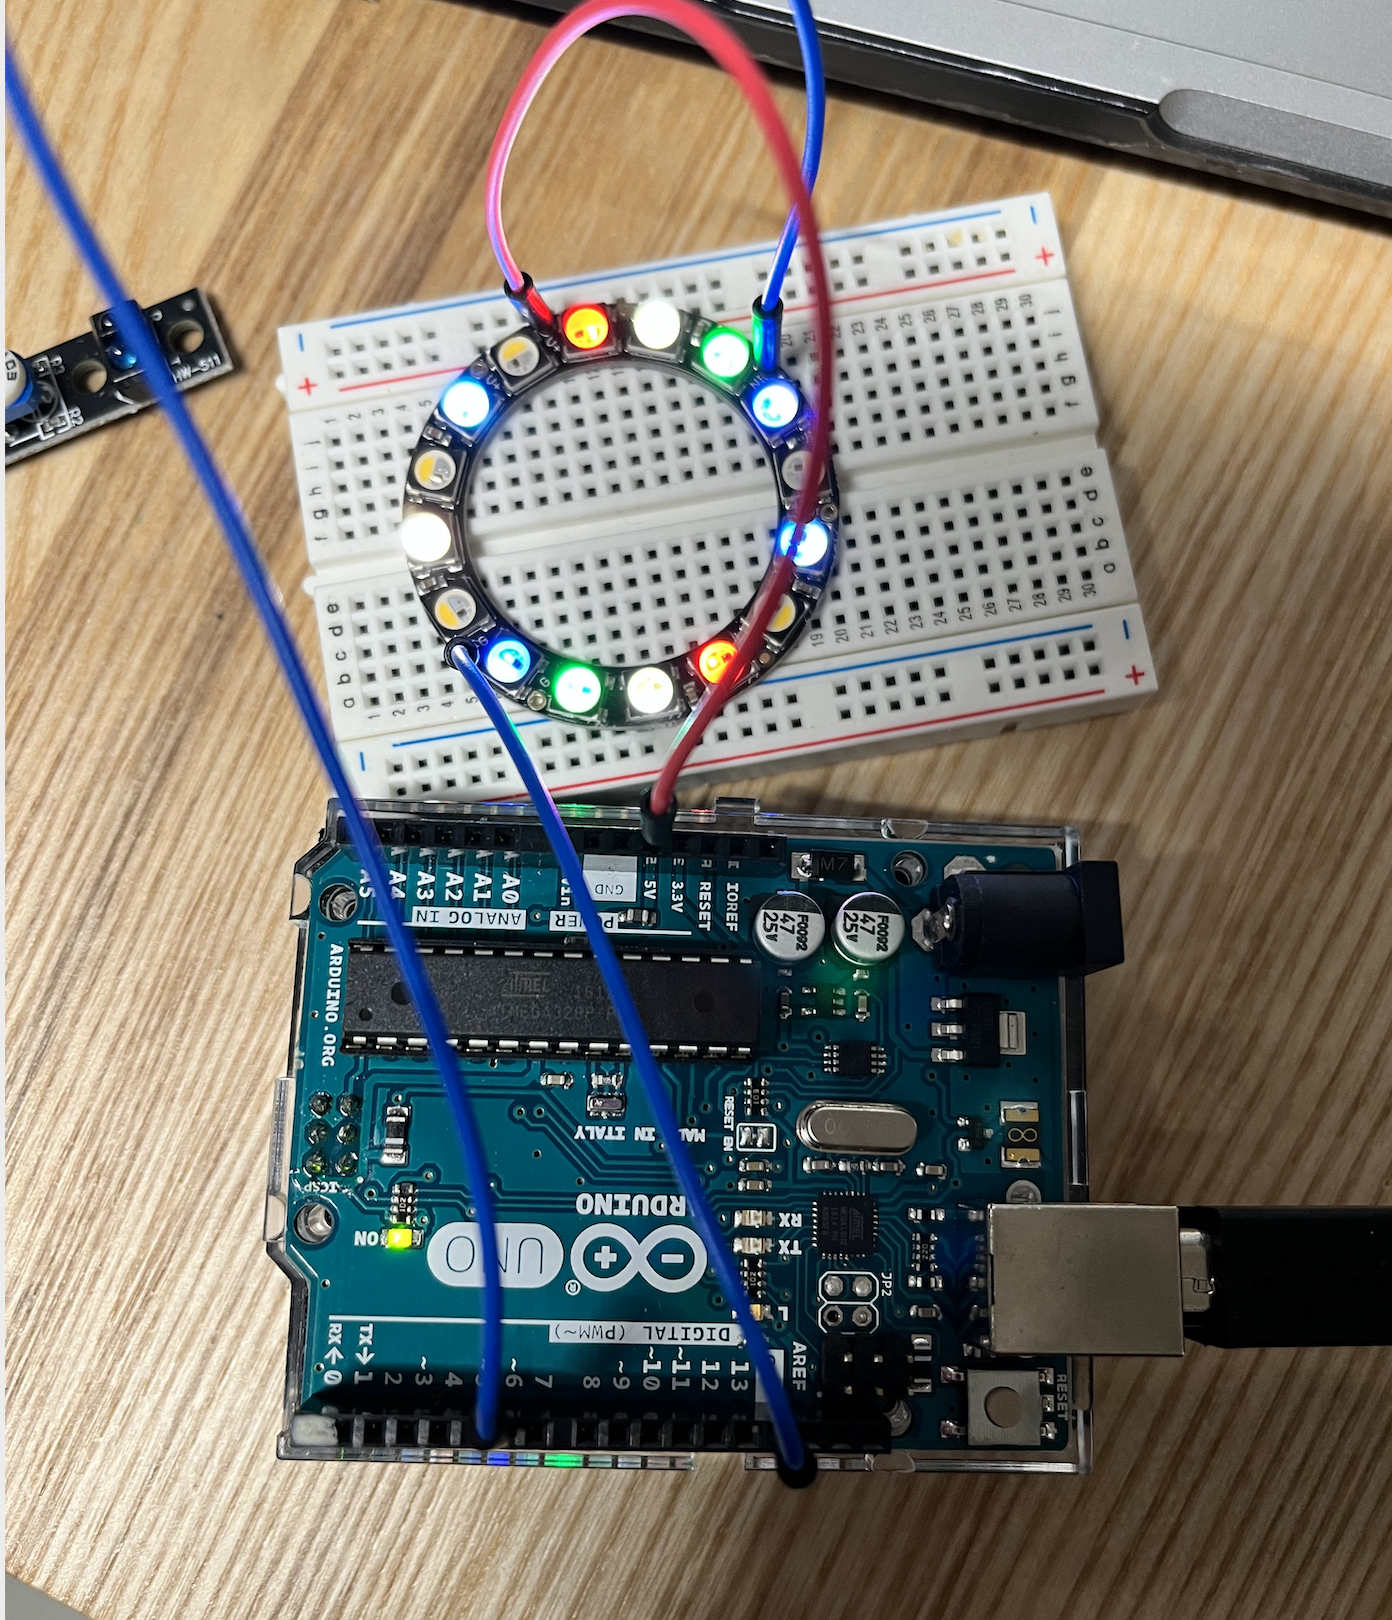
I first created a wheel that has holes in it so it can also use arduino lights to make it shine.
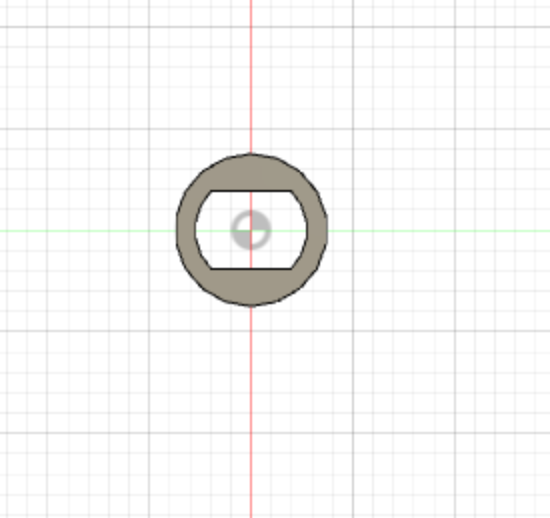
Wheel model in Fusion 360
I used strandtest wheel script to make the Neopixel light up
Then I laser cutted the parts in 1/4 wood. I didn't choose 1/8 becasue i was worried if it may break.

I assembled them together.
When I tried to make all parts spin, I realized the motor holder was too small to hold all parts together.
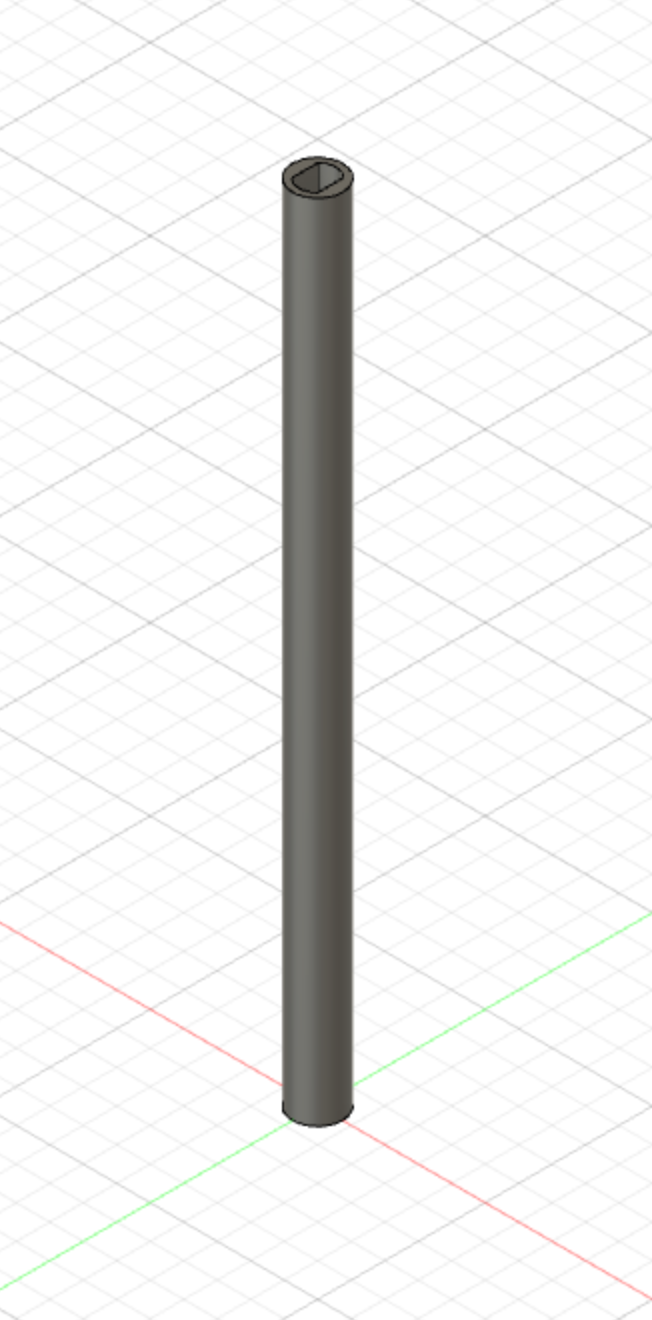
Then I decided to make it stick. Instead of using the wood one, which I need to drill a hole. I decided to design it myself and 3D print the stick.
Top view
front view
3D printing the file took a long time. 4 hours but I was able to learn how the machine works.
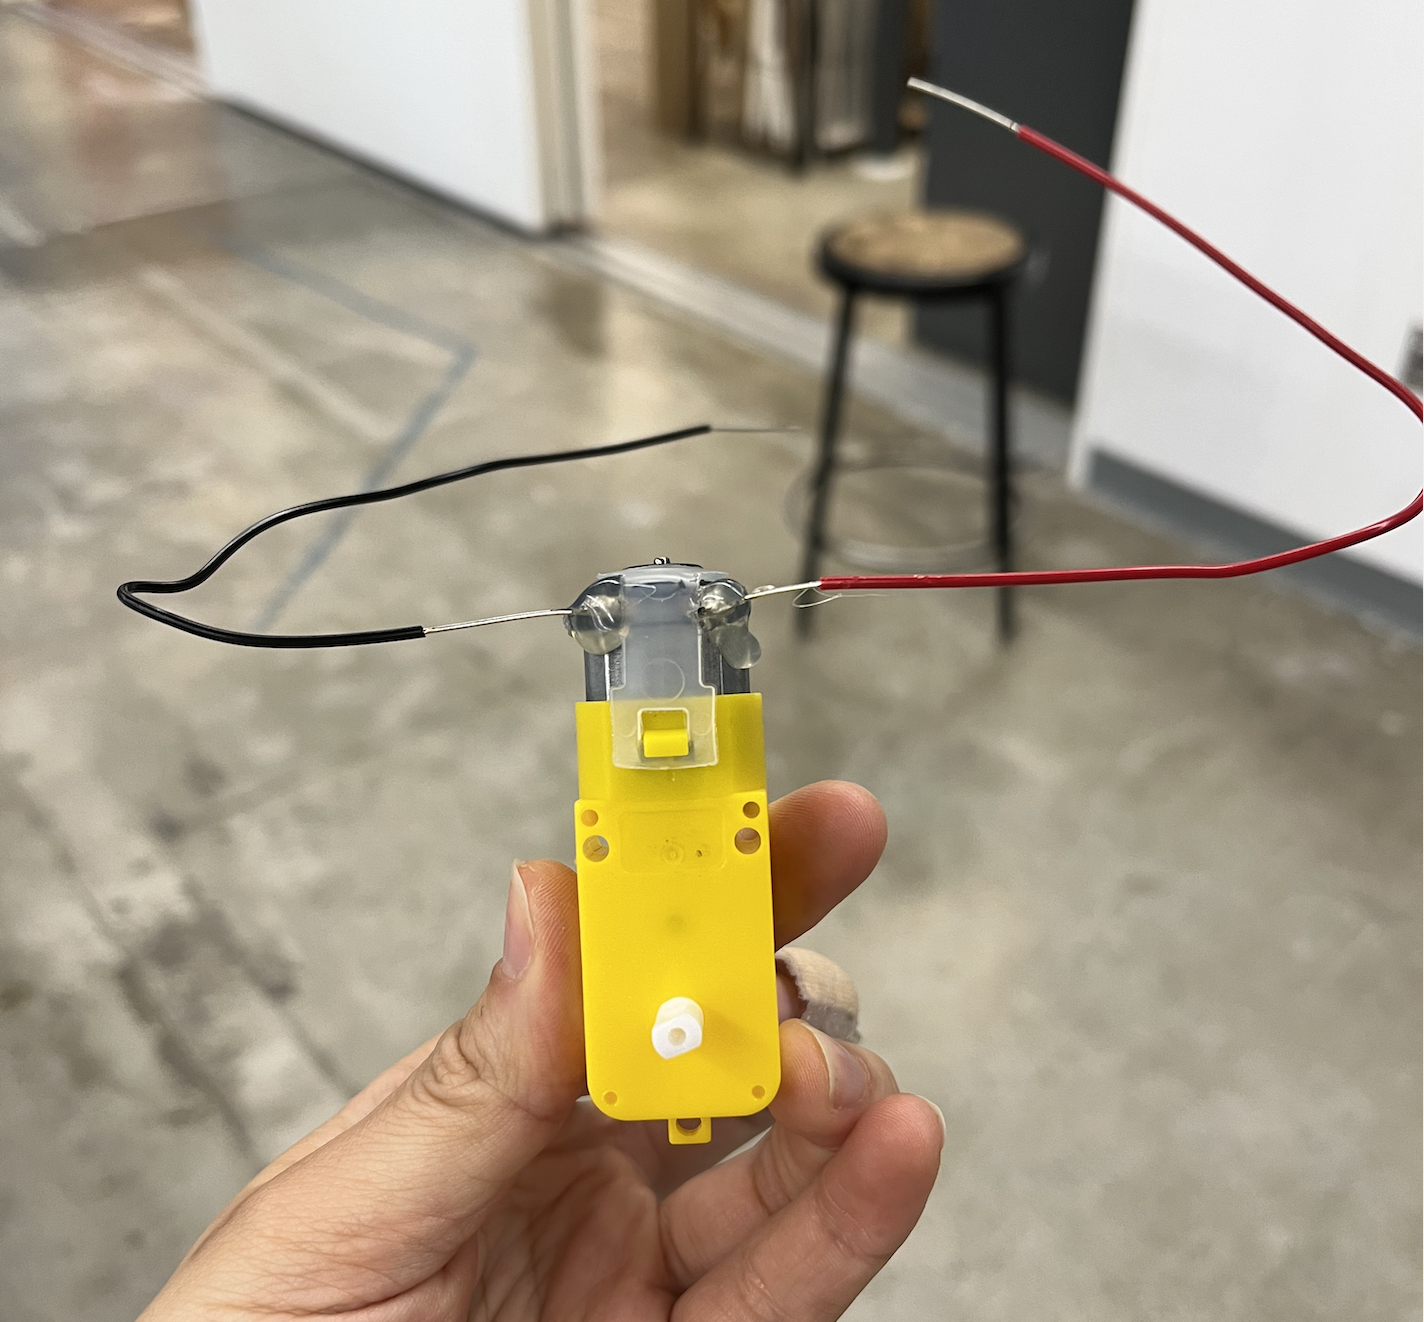
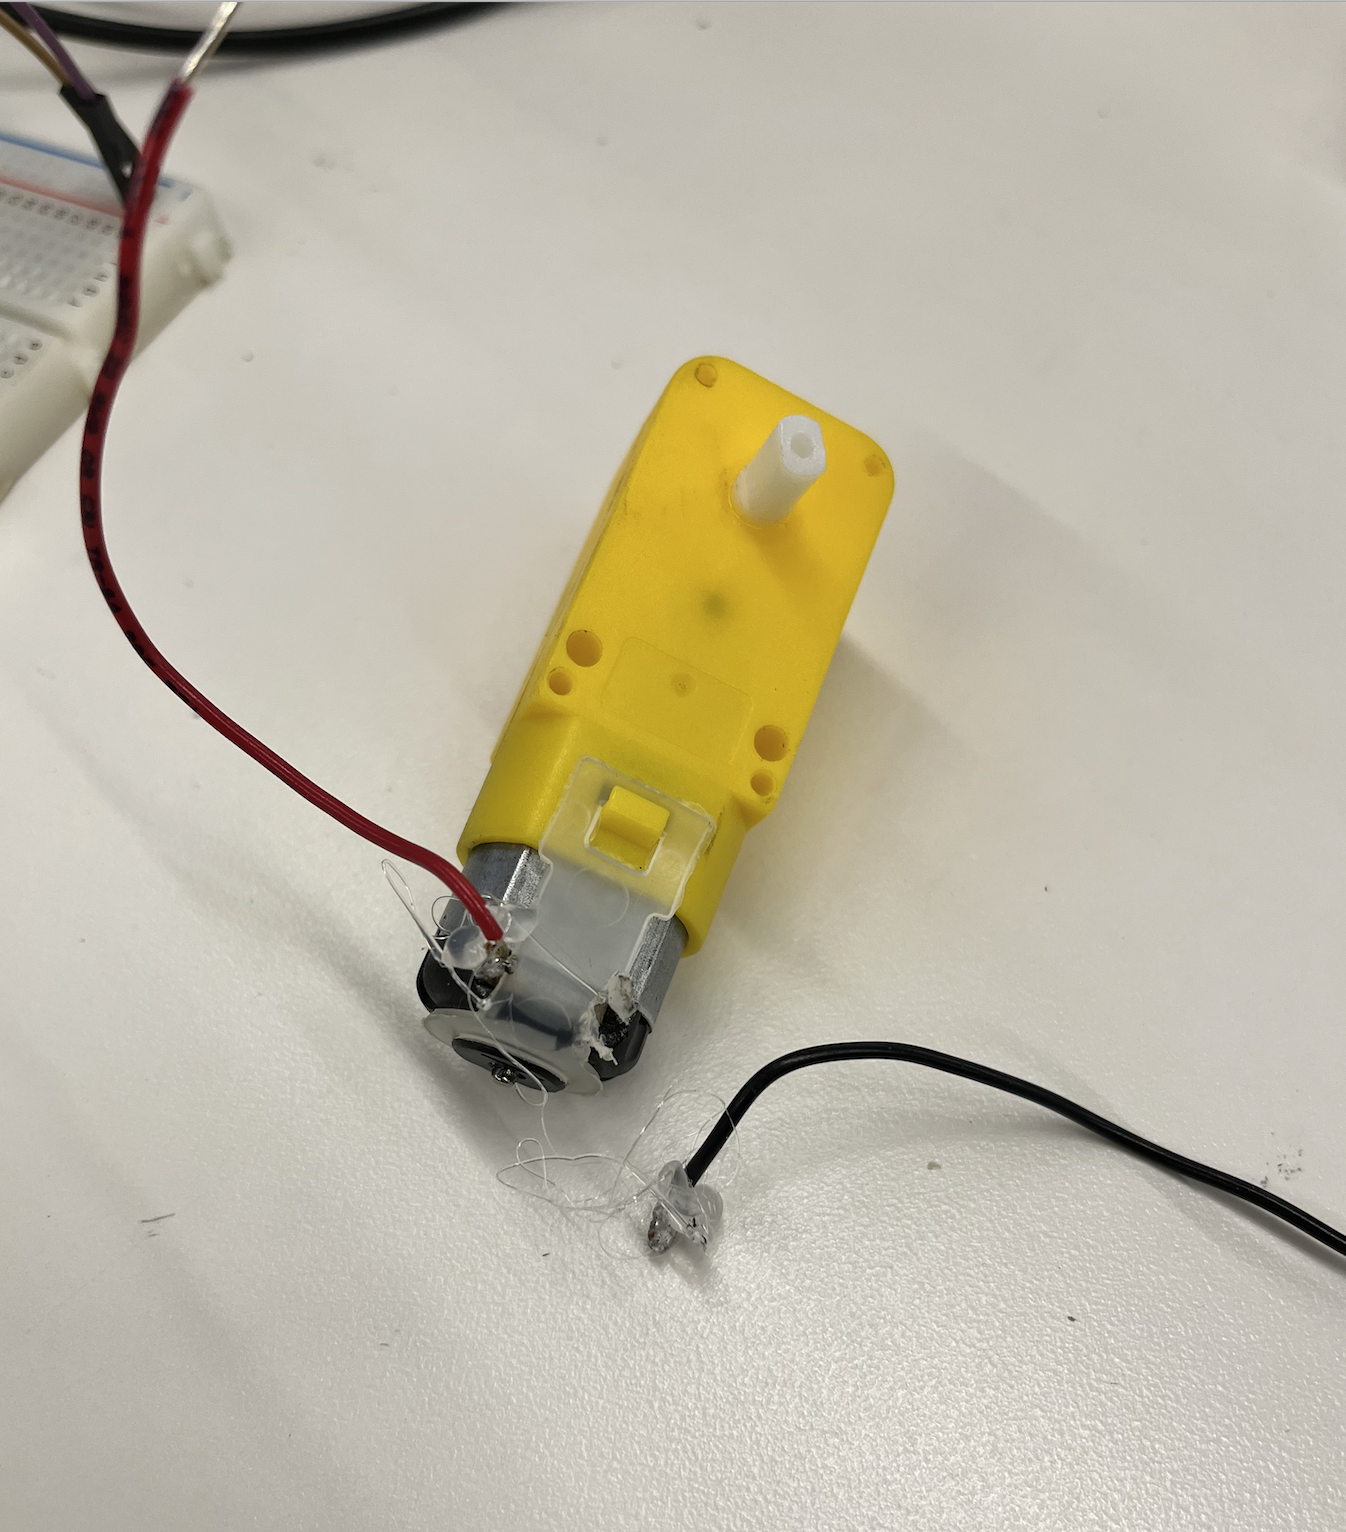
However, the wires I attached to my motor broke even after applying hot glue gun on it.
Motor Before
After
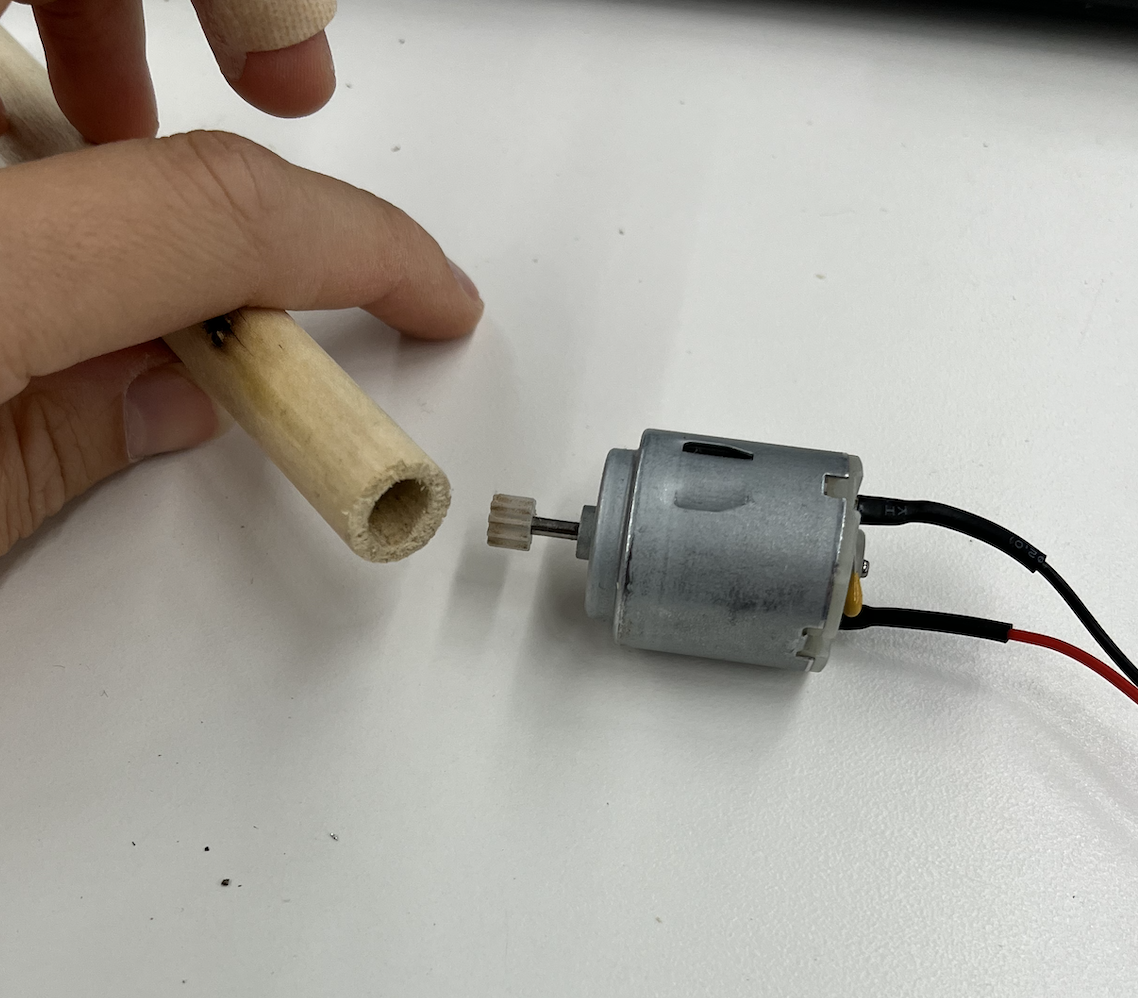
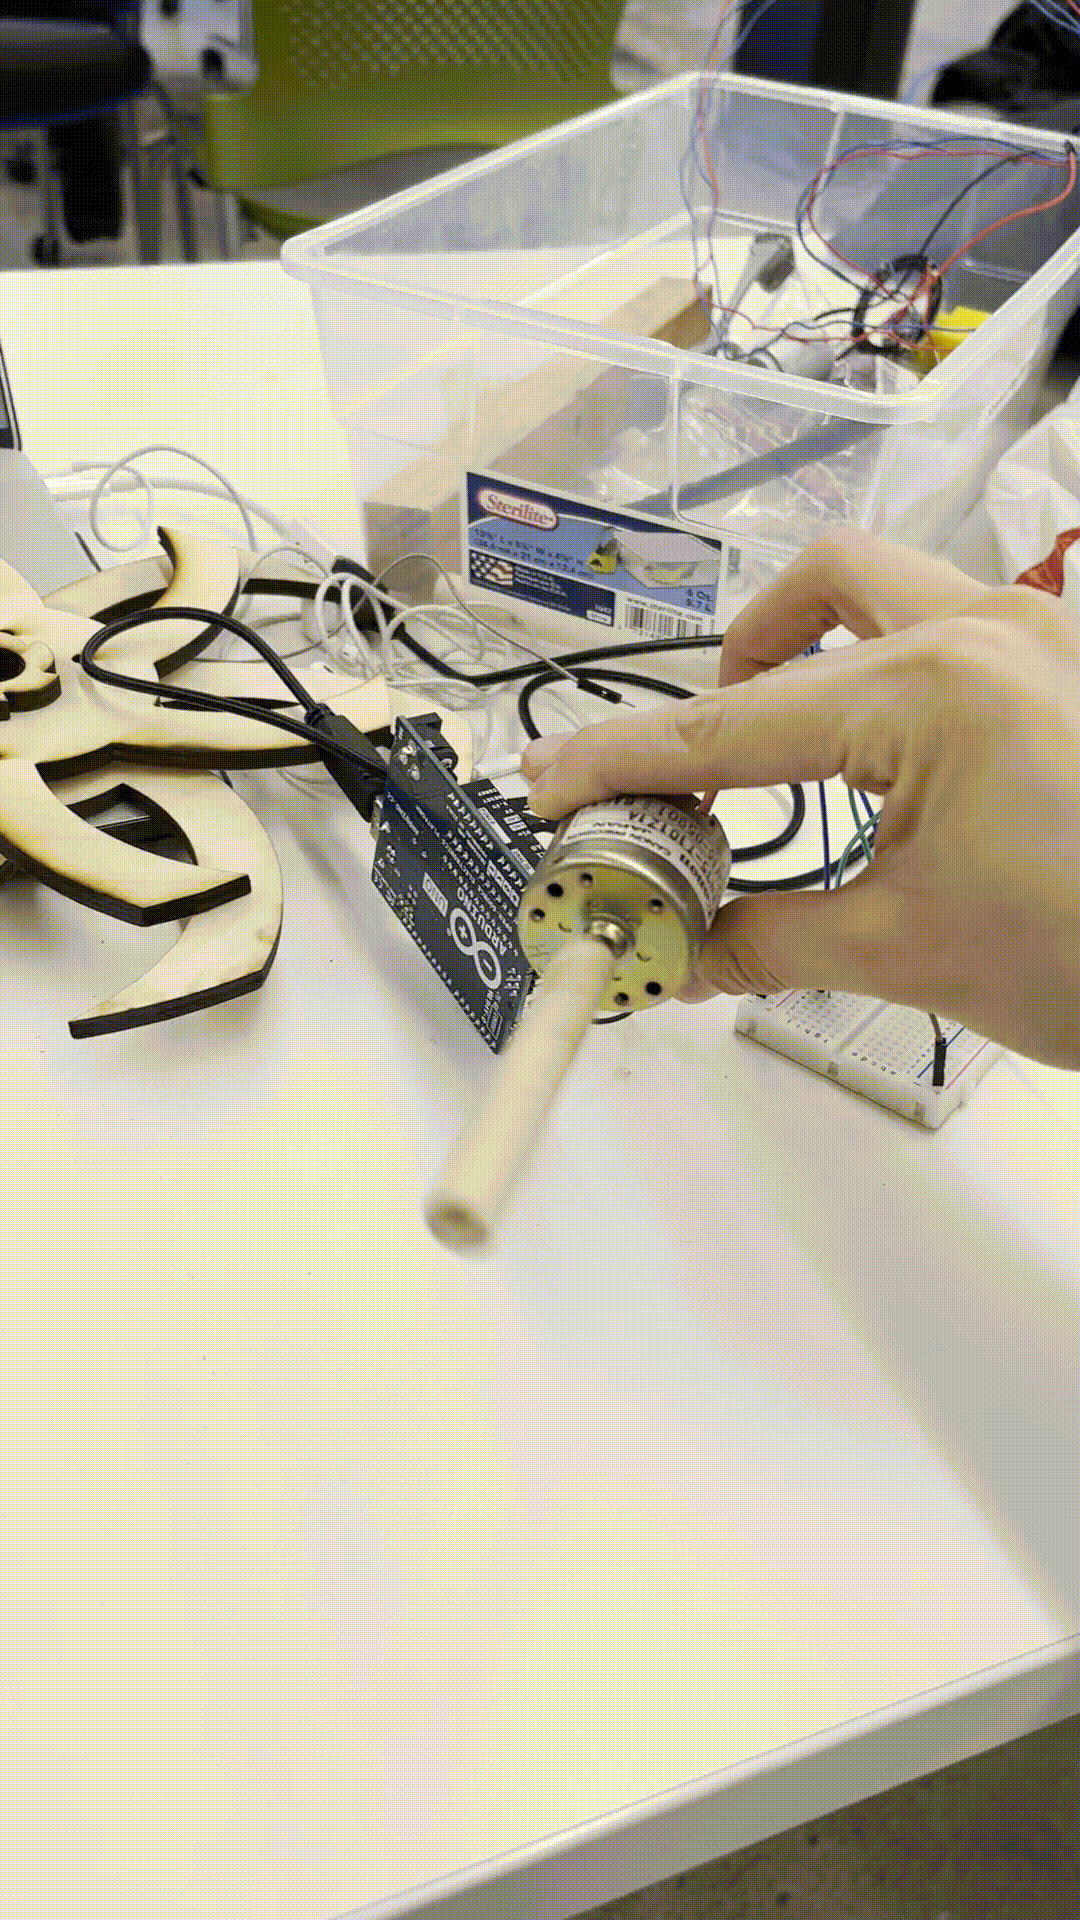
I also tried to drill a hole to the stick and make the motor acctach to it.
Motor Before
After
Other modeling
I am interested in learning how the joints work and create wheels.
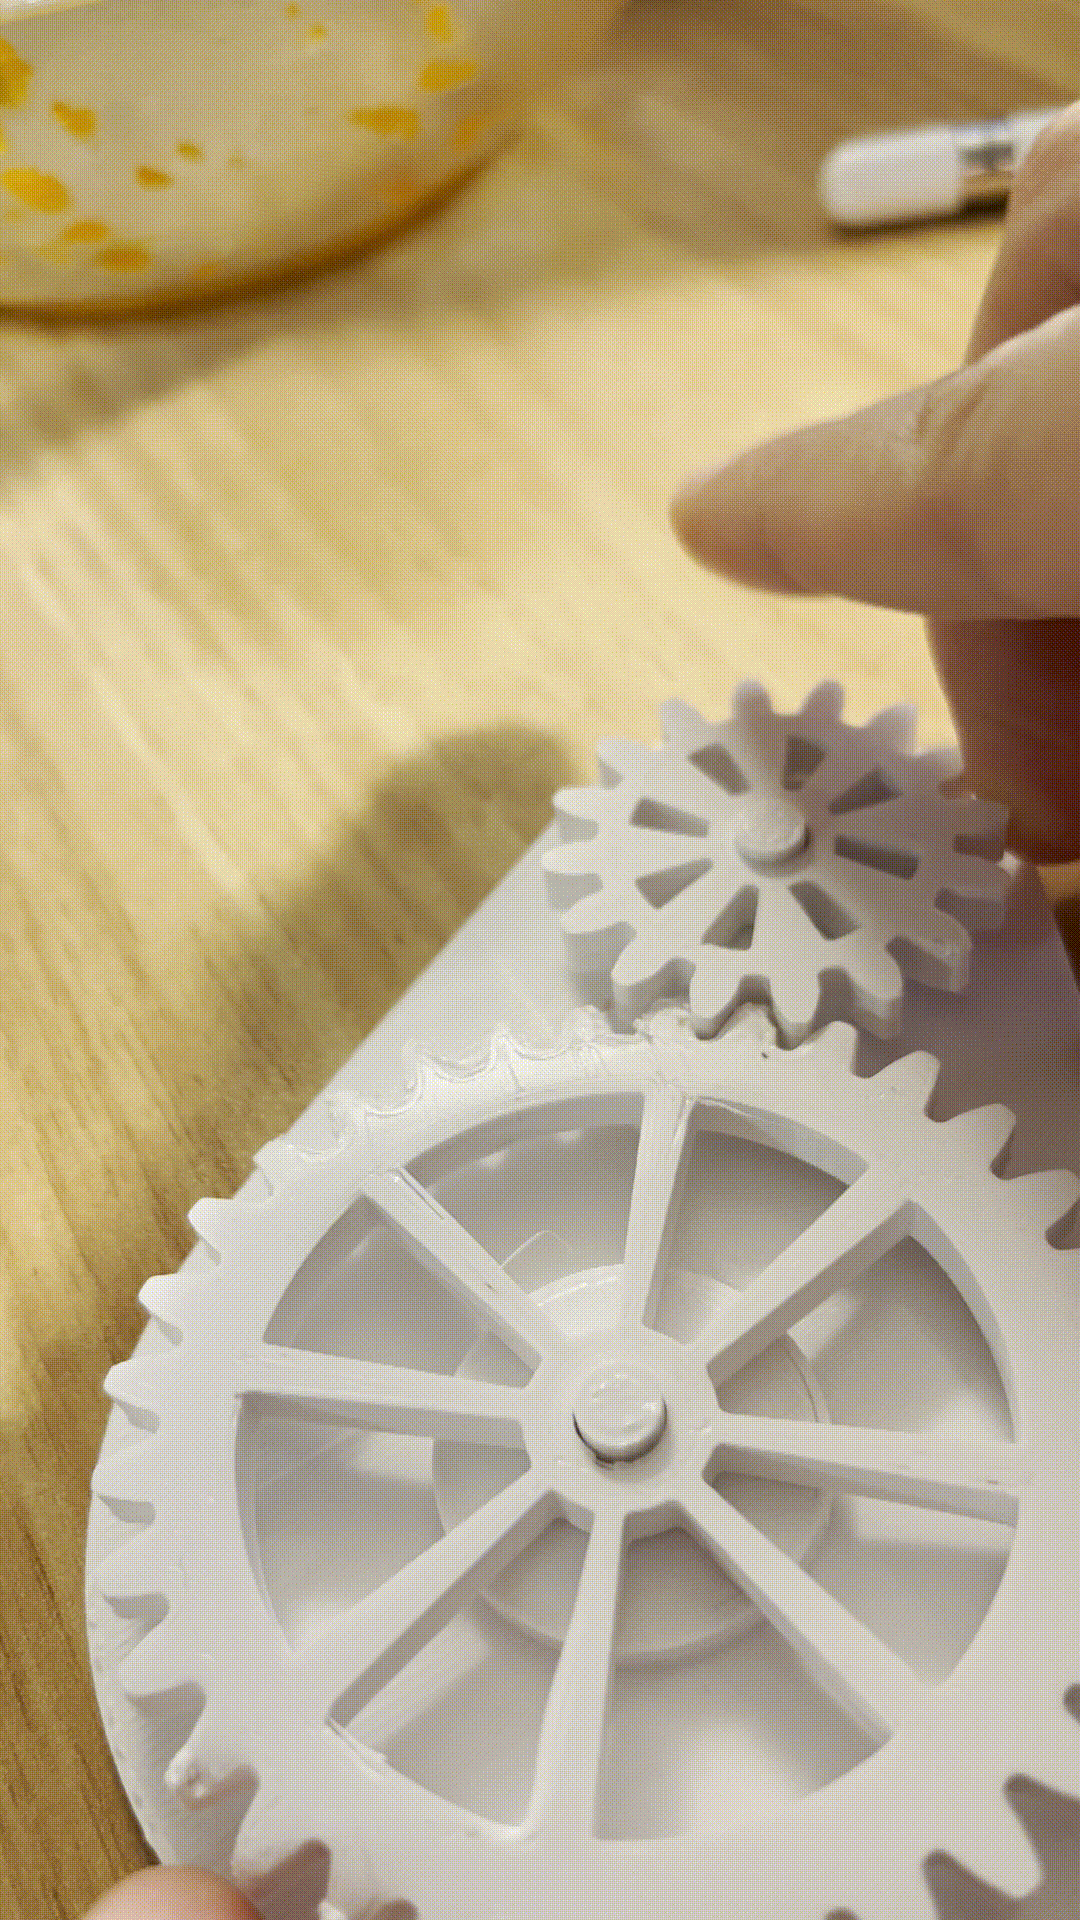
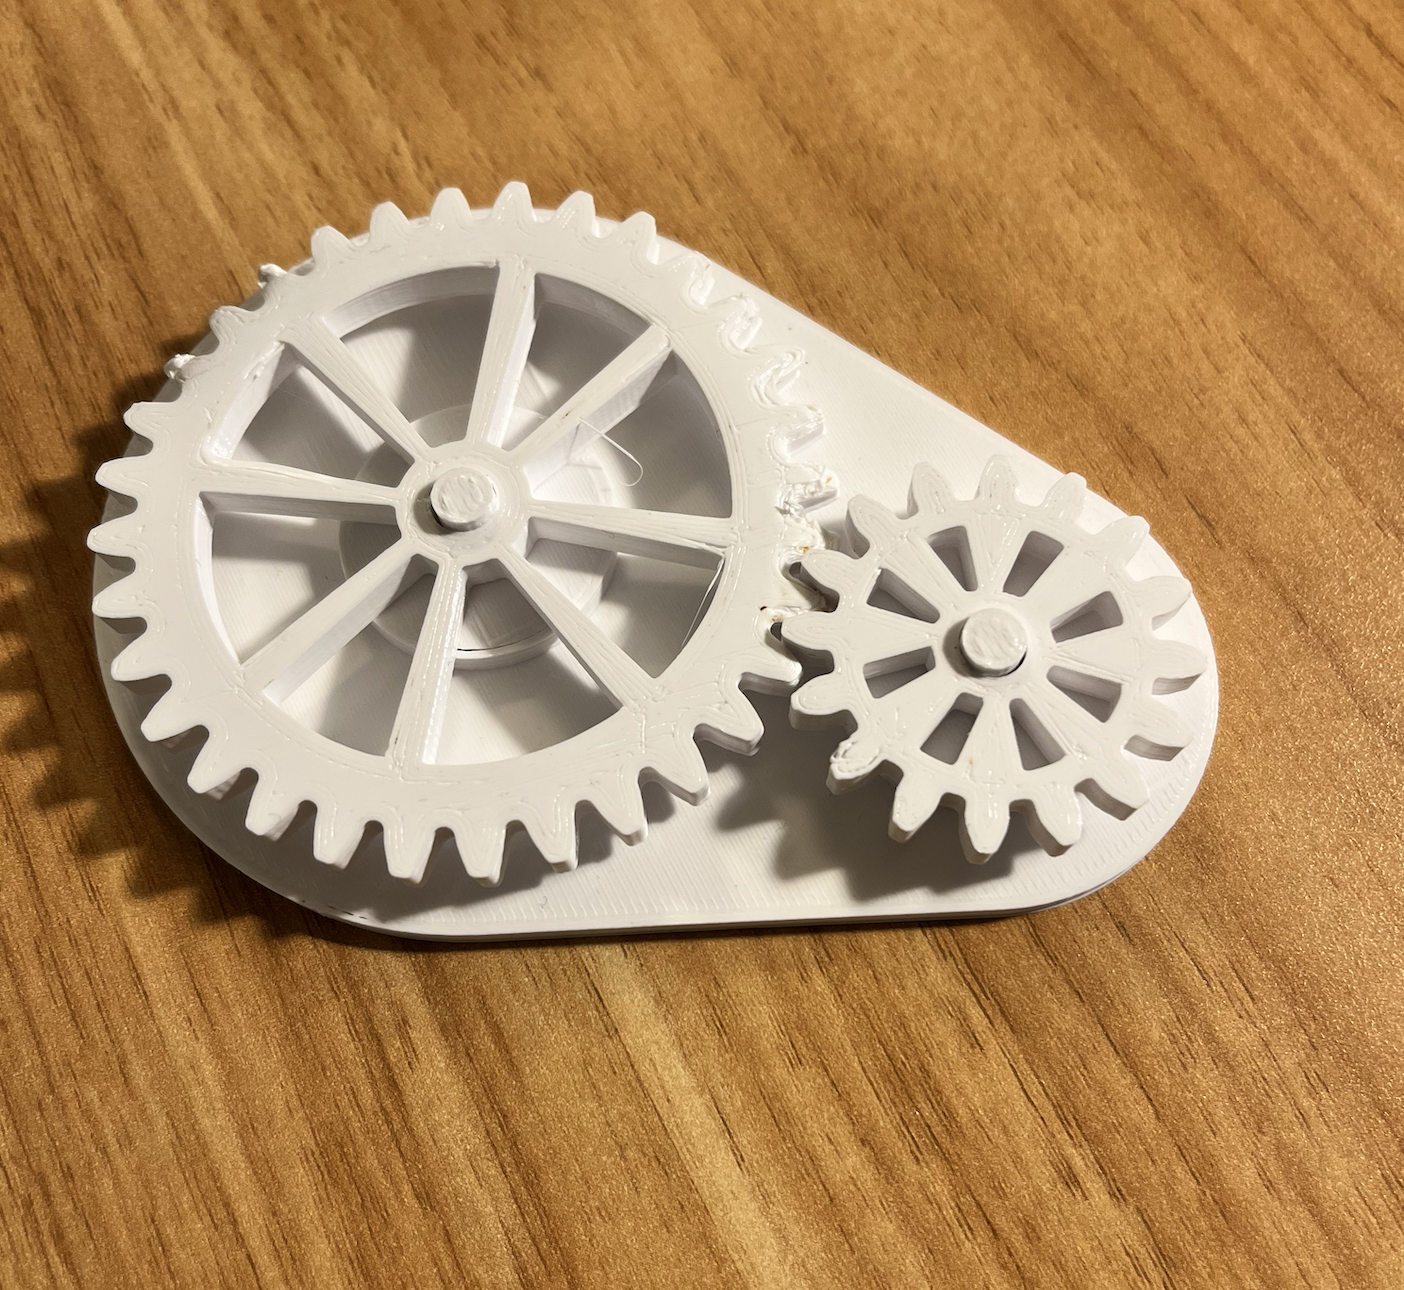
I learned to use add-ons scripts (spurgears) to make the gears
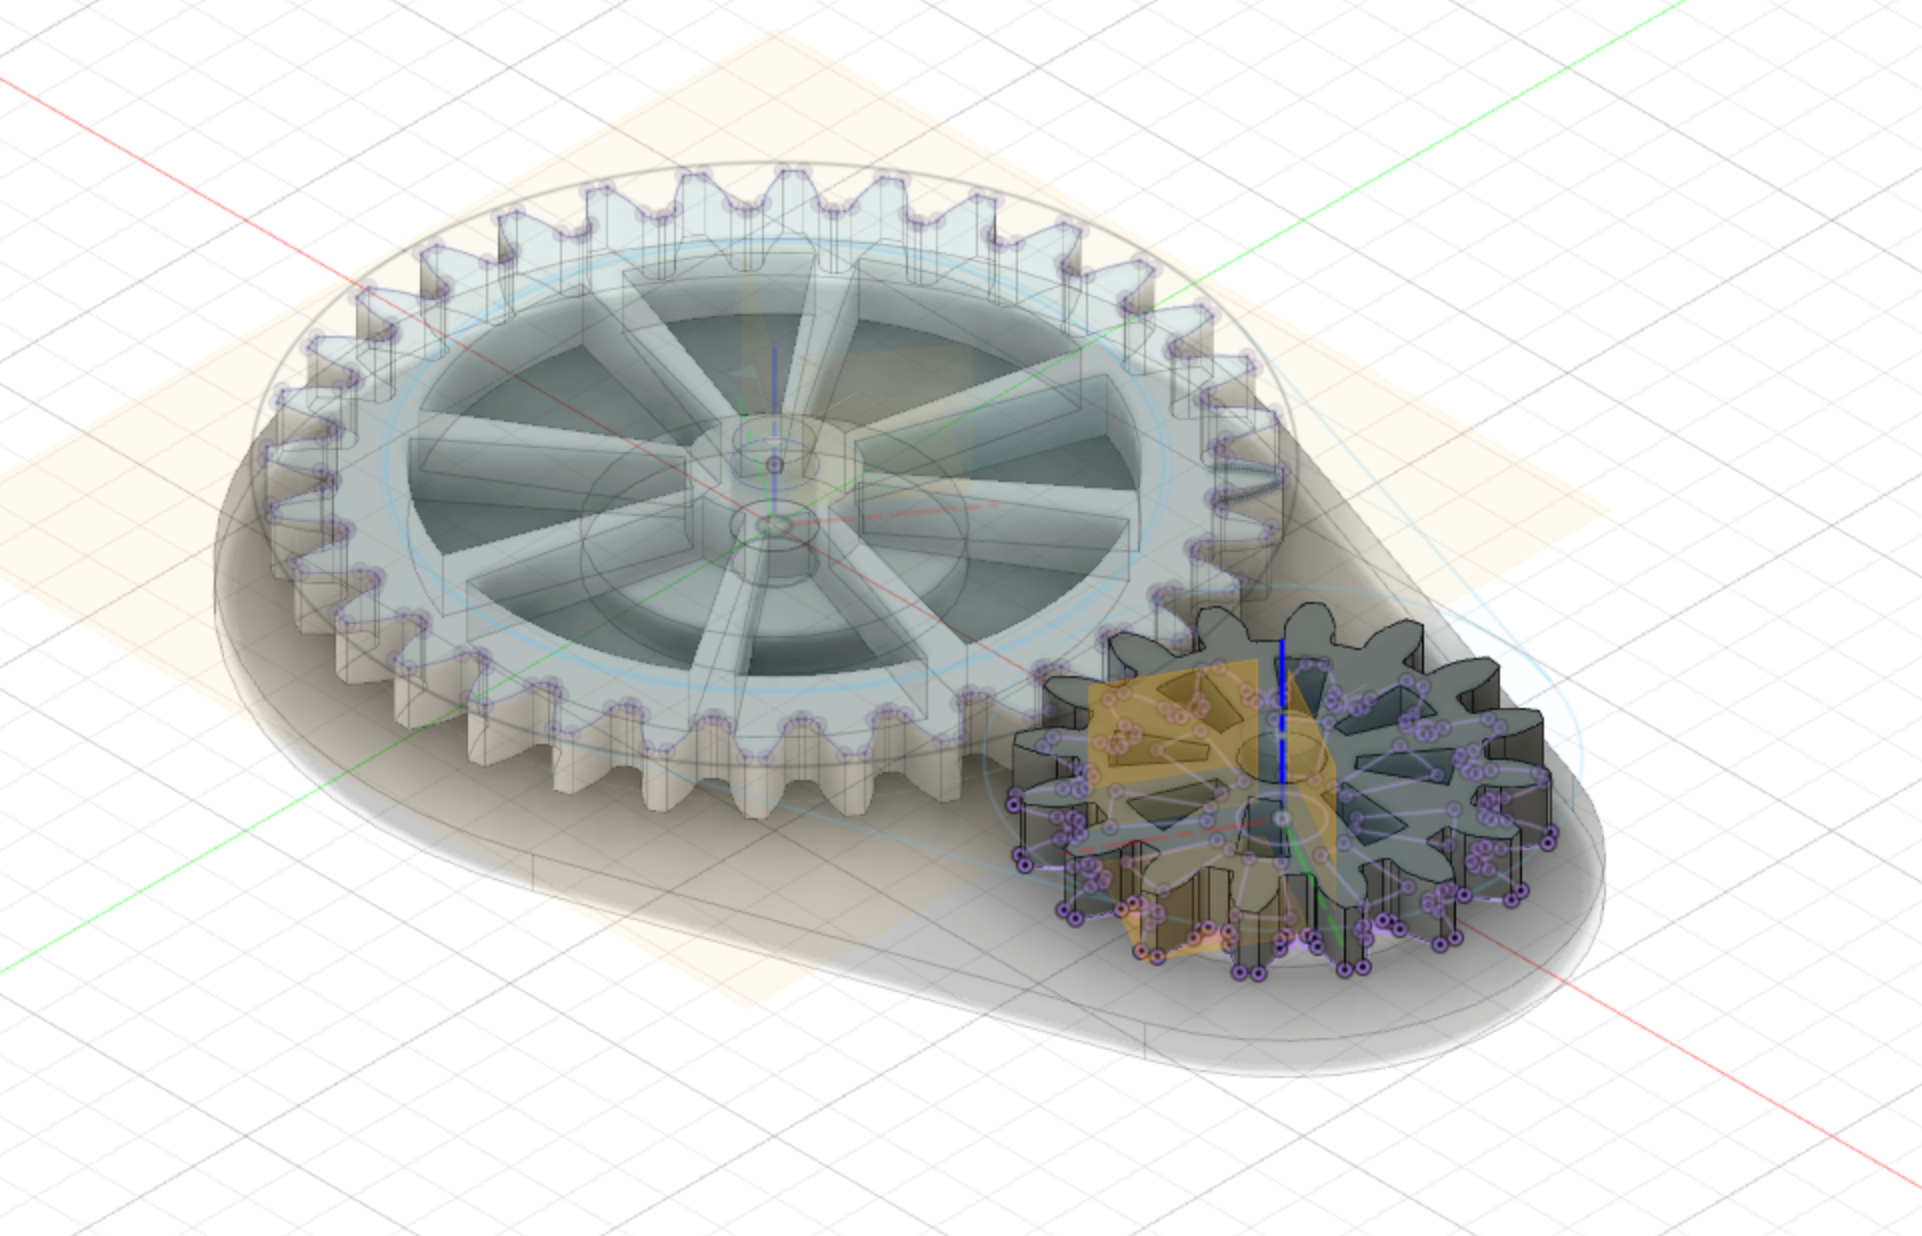
Following the tutorial, i was able to make the wheel spin.

3D printed gears gif
3D printed sales
Measure voltage. Ohm's Law.
I am powering using 3.3V. The total voltage is about 3.3V. The resistance is a 300 Ohm resistor. I = V / R = 3.3V / 300 ohm = 0.011A = 11mA
Arduino code
            #include
              #ifdef __AVR__
                #include
              #endif

              #define PIN 6

              // Parameter 1 = number of pixels in strip
              // Parameter 2 = Arduino pin number (most are valid)
              // Parameter 3 = pixel type flags, add together as needed:
              //   NEO_KHZ800  800 KHz bitstream (most NeoPixel products w/WS2812 LEDs)
              //   NEO_KHZ400  400 KHz (classic 'v1' (not v2) FLORA pixels, WS2811 drivers)
              //   NEO_GRB     Pixels are wired for GRB bitstream (most NeoPixel products)
              //   NEO_RGB     Pixels are wired for RGB bitstream (v1 FLORA pixels, not v2)
              //   NEO_RGBW    Pixels are wired for RGBW bitstream (NeoPixel RGBW products)
              Adafruit_NeoPixel strip = Adafruit_NeoPixel(60, PIN, NEO_GRB + NEO_KHZ800);

              // IMPORTANT: To reduce NeoPixel burnout risk, add 1000 uF capacitor across
              // pixel power leads, add 300 - 500 Ohm resistor on first pixel's data input
              // and minimize distance between Arduino and first pixel.  Avoid connecting
              // on a live circuit...if you must, connect GND first.

              void setup() {
                // This is for Trinket 5V 16MHz, you can remove these three lines if you are not using a Trinket
                #if defined (__AVR_ATtiny85__)
                  if (F_CPU == 16000000) clock_prescale_set(clock_div_1);
                #endif
                // End of trinket special code

                strip.begin();
                strip.setBrightness(50);
                strip.show(); // Initialize all pixels to 'off'
              }

              void loop() {
                // Some example procedures showing how to display to the pixels:
                colorWipe(strip.Color(255, 0, 0), 50); // Red
                colorWipe(strip.Color(0, 255, 0), 50); // Green
                colorWipe(strip.Color(0, 0, 255), 50); // Blue
              //colorWipe(strip.Color(0, 0, 0, 255), 50); // White RGBW
                // Send a theater pixel chase in...
                theaterChase(strip.Color(127, 127, 127), 50); // White
                theaterChase(strip.Color(127, 0, 0), 50); // Red
                theaterChase(strip.Color(0, 0, 127), 50); // Blue

                rainbow(20);
                rainbowCycle(20);
                theaterChaseRainbow(50);
              }

              // Fill the dots one after the other with a color
              void colorWipe(uint32_t c, uint8_t wait) {
                for(uint16_t i=0; i