
Final Project
Introduction
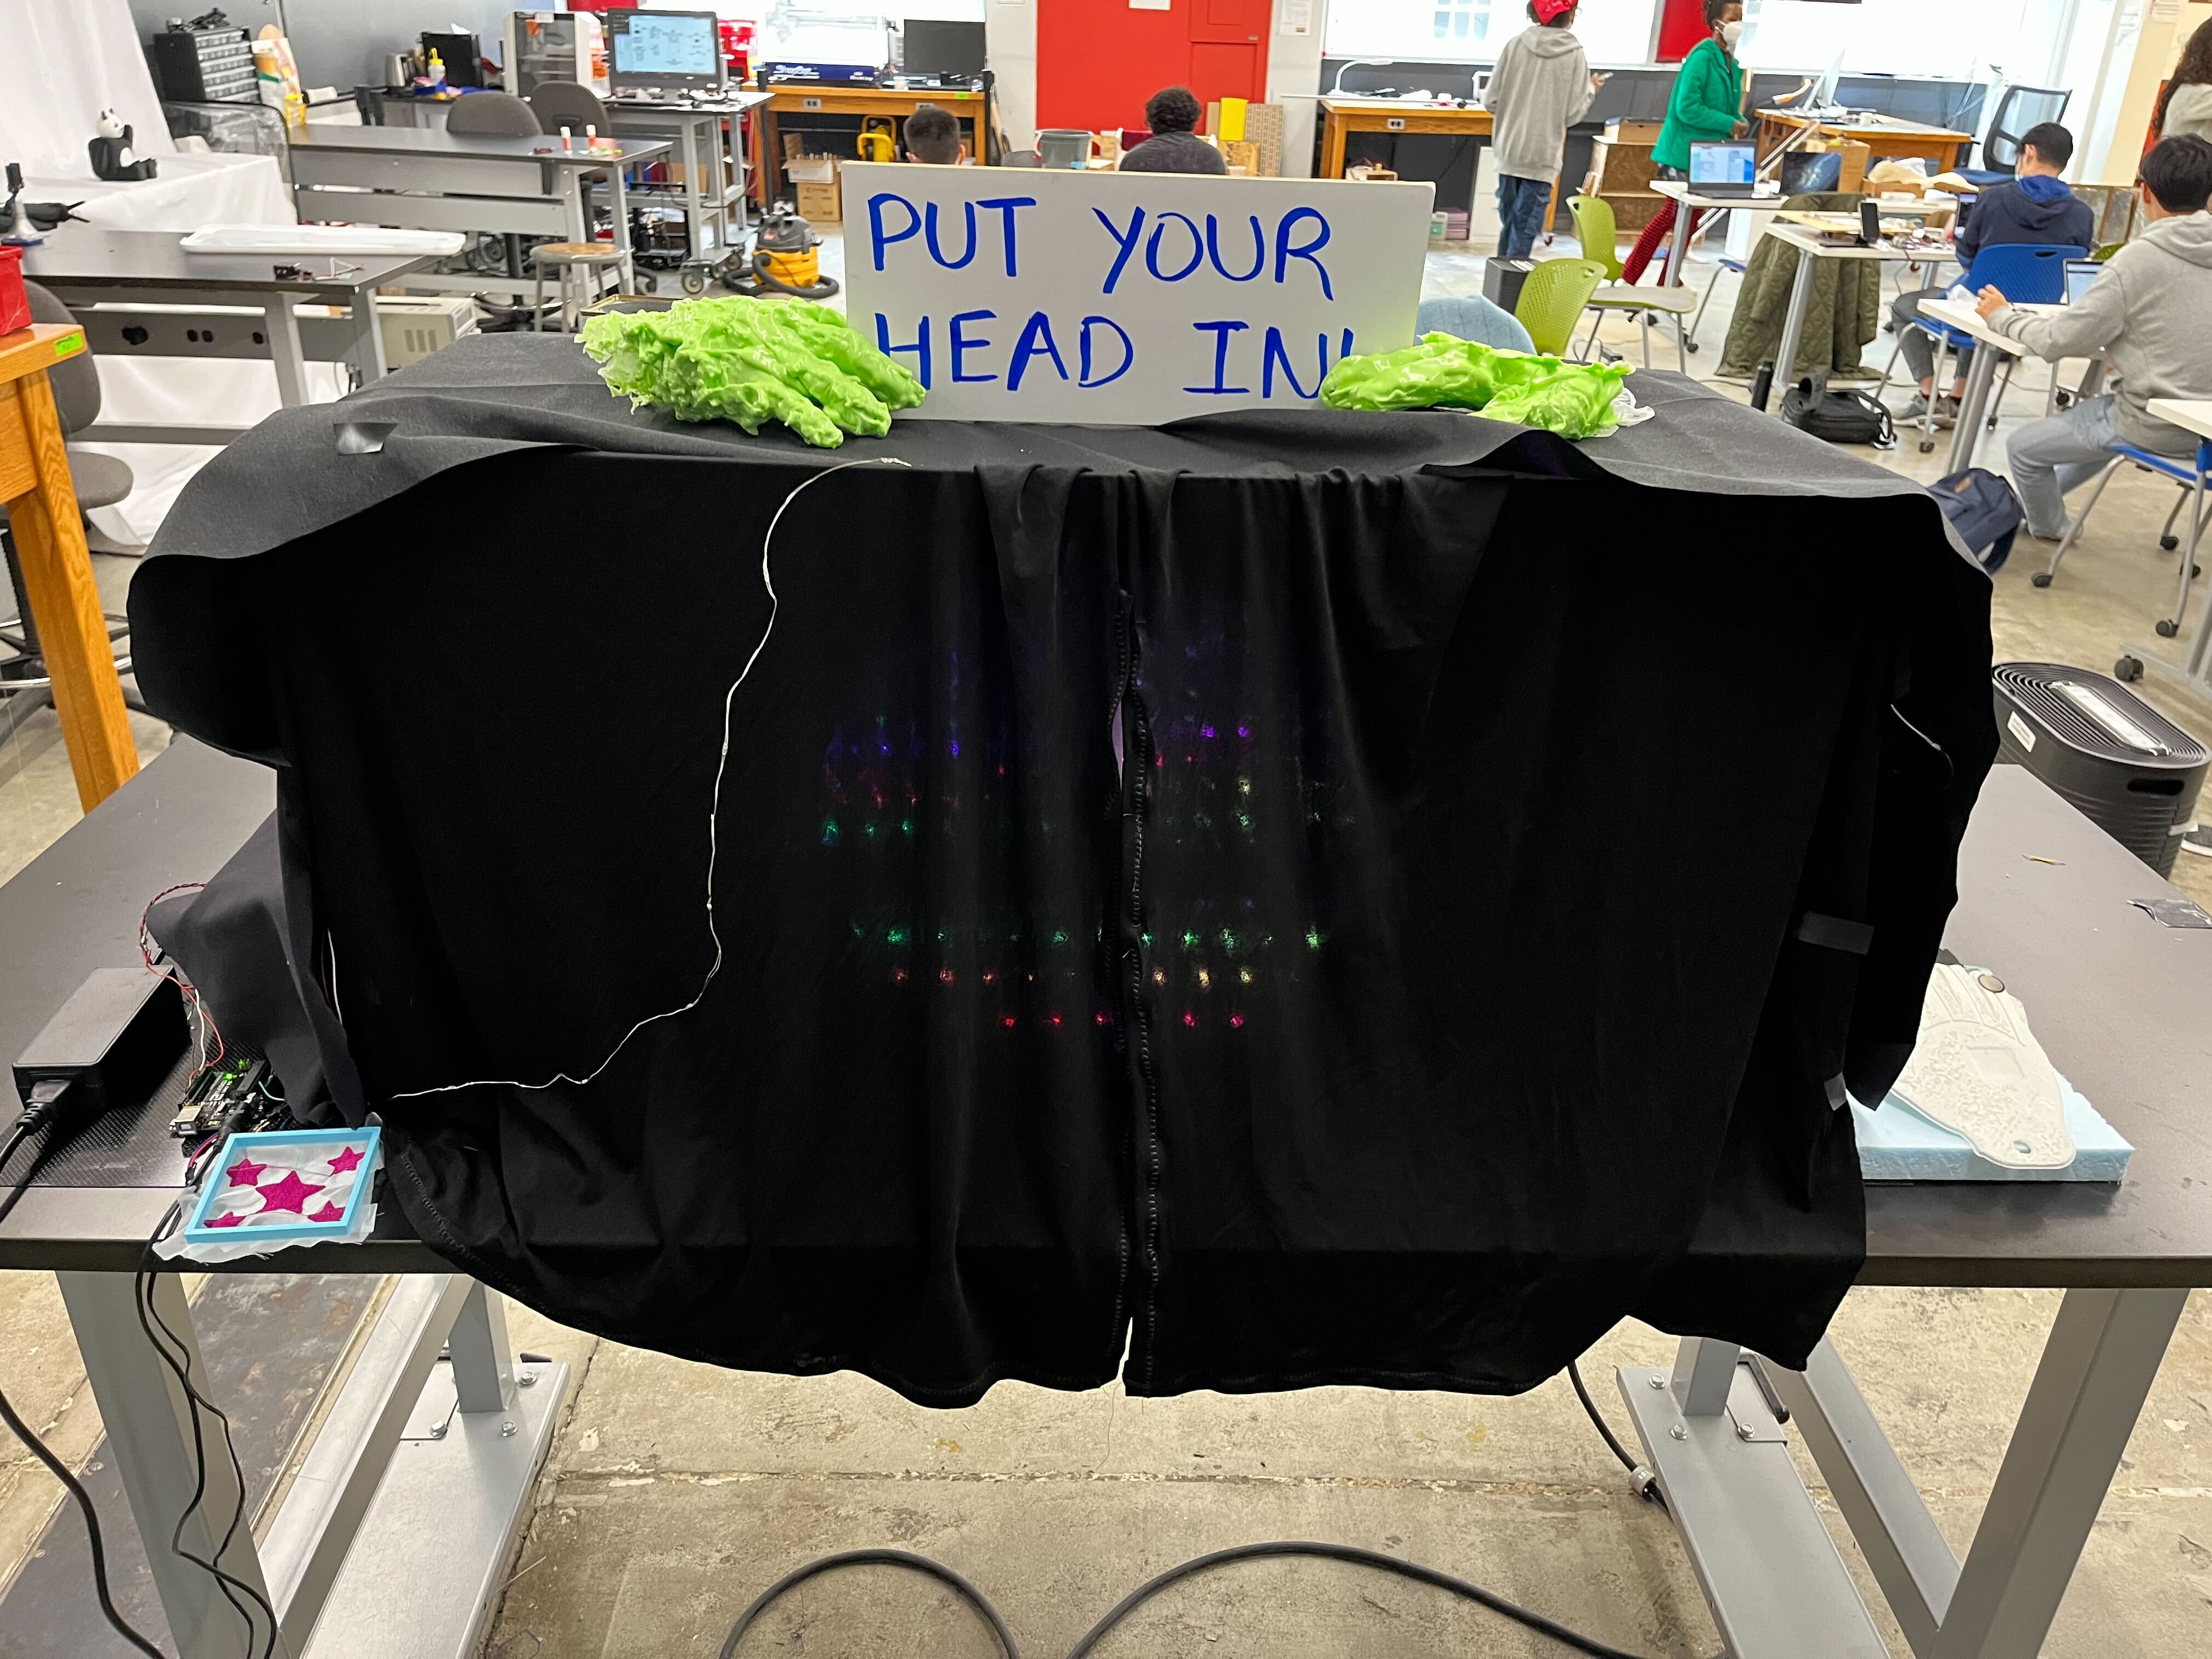
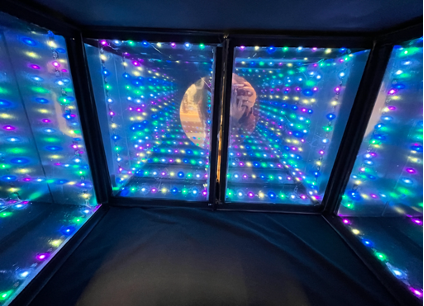
I am always a big fan of Yayoi Kusama's work, especially the “Infinity Mirrored Room” series. The goal of the project was to create an infinity box that depicted the illusion of infinitely many lights going out into space. This illusion was accompanied by audio and a light show from within the box. People place their head in the box with a curtain covering their back in order to ensure the best user experience. While their head is in the box, they reach their hand to the right and left side of the box to find a hand shaped pressure sensor in order to control the audio, brightness of the lights and color. Each finger in the pressure sensor handpiece controlled a different color. The greater amount of pressure applied to the sensors, manipulated the brightness of the lights and audio by making them both louder and brighter.
In summary, the Infinity Mirror is an electrically driven art installation guided towards entertaining the user through the use of illusion, colorful lights, and audio. For Yayoi Kusama's work, people can't interact with the work, except taking photos. By creating this art piece, users can control their experience and make their own artwork.
Process Summary
In this project, the input is the hand (FSR/buttons), and the output is the LED lights (brightness, color) and speaker (song/tone).
Techniques used in this project
- Microcontroller Programming (Arduino)
- Electronic Input & Output
- 3D Design & Printing
- Laser Cutting
- Embroidery
- Molding & Casting
Process In Details
Planning
I first found a tutorial online on how to make a infinity mirror. It only uses a box and it doesn't have the immersive experience that you would have for Yayoi's work. So I decided to create a mini room/box, as it's impossible for me to create a whole room with lights.
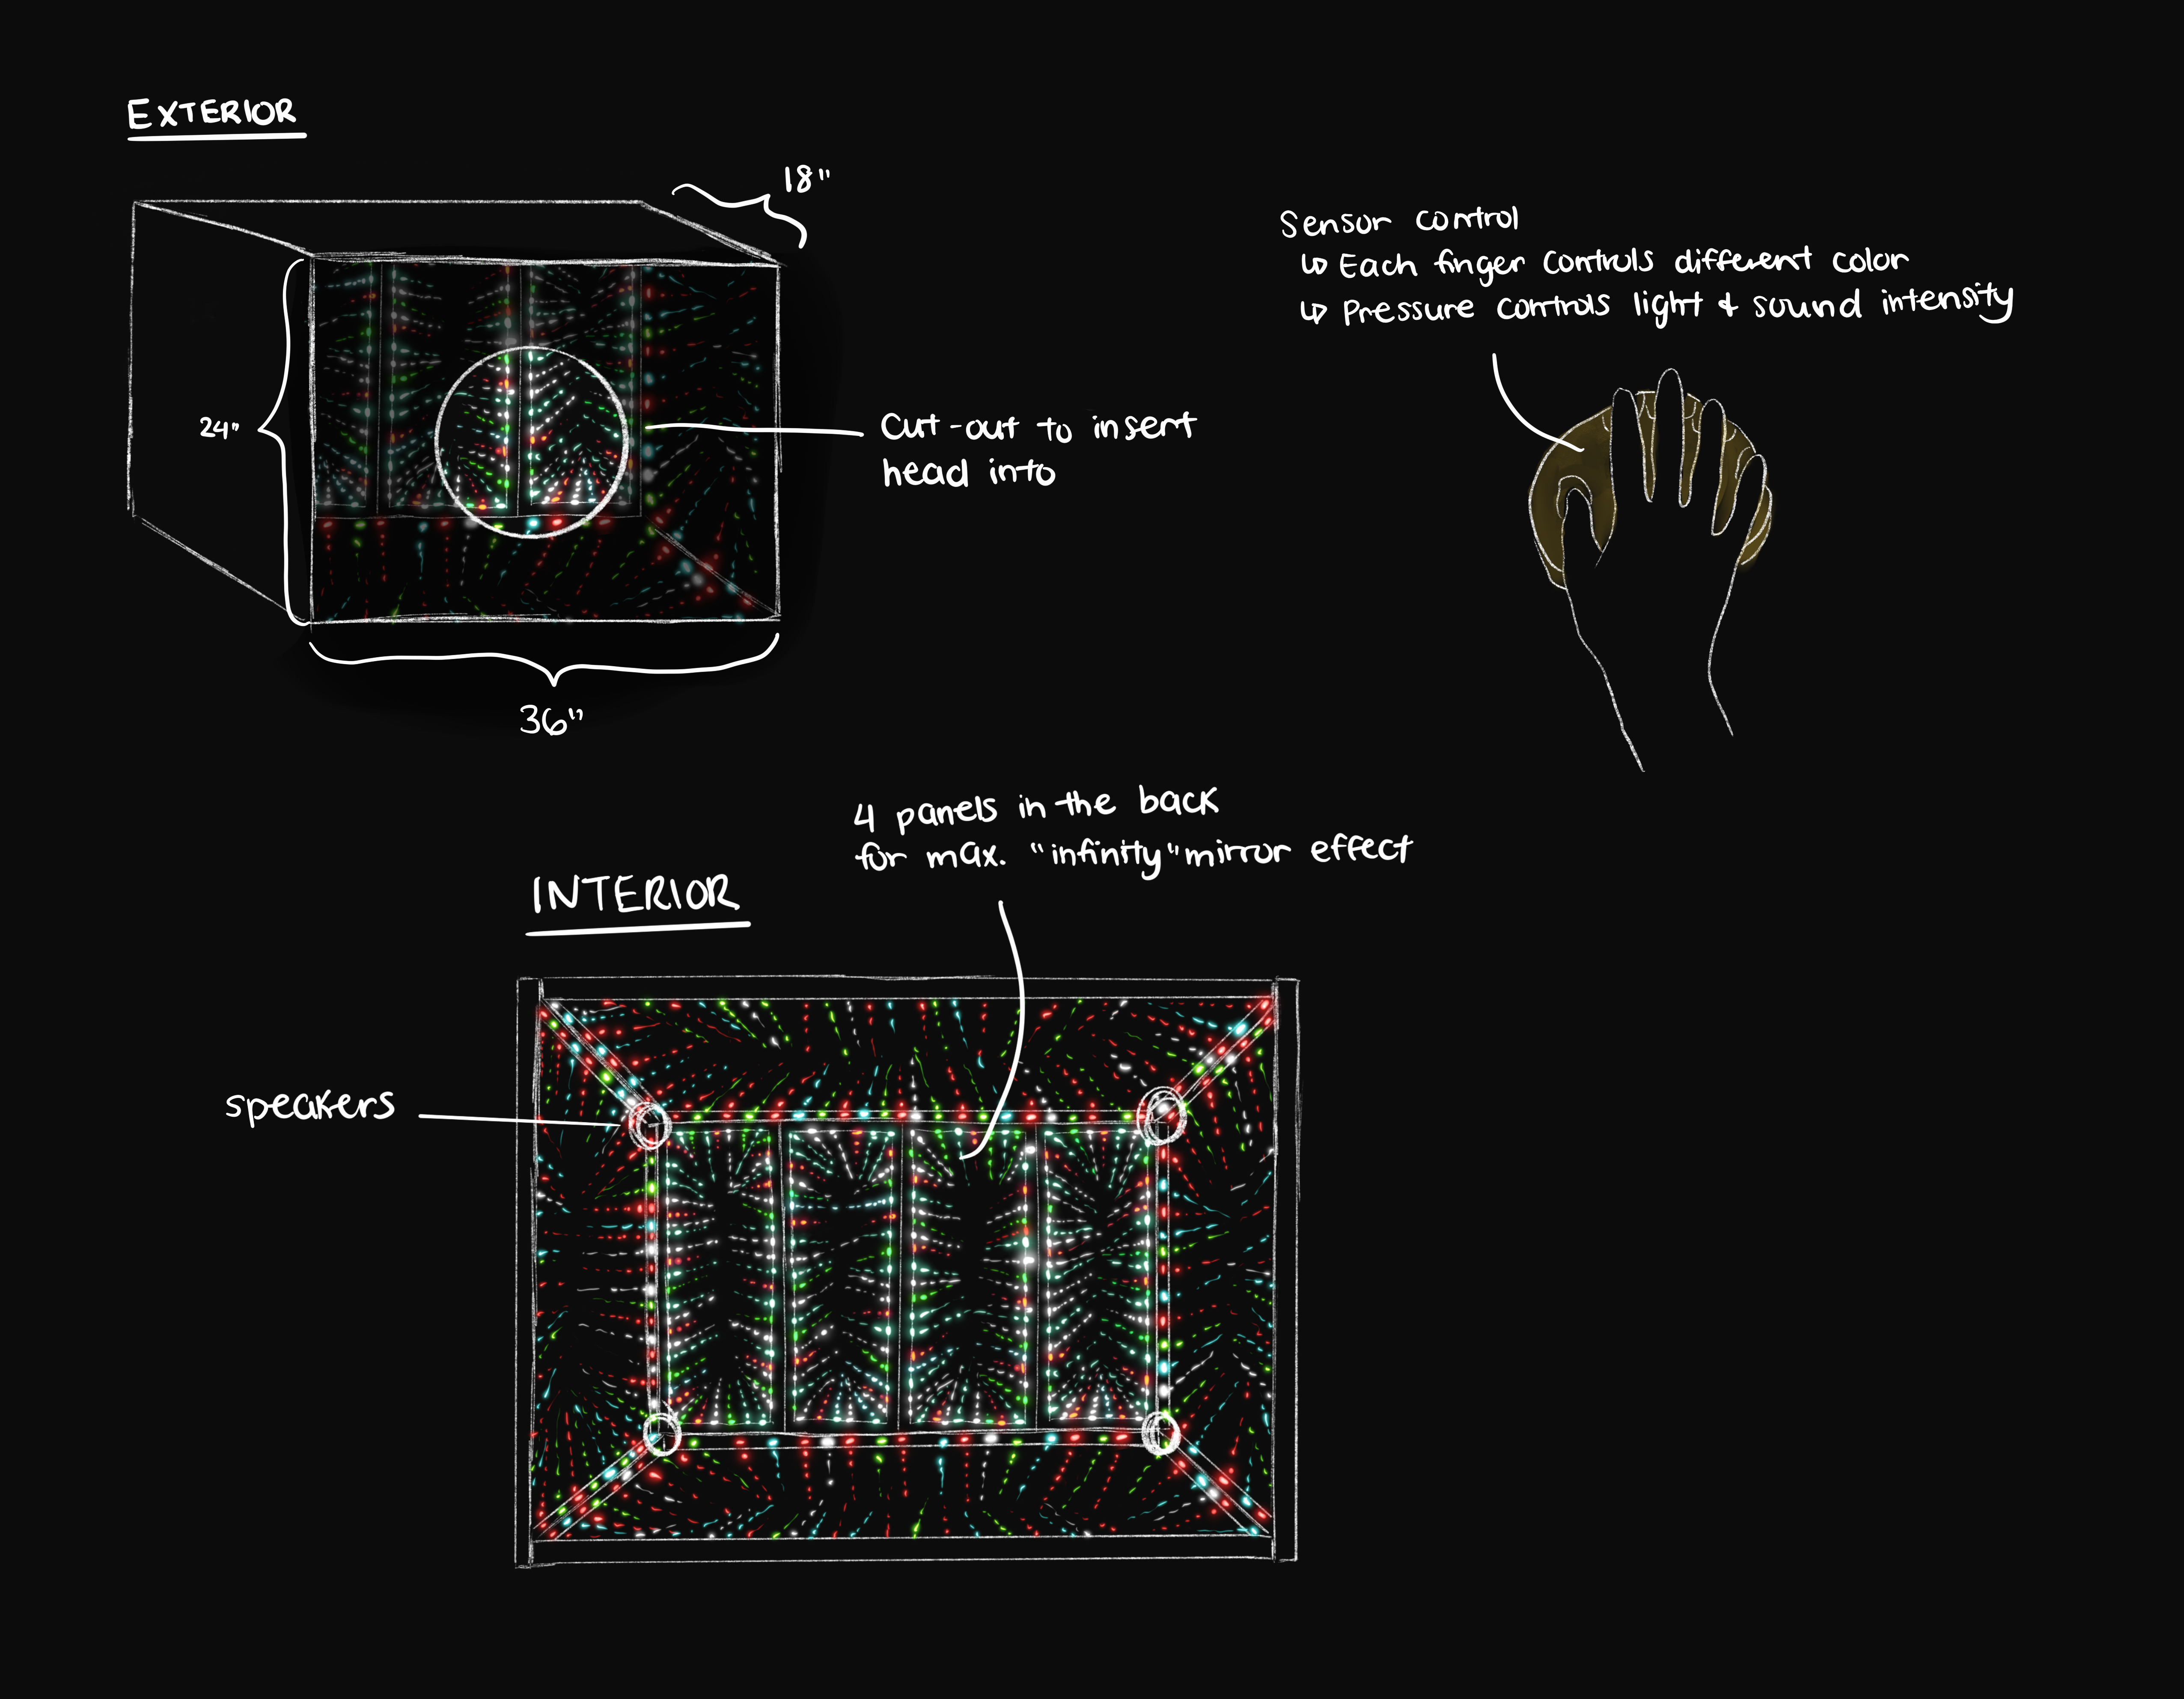
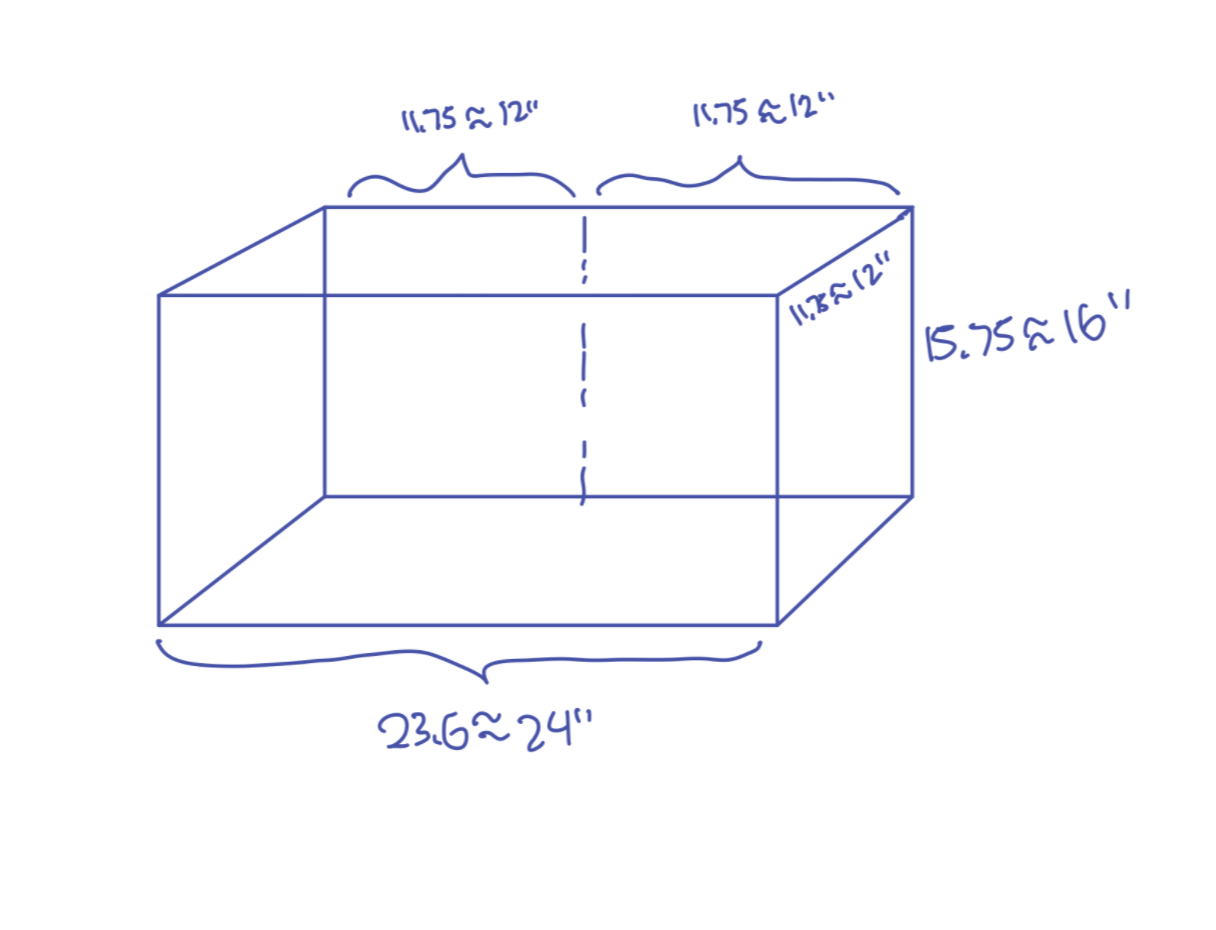
Then I draw the concept as shown below. However, as I'm doing more prepartion of the project, I had to resize the box in order to fit into material limitation.
Constructing the box
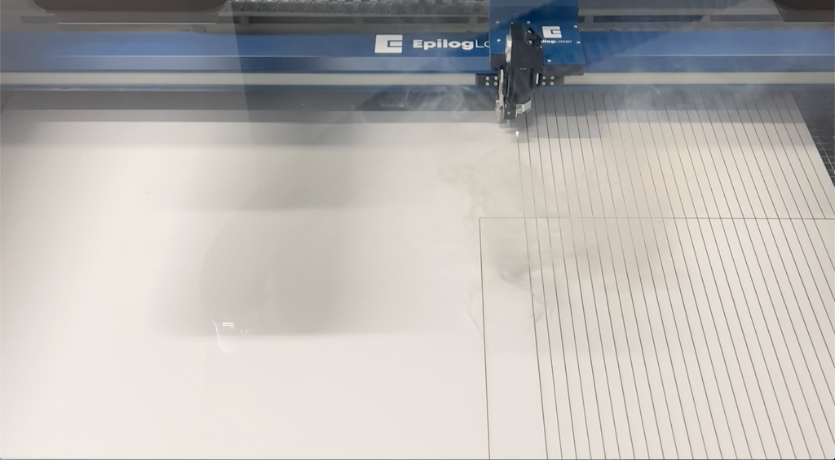
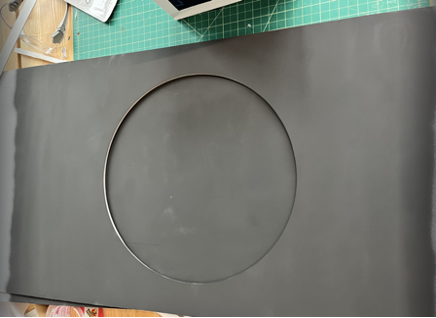
I first cut the foam core board using knife, showing as following. However, due to inaccurate cutting, it was not aligned properly. So I used laser cutters to create well assigned parts so parts can be fitted perfectly.
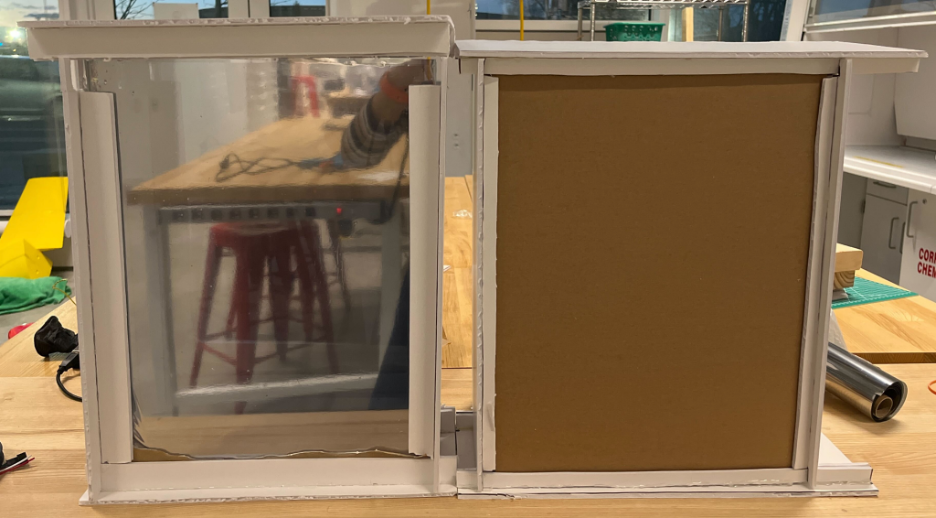
I also applied window film to the mirror as the infinity mirror consists of one clear acrylic plate with mirror film placed in front of a mirror plate, yielding the desired illusory effect. Then I tested the reflective effect using LED lights.
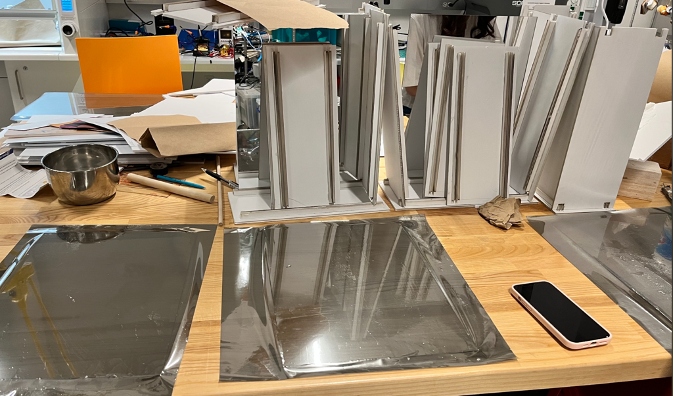
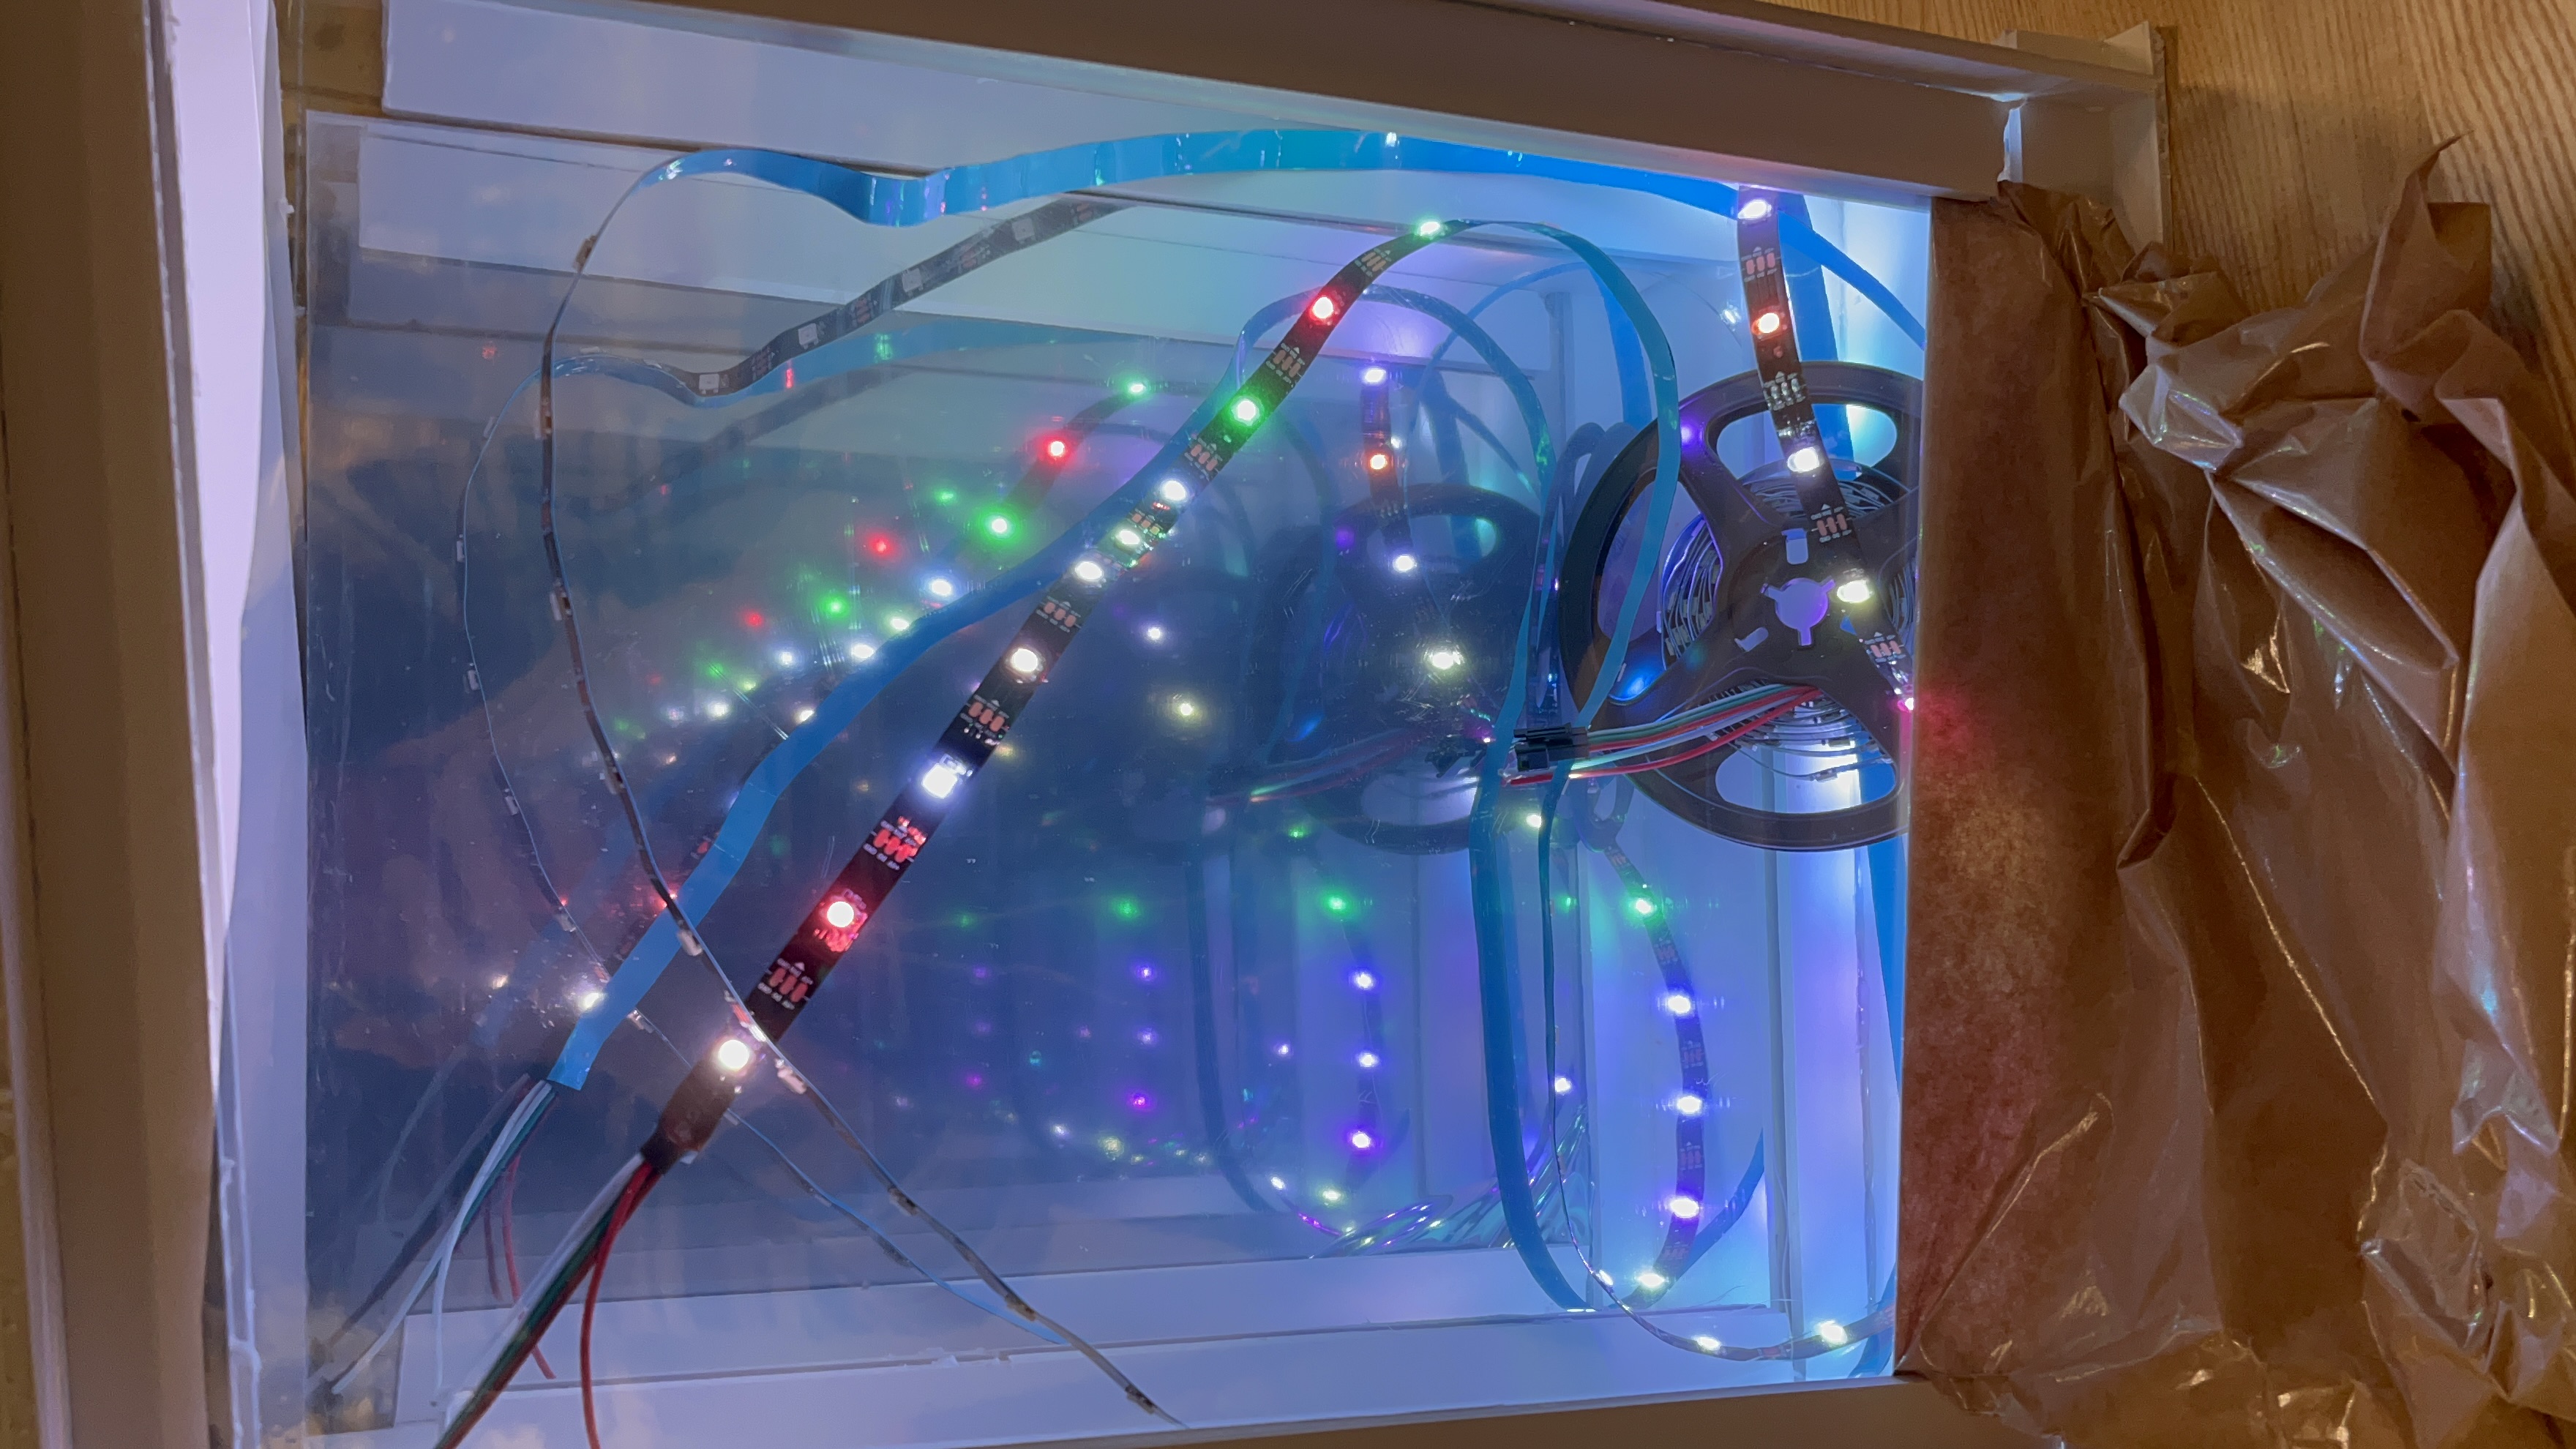
The frames were arranged as follows: one on the left, then two in the back, and one on the right, to outline the shape of a rectangular prism, longer than it is wide. Each frame was pieced together with hot glue, and had two sets of slots measured and pasted onto them so that they may fit the acrylic plates for the mirrors.
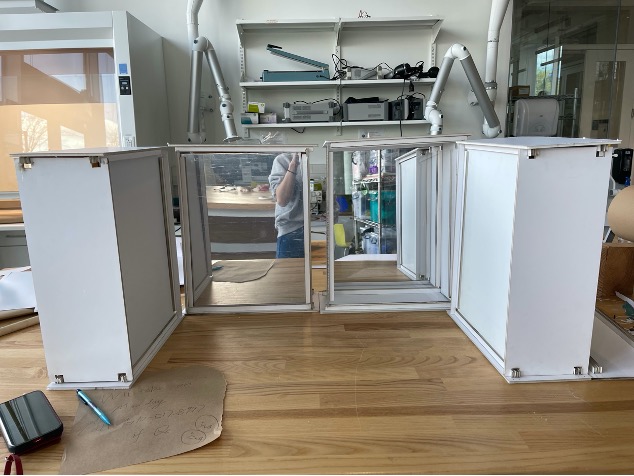
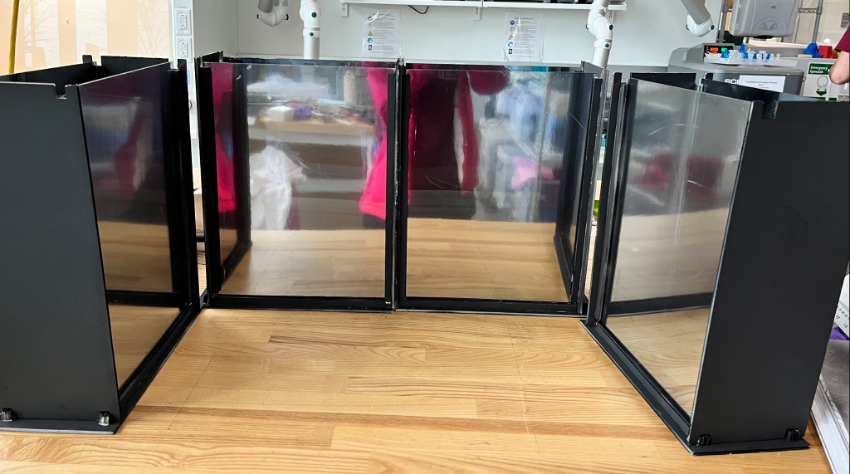
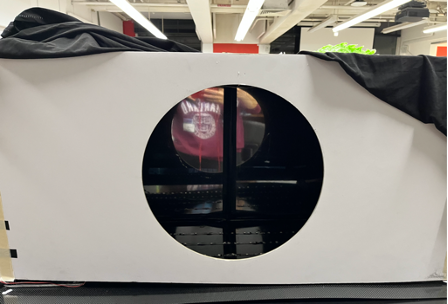
The front panel of the box (which had no mirrors) has a laser cut hole for users to place their head inside the box, and the top panel featured a black cloth draped over the body of the box to shut out external light.

Input Device
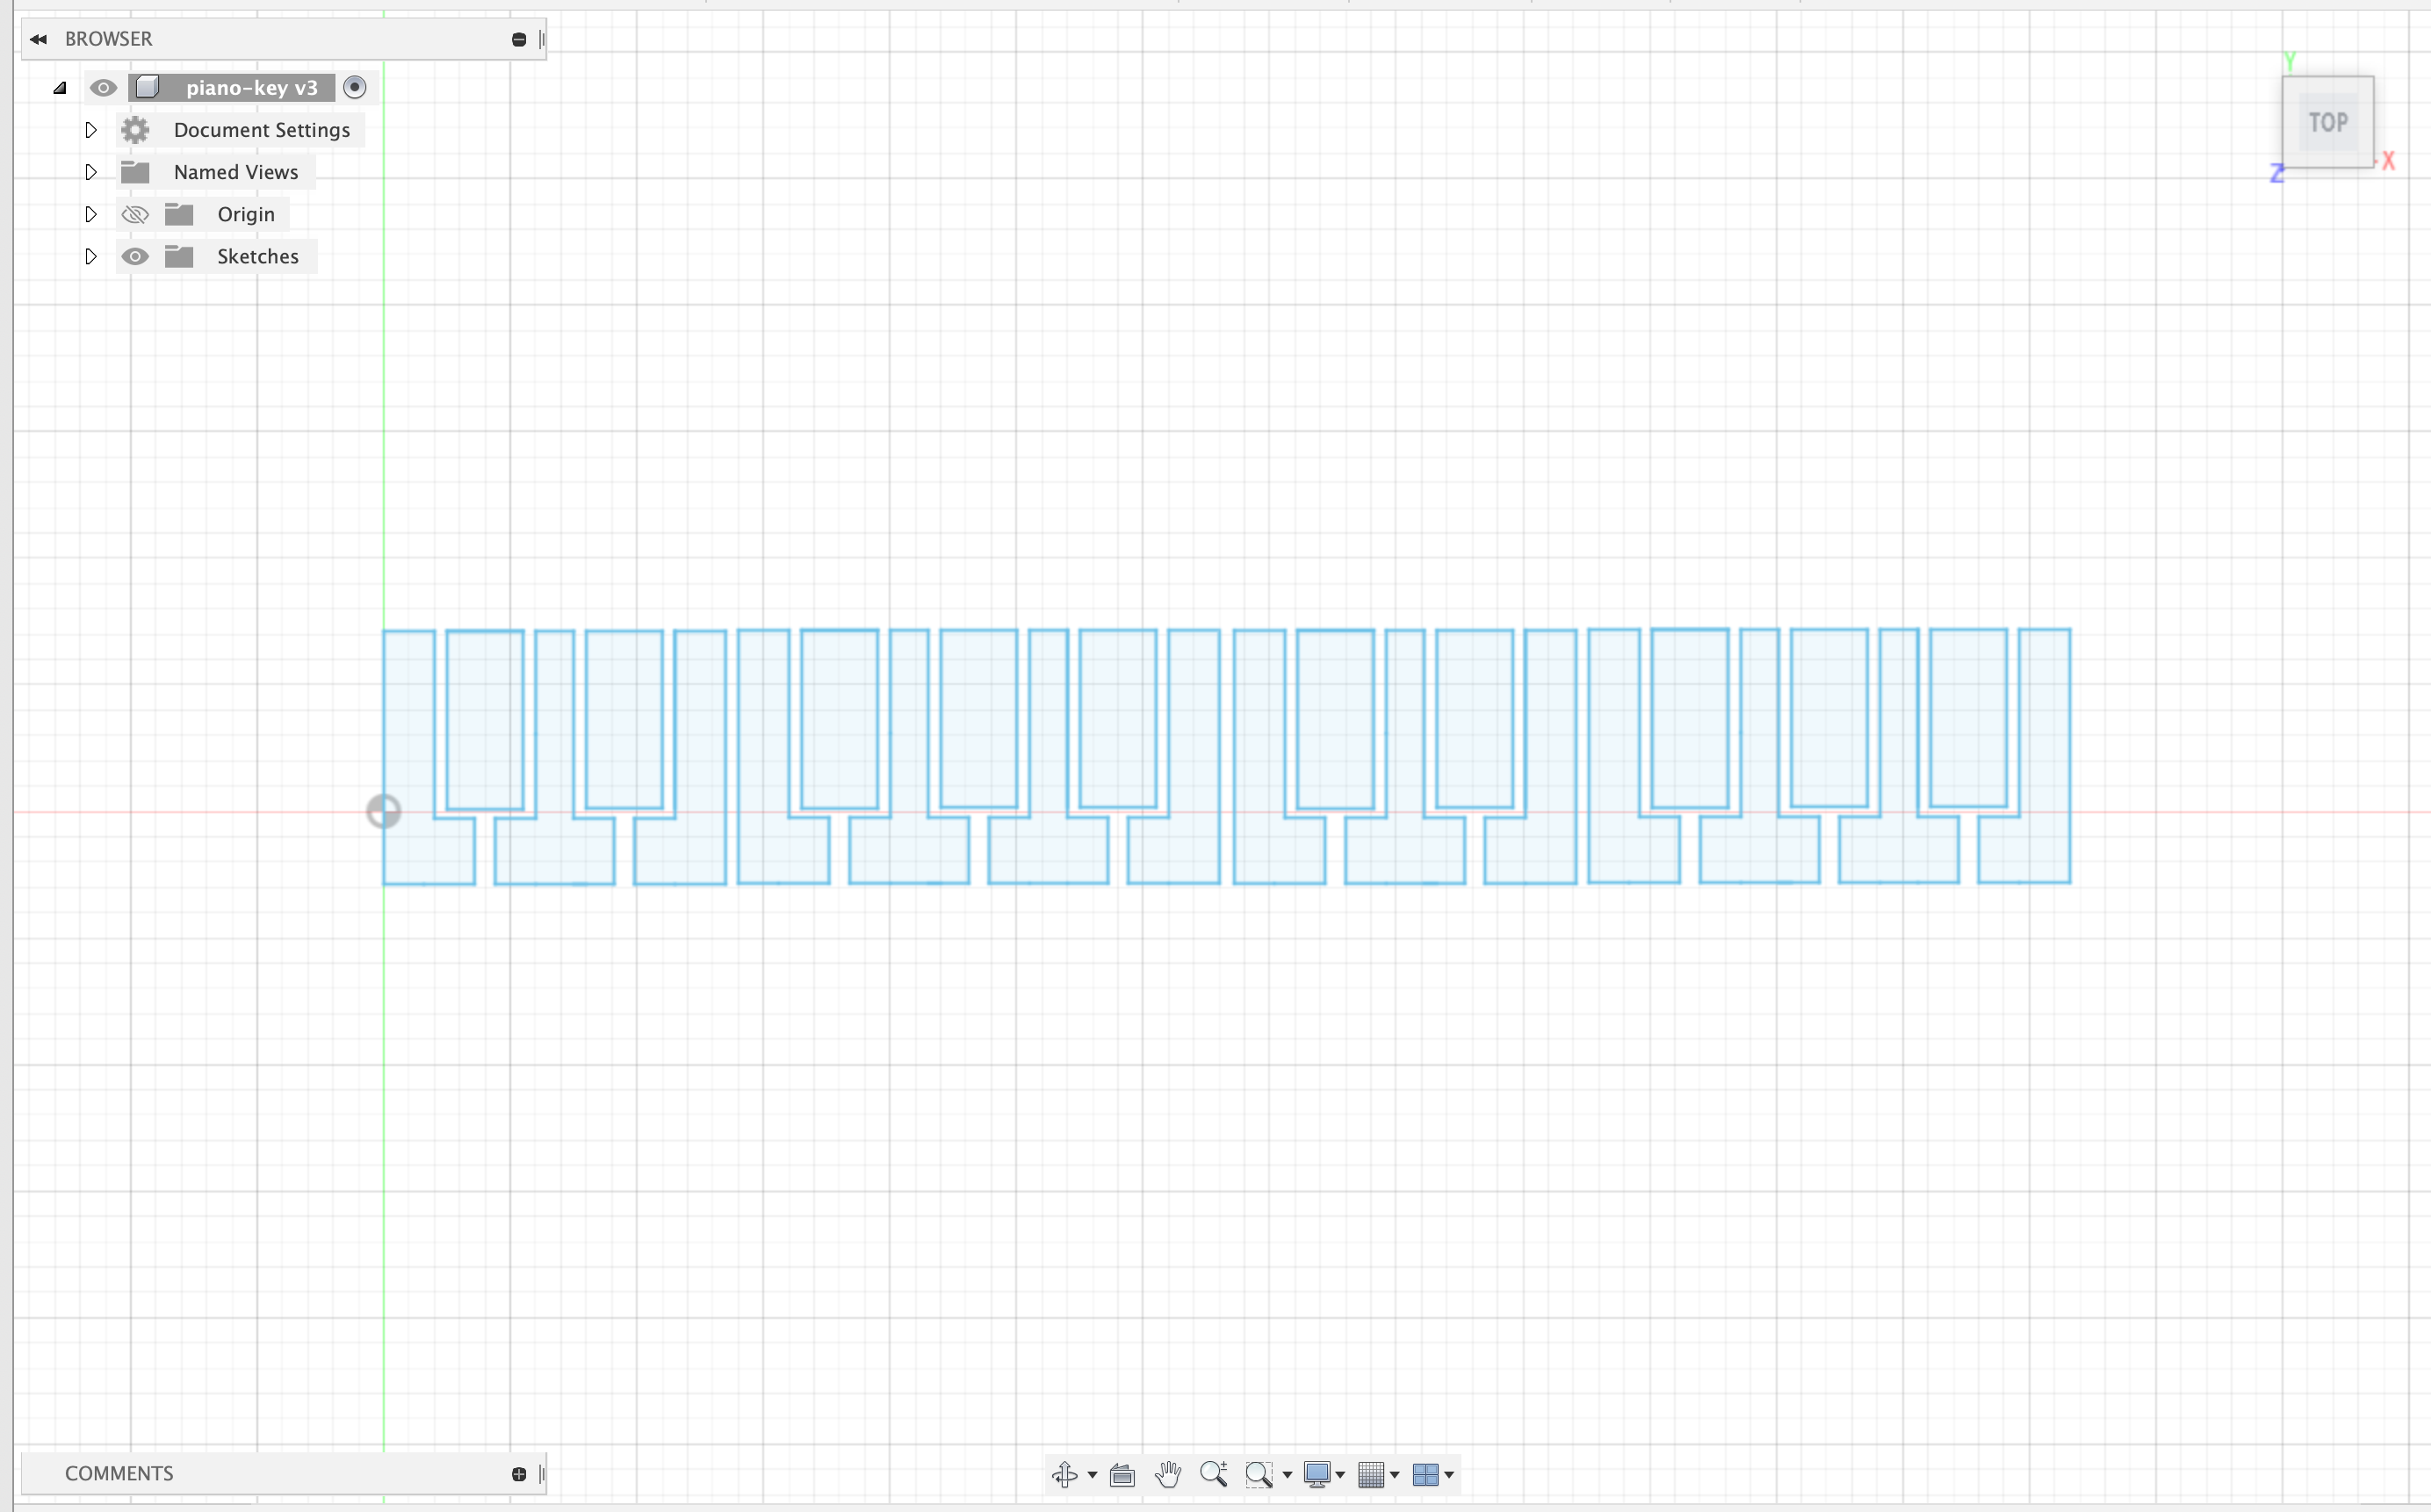
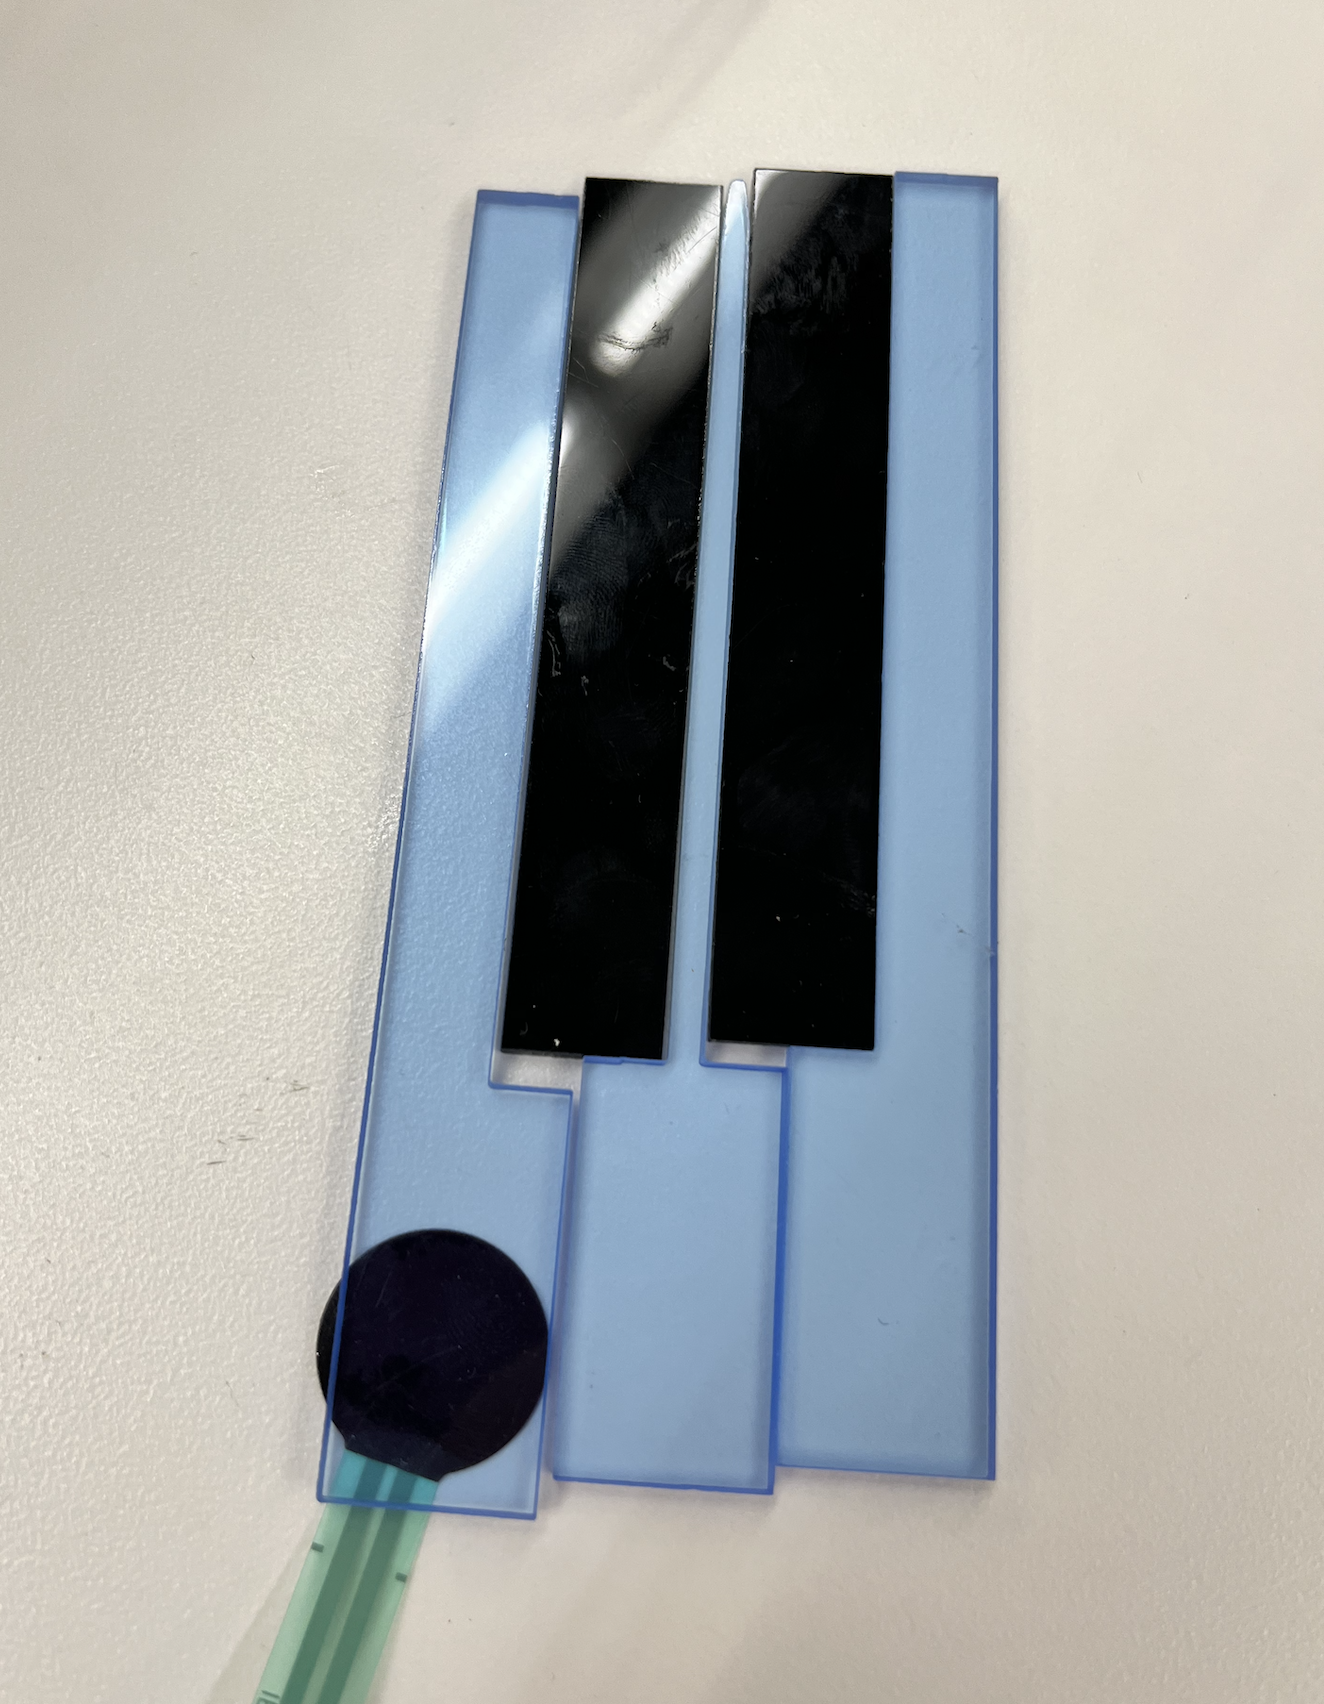
I first thought of the input device as a piano keys. I first designed it on Fusion 360 and then printed on acrylic (black and transparent material) in order to this black/white key effect. However, I quickly realized that won't work as the FSR is not detecting the force from the bottom. it's being spread out across the whole surface, unless I place the FSR on the top.
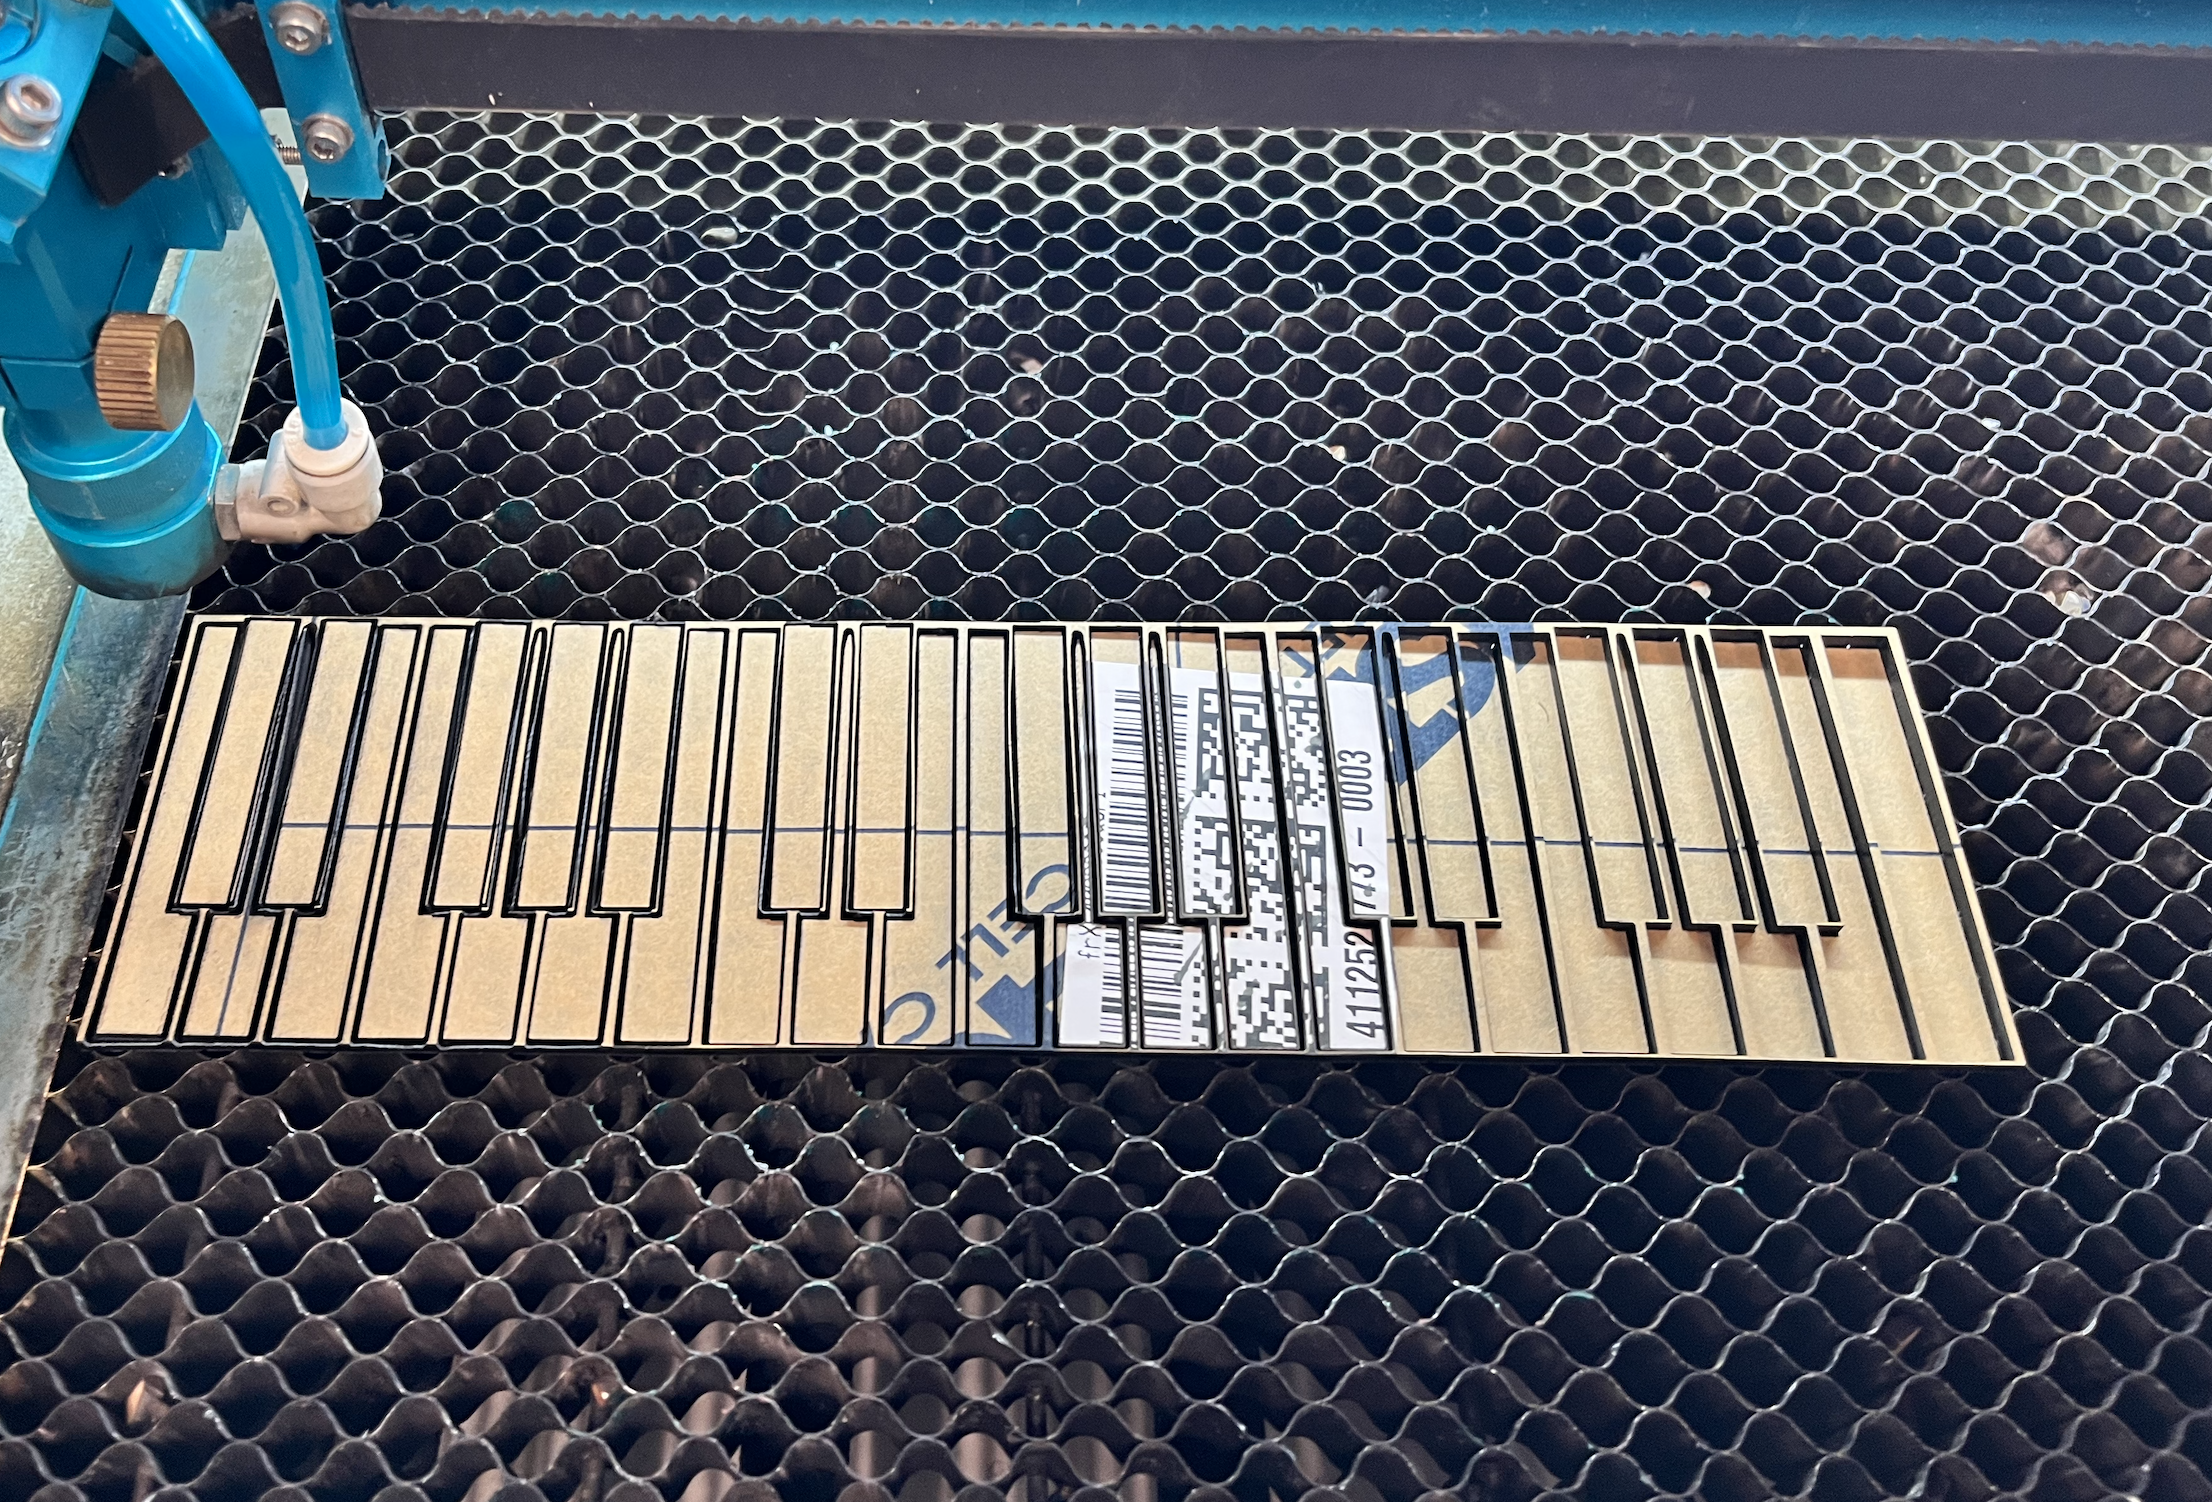
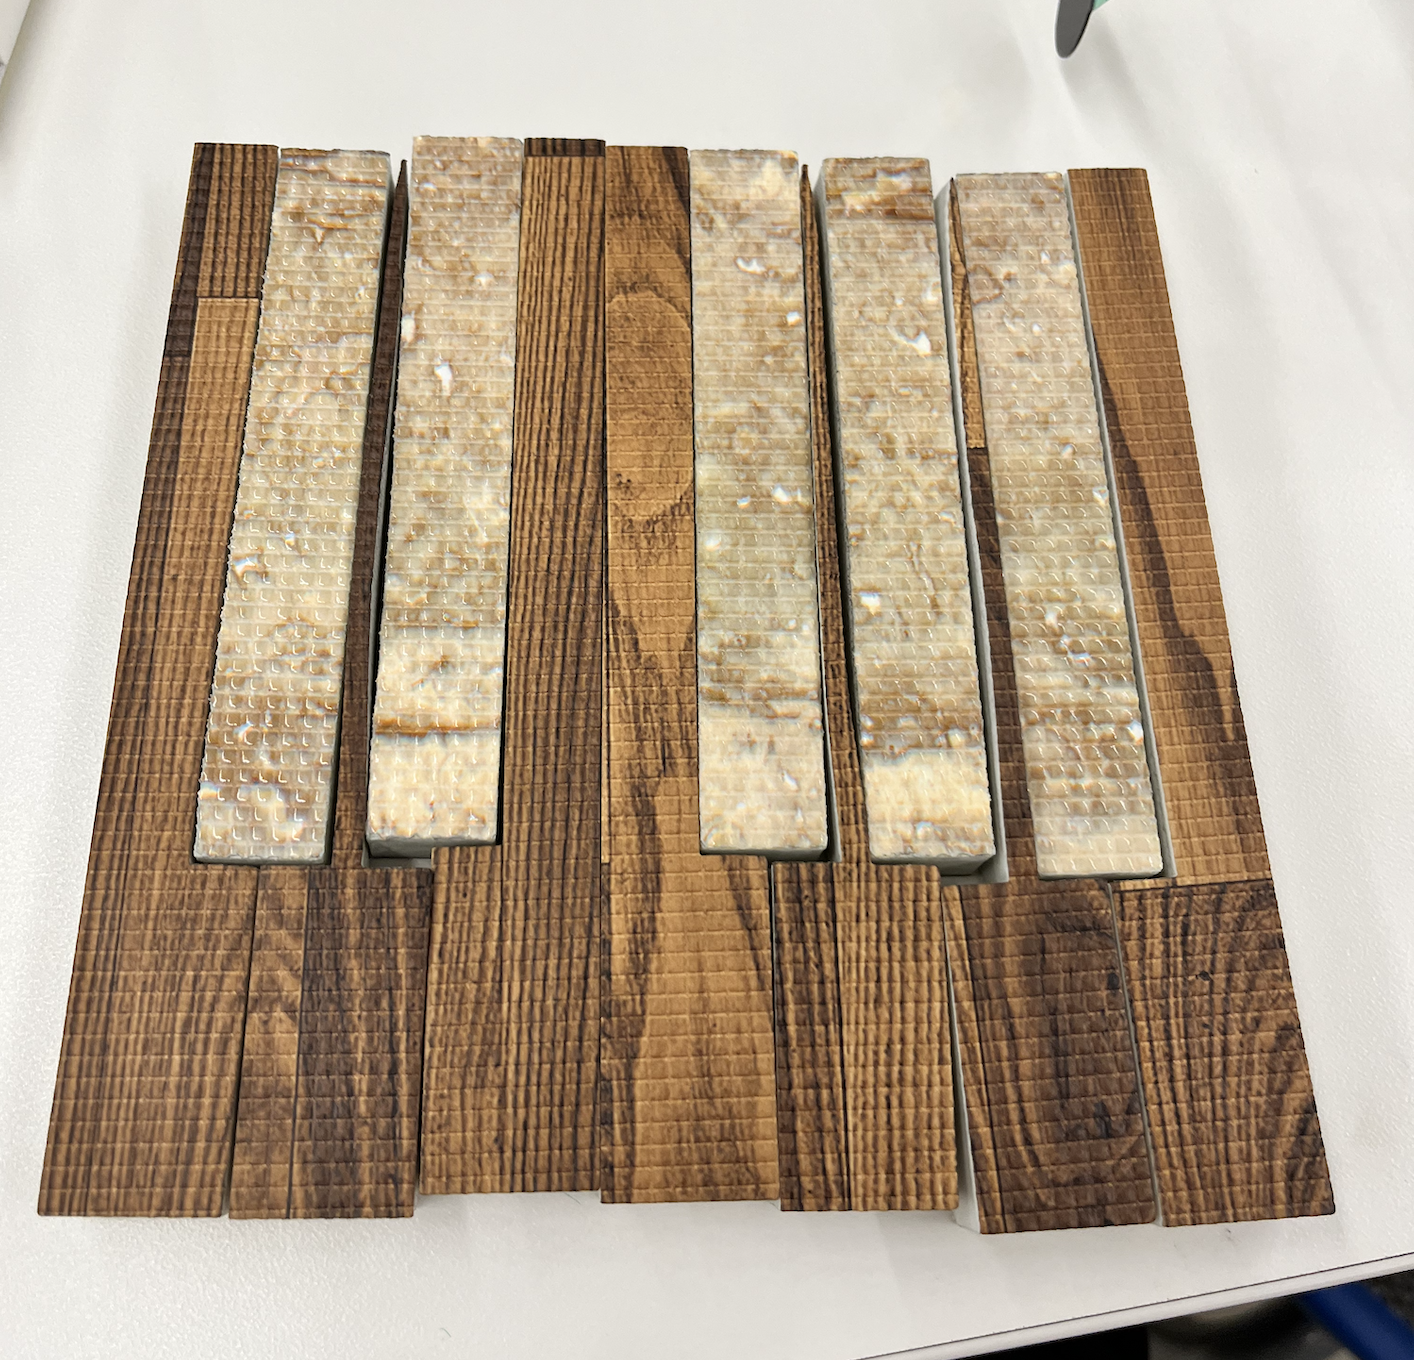
So I decided to experiment with other materials. I tried on wood and didn't work either. I found this foam and laser cut the piano there. It worked great and the texture looked very nice.
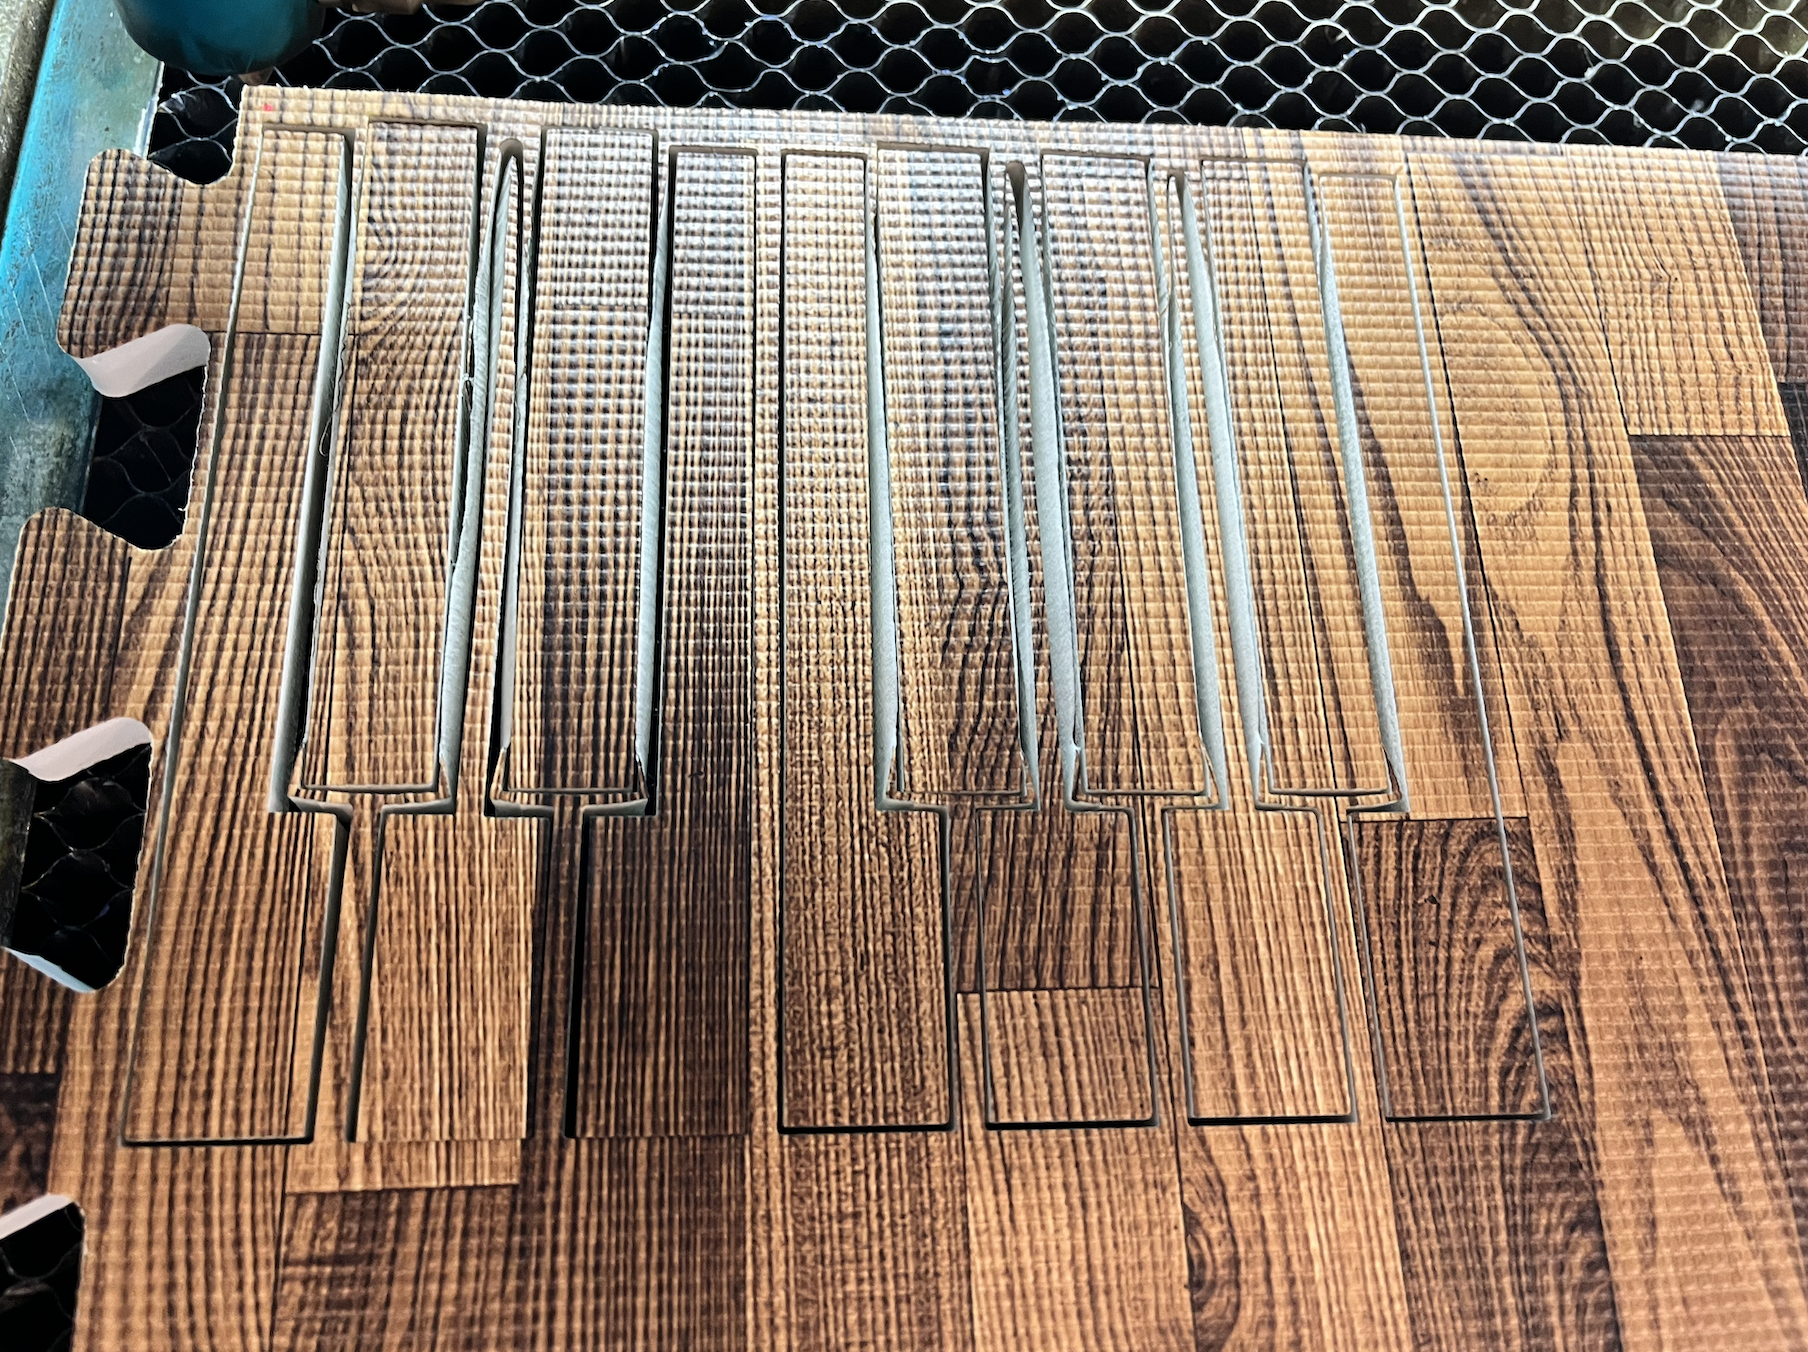
Then I experimented with this piano key input and it worked very nicely. However, I realized that this input would be very difficult for people to interact with if they don't know how to play a piano and also they can't see the piano key when they put their hand inside. So I decided to go with the hand shaped input idea.
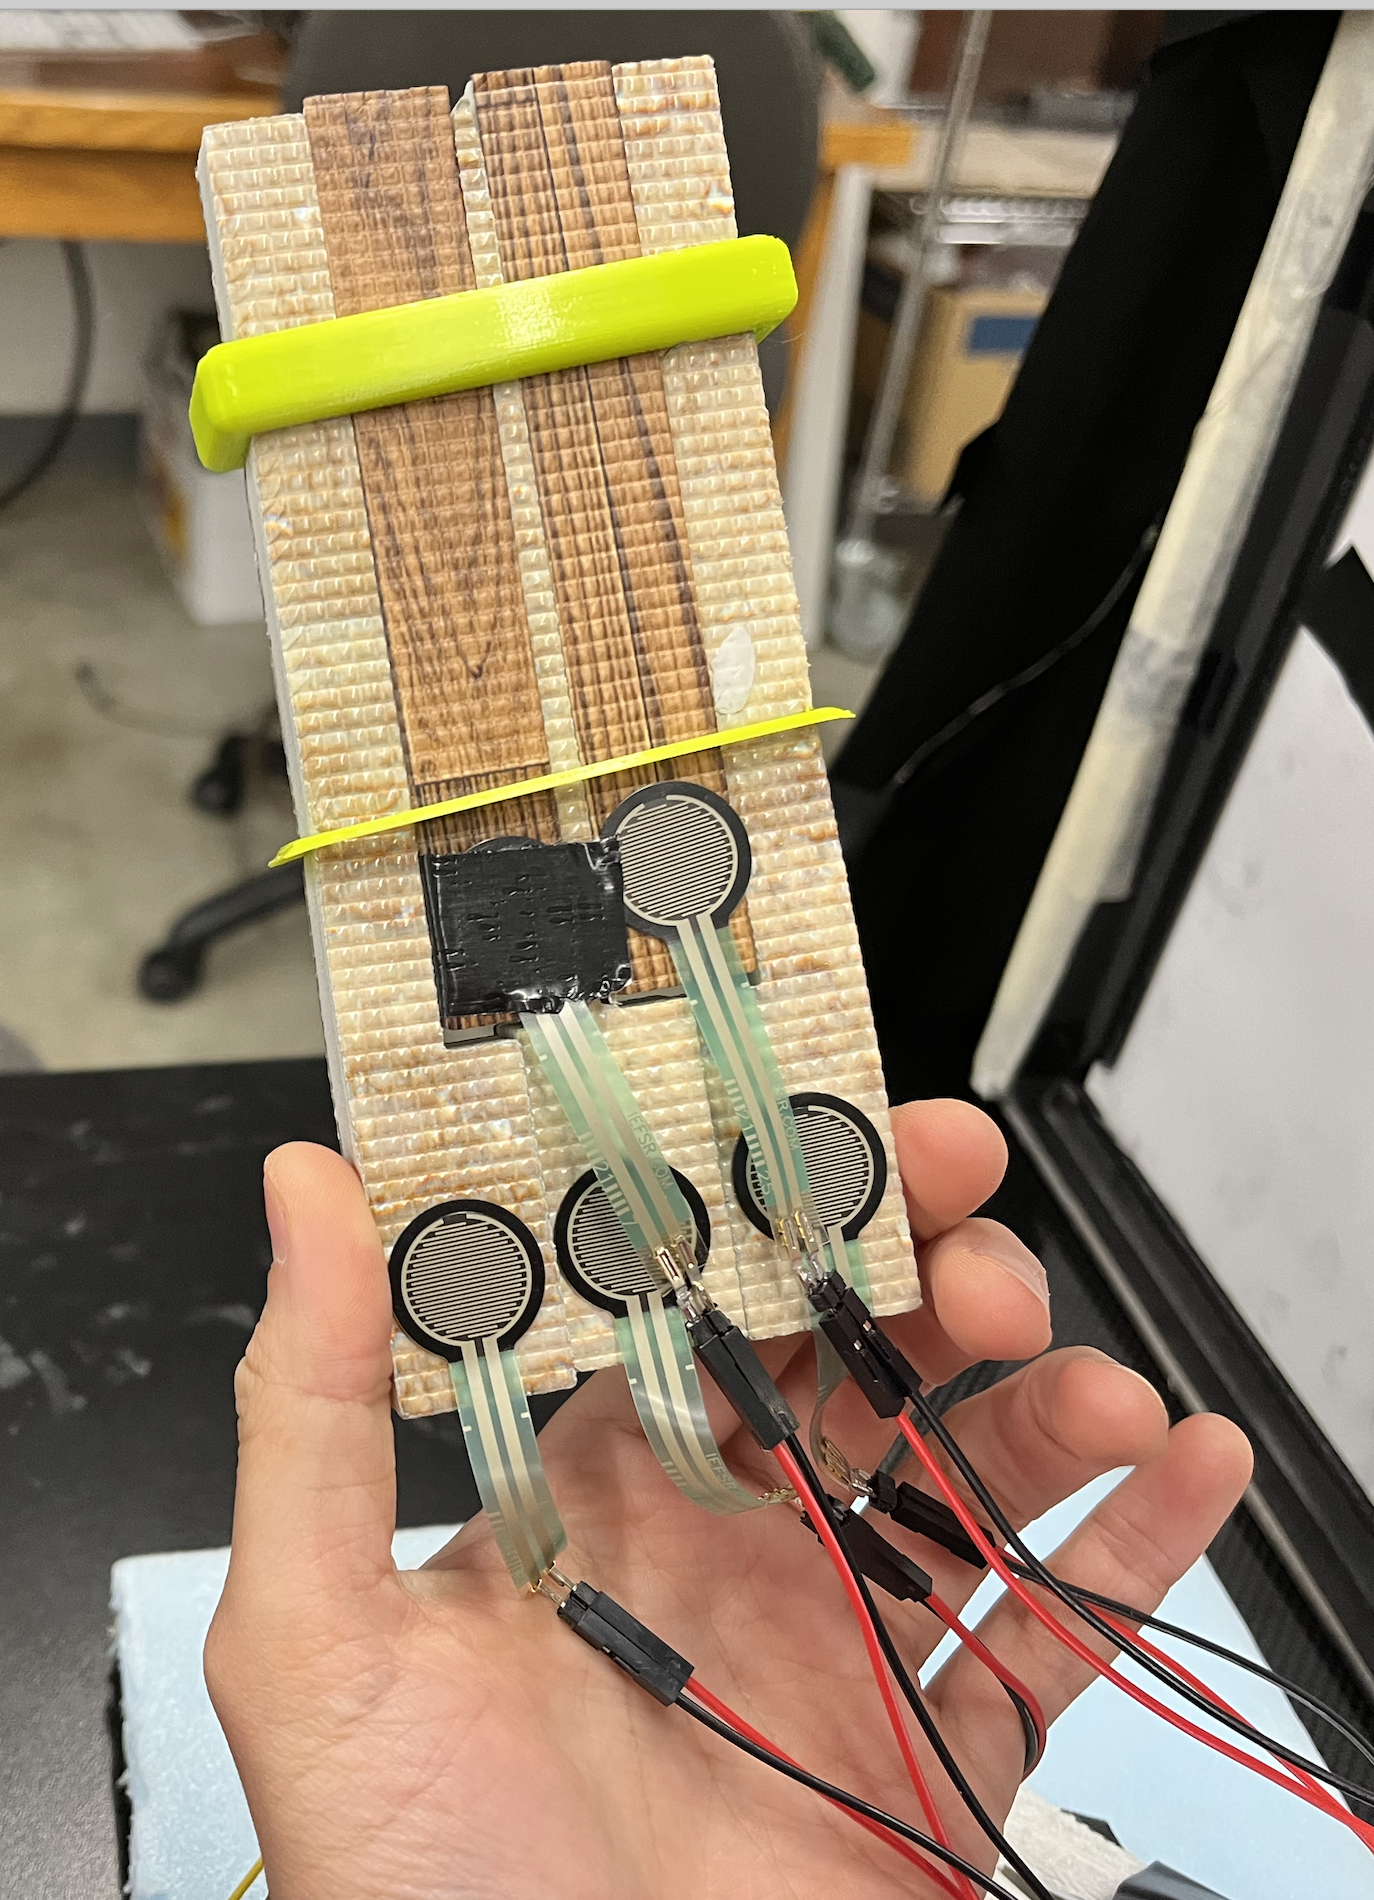
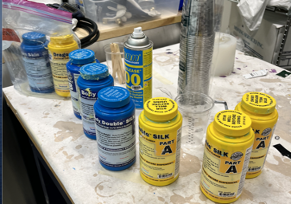
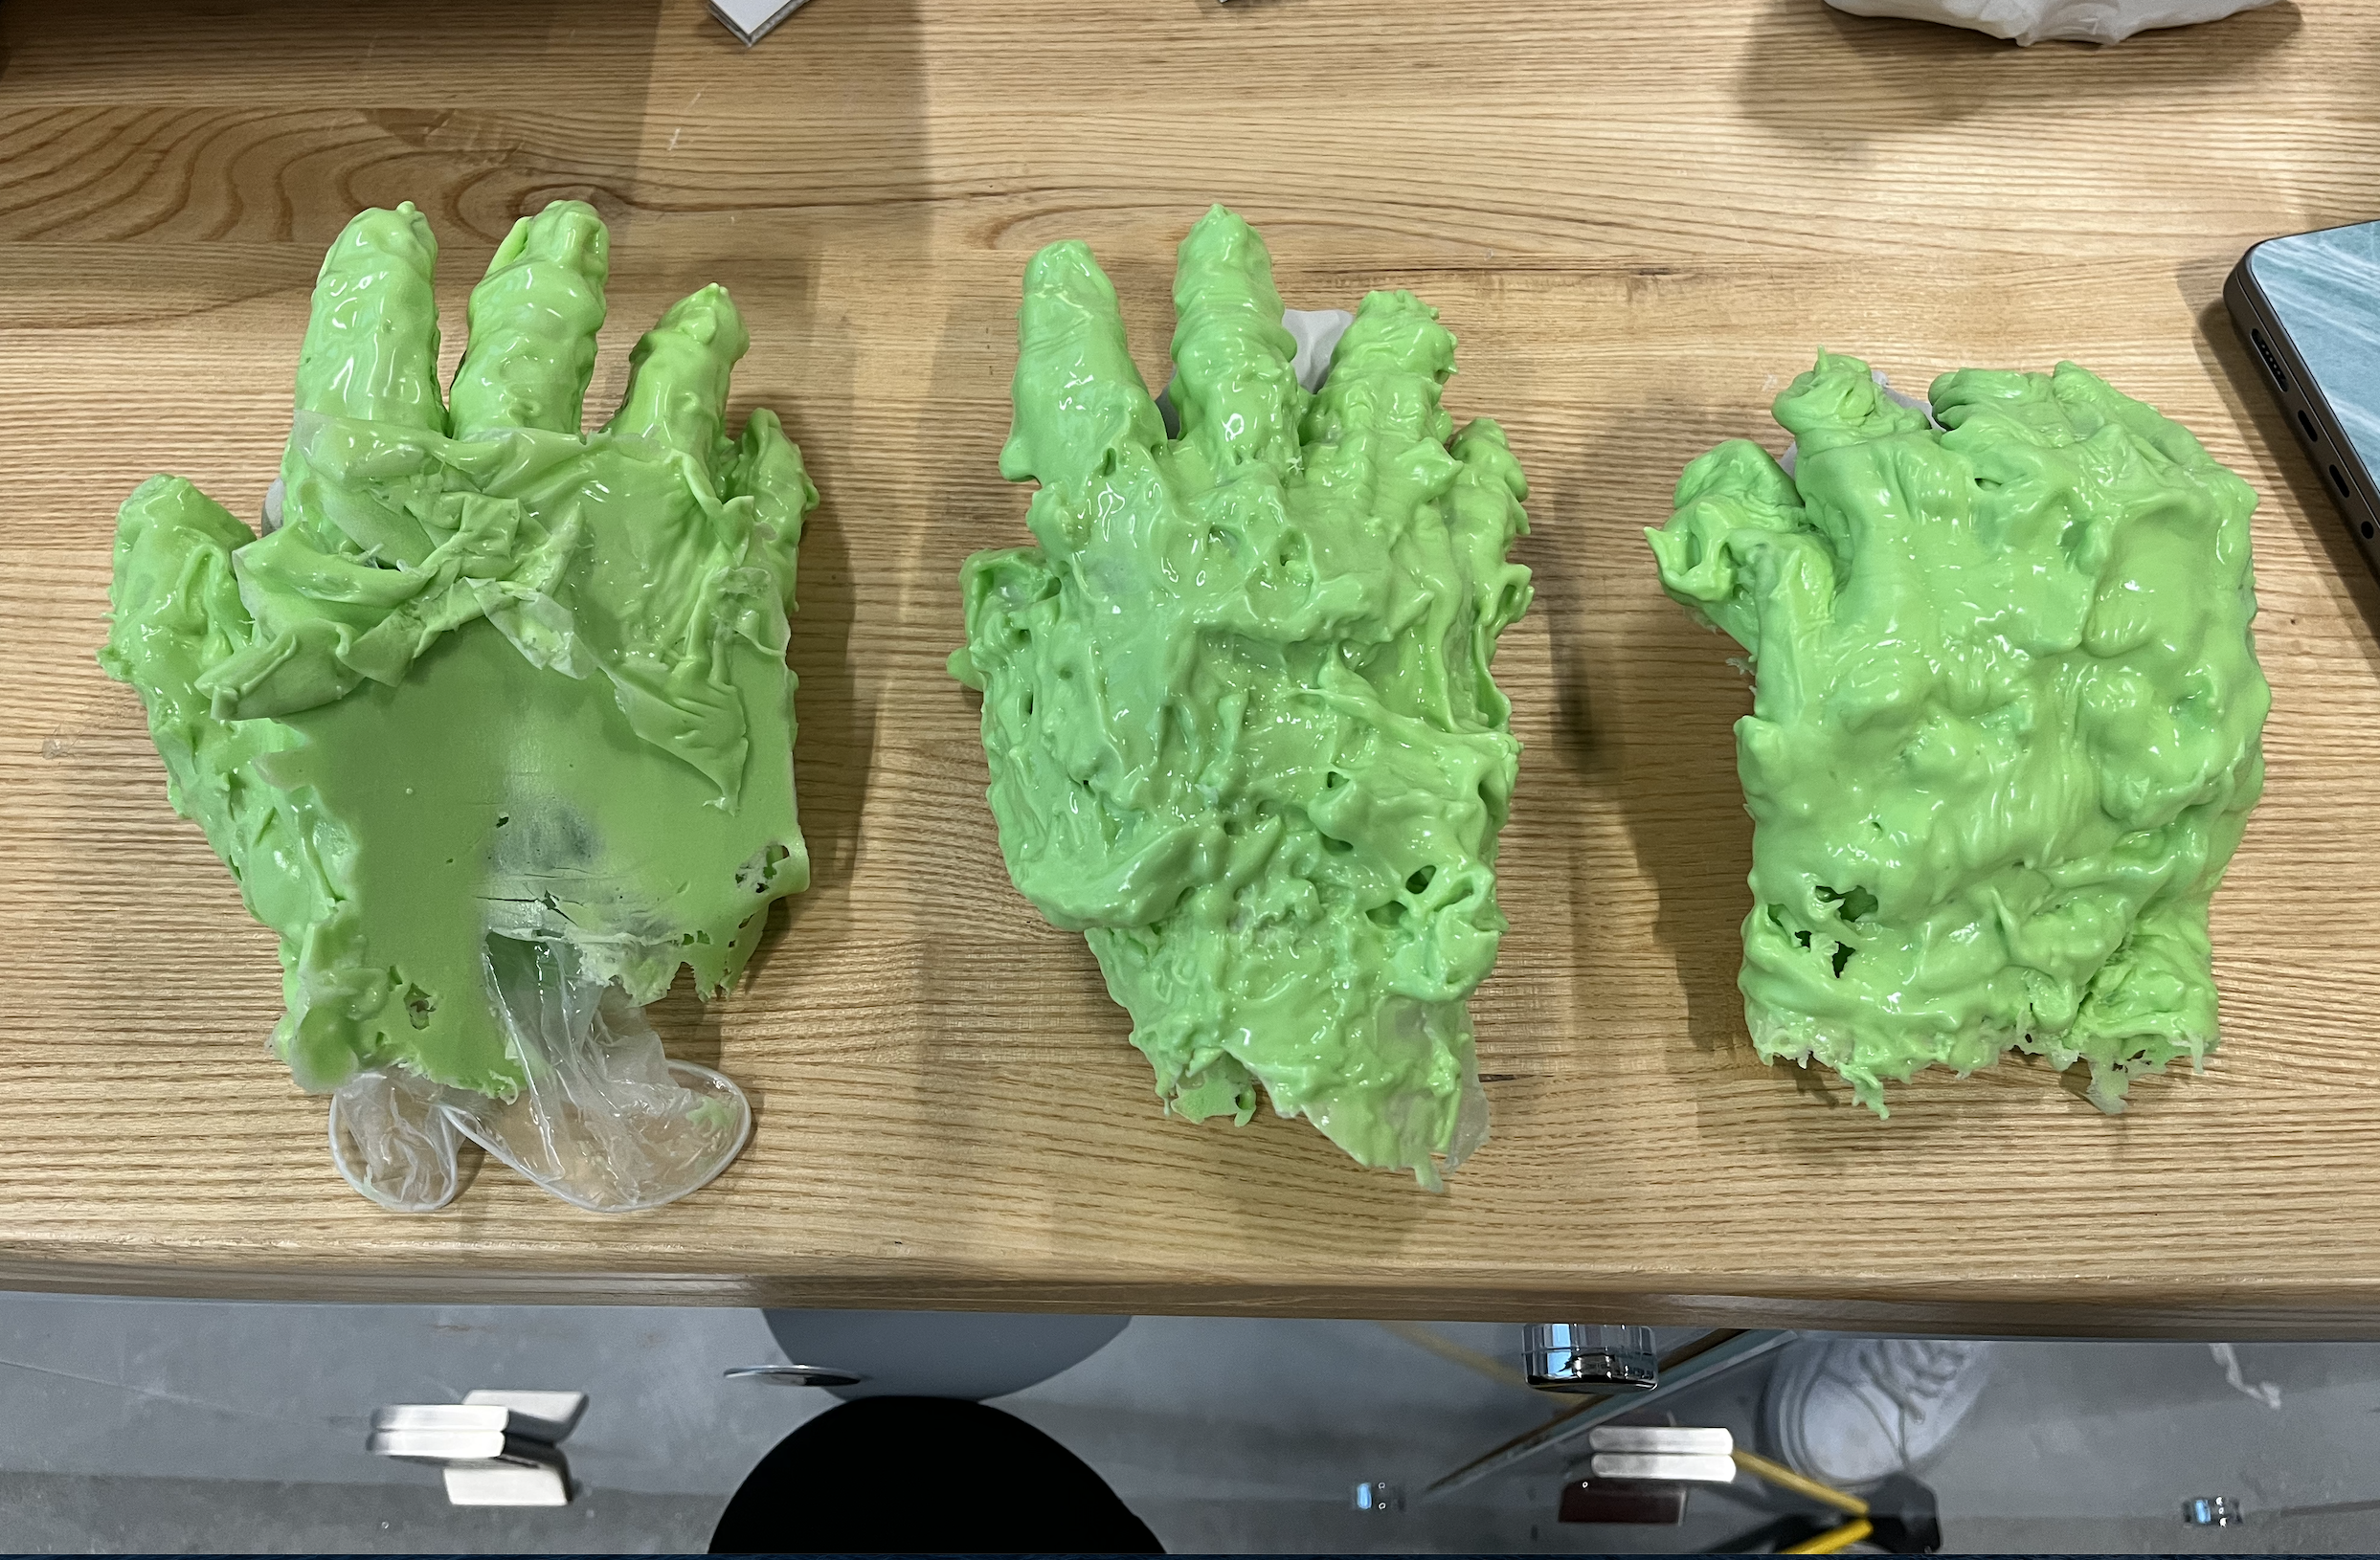
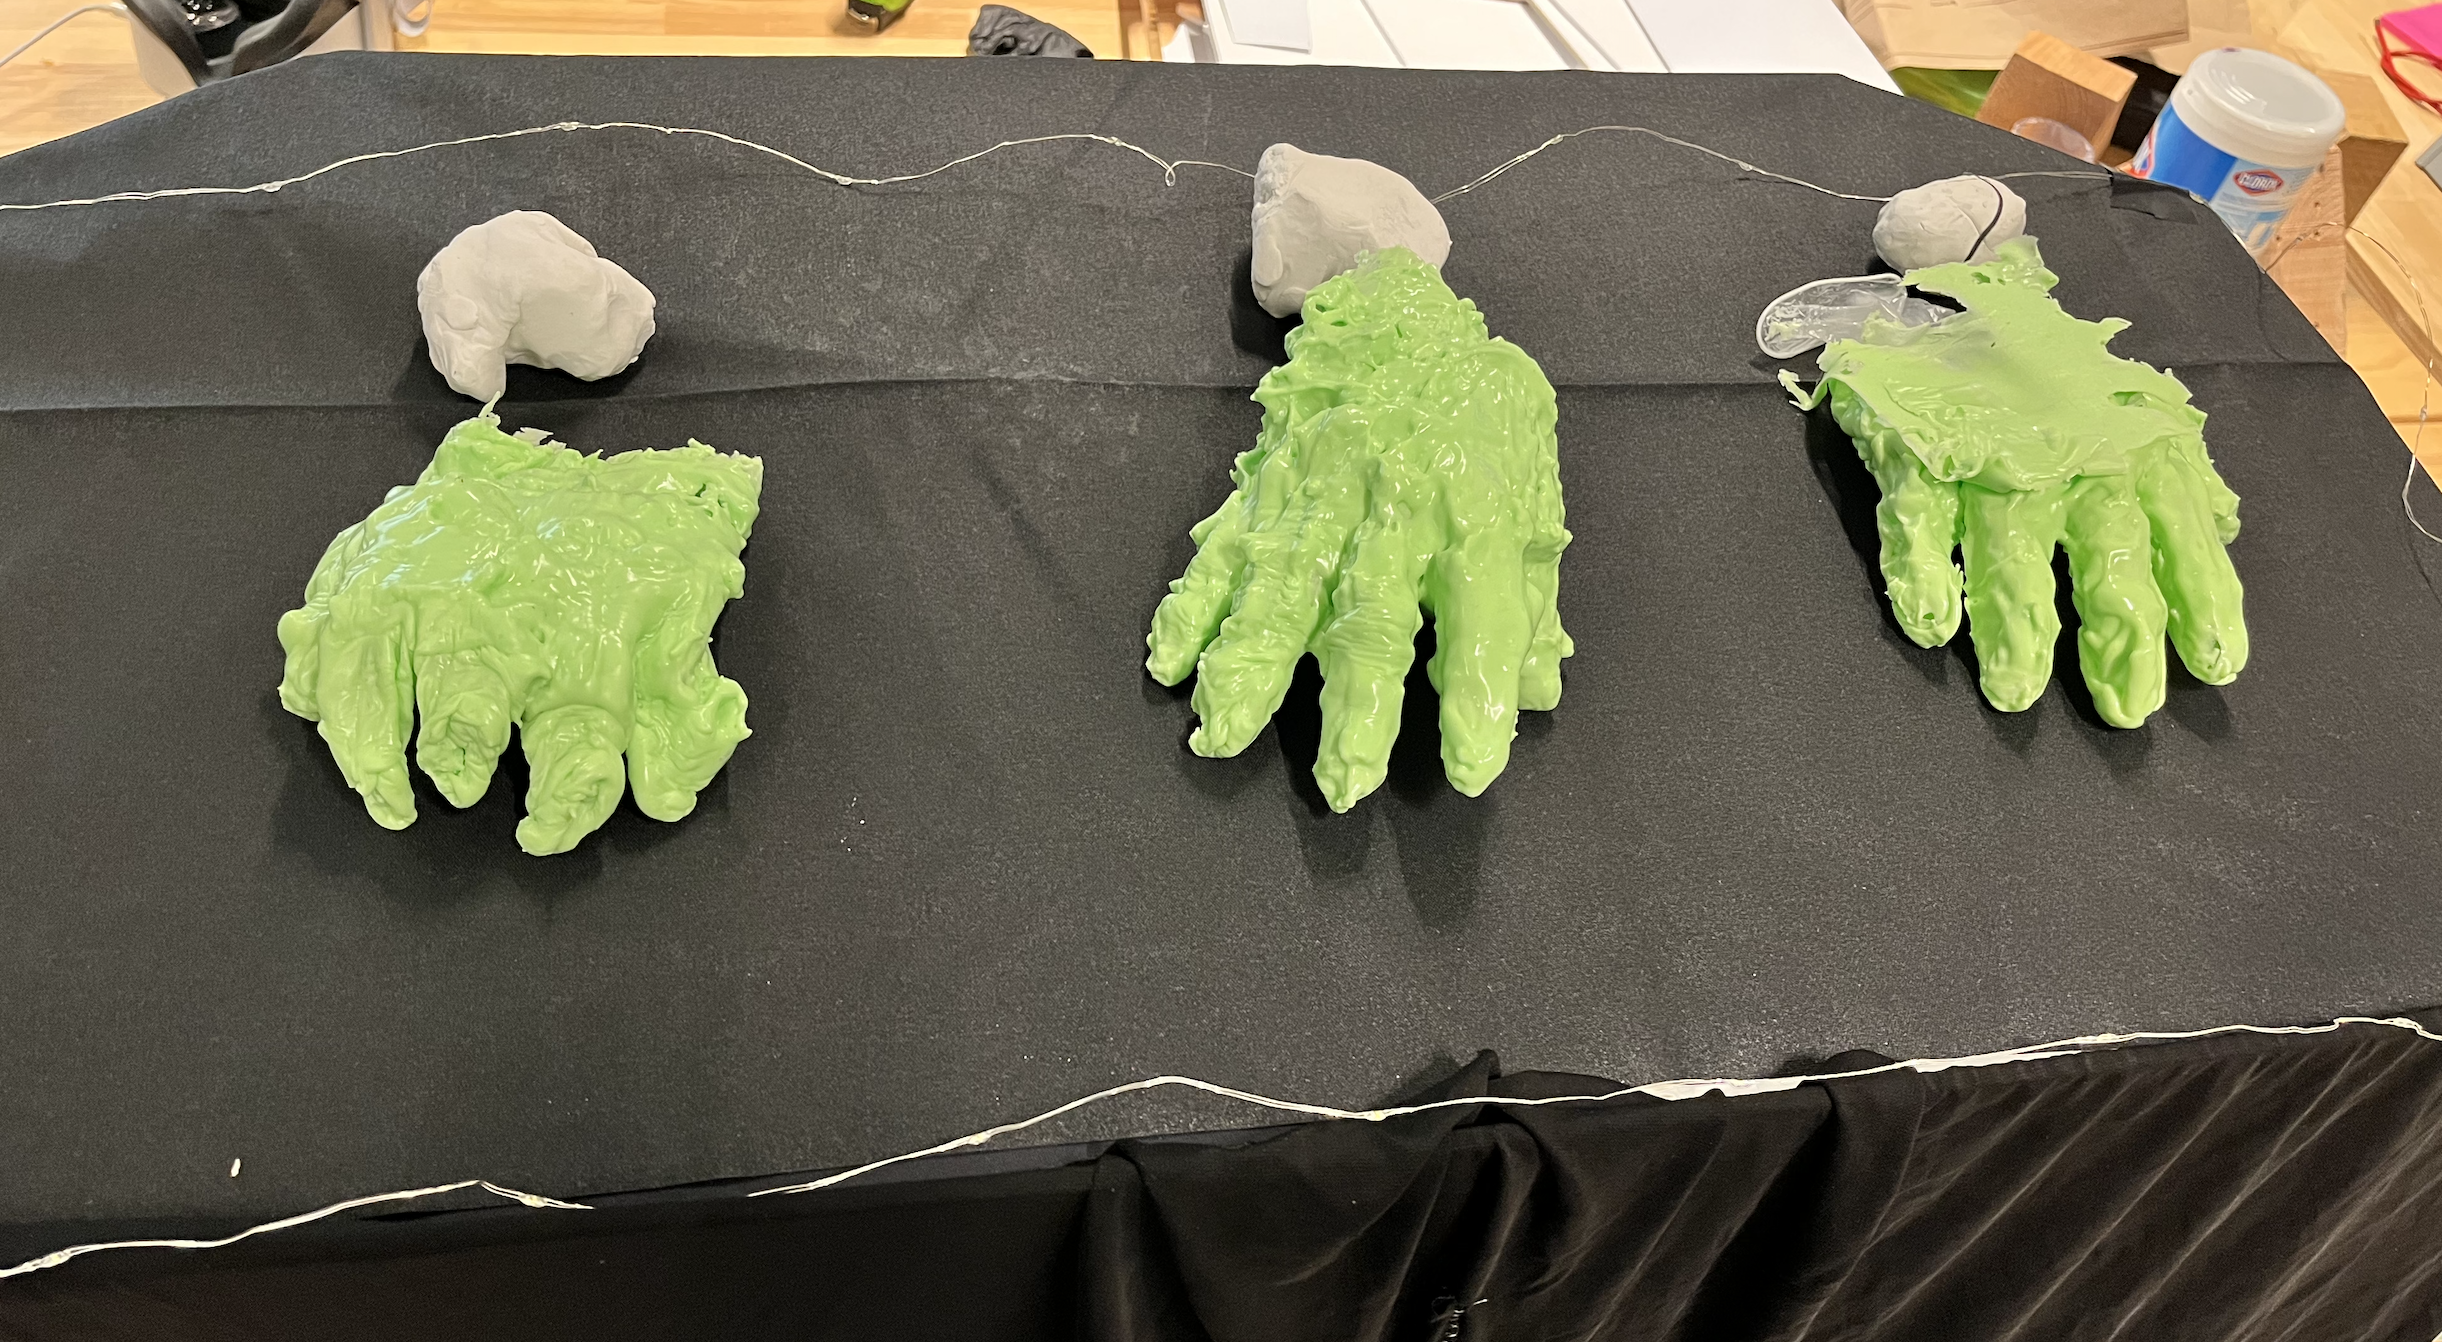
I want to cast a shape of my hand but with soft material, as I learned about FSR that it didn't work with hard mateirals. I found this body double silk material that I can apply to my skin and take it off easily. I tried with this material three times but the end result didn't work very well. Instead, the hand looked very scary, like a Halloween costume.

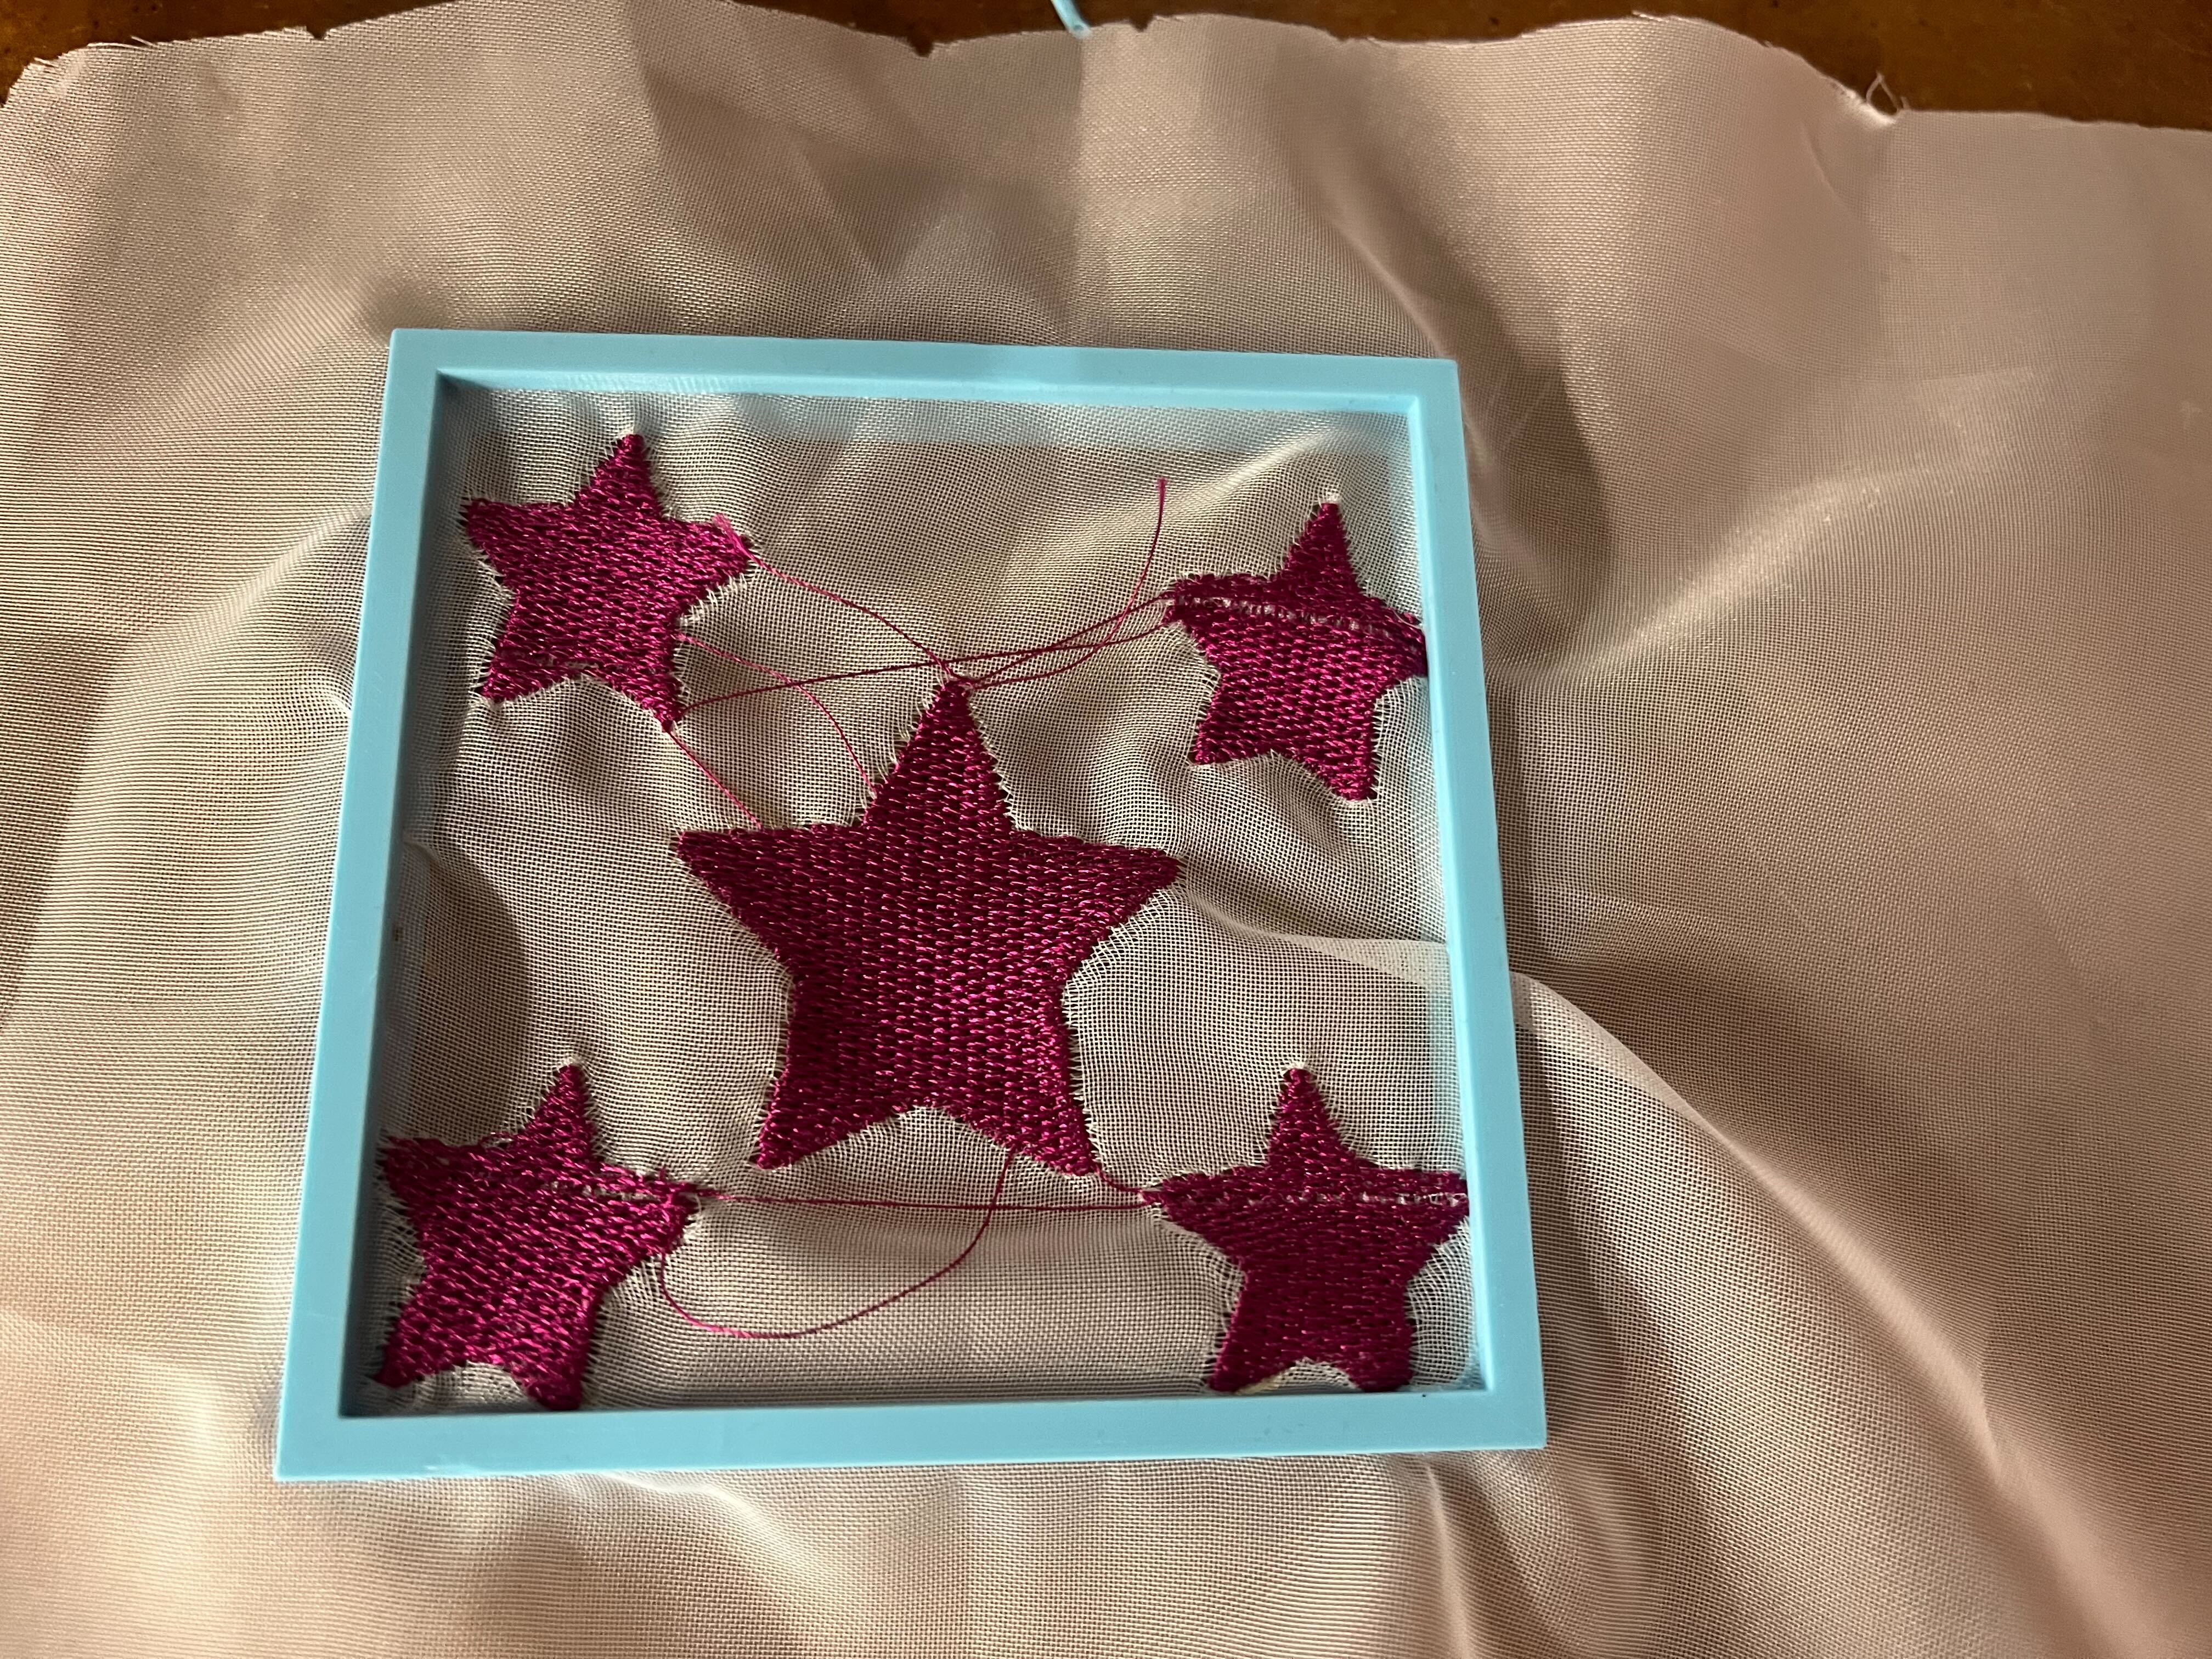
I also want to have a separate input so people can fully utilize their both hands. So I used the embrodiery work I did and added 3D printing on top of the material. The end result looked great!
Then a friend has a spare 3D printed hand that I can borrow and the shape and size looked great! So i decided to use that, instead of trying to make a perfect input device myself.
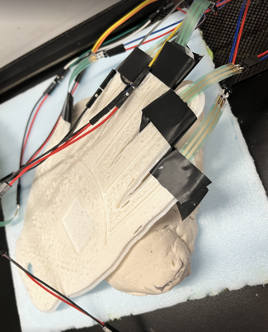
In summary, I have two inputs (one 3D printed, the other embrodiery)
Electronics
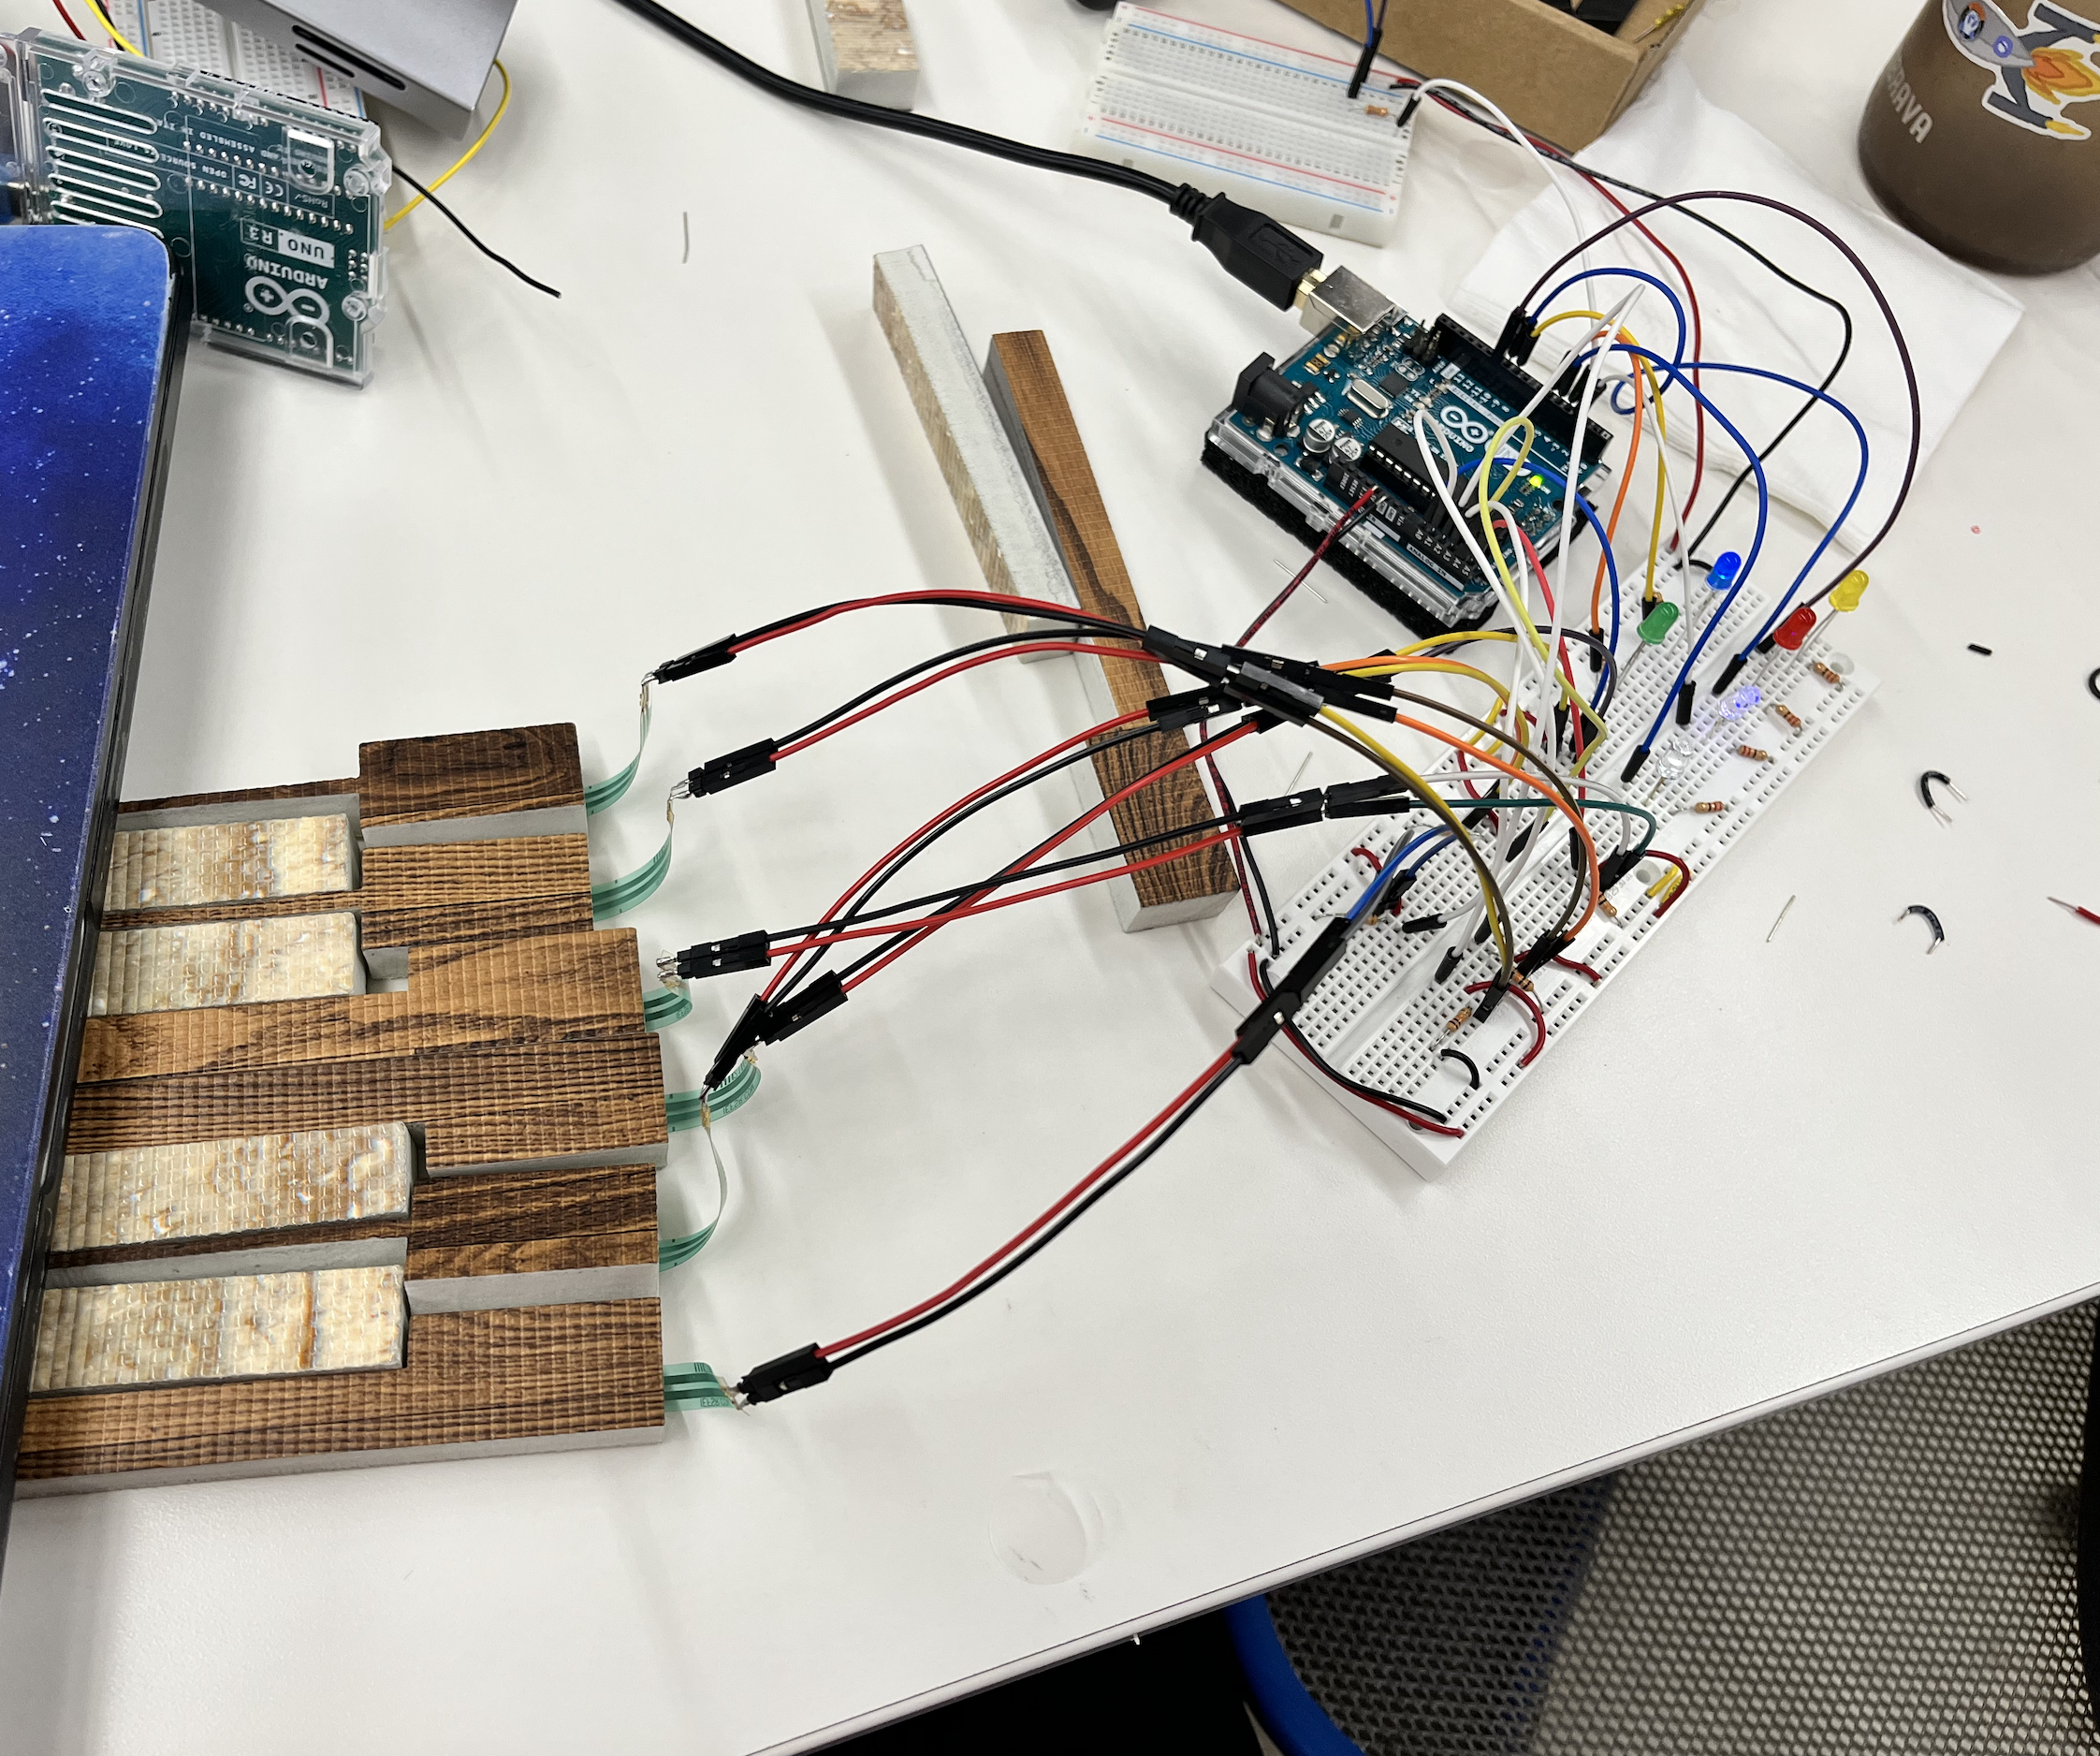
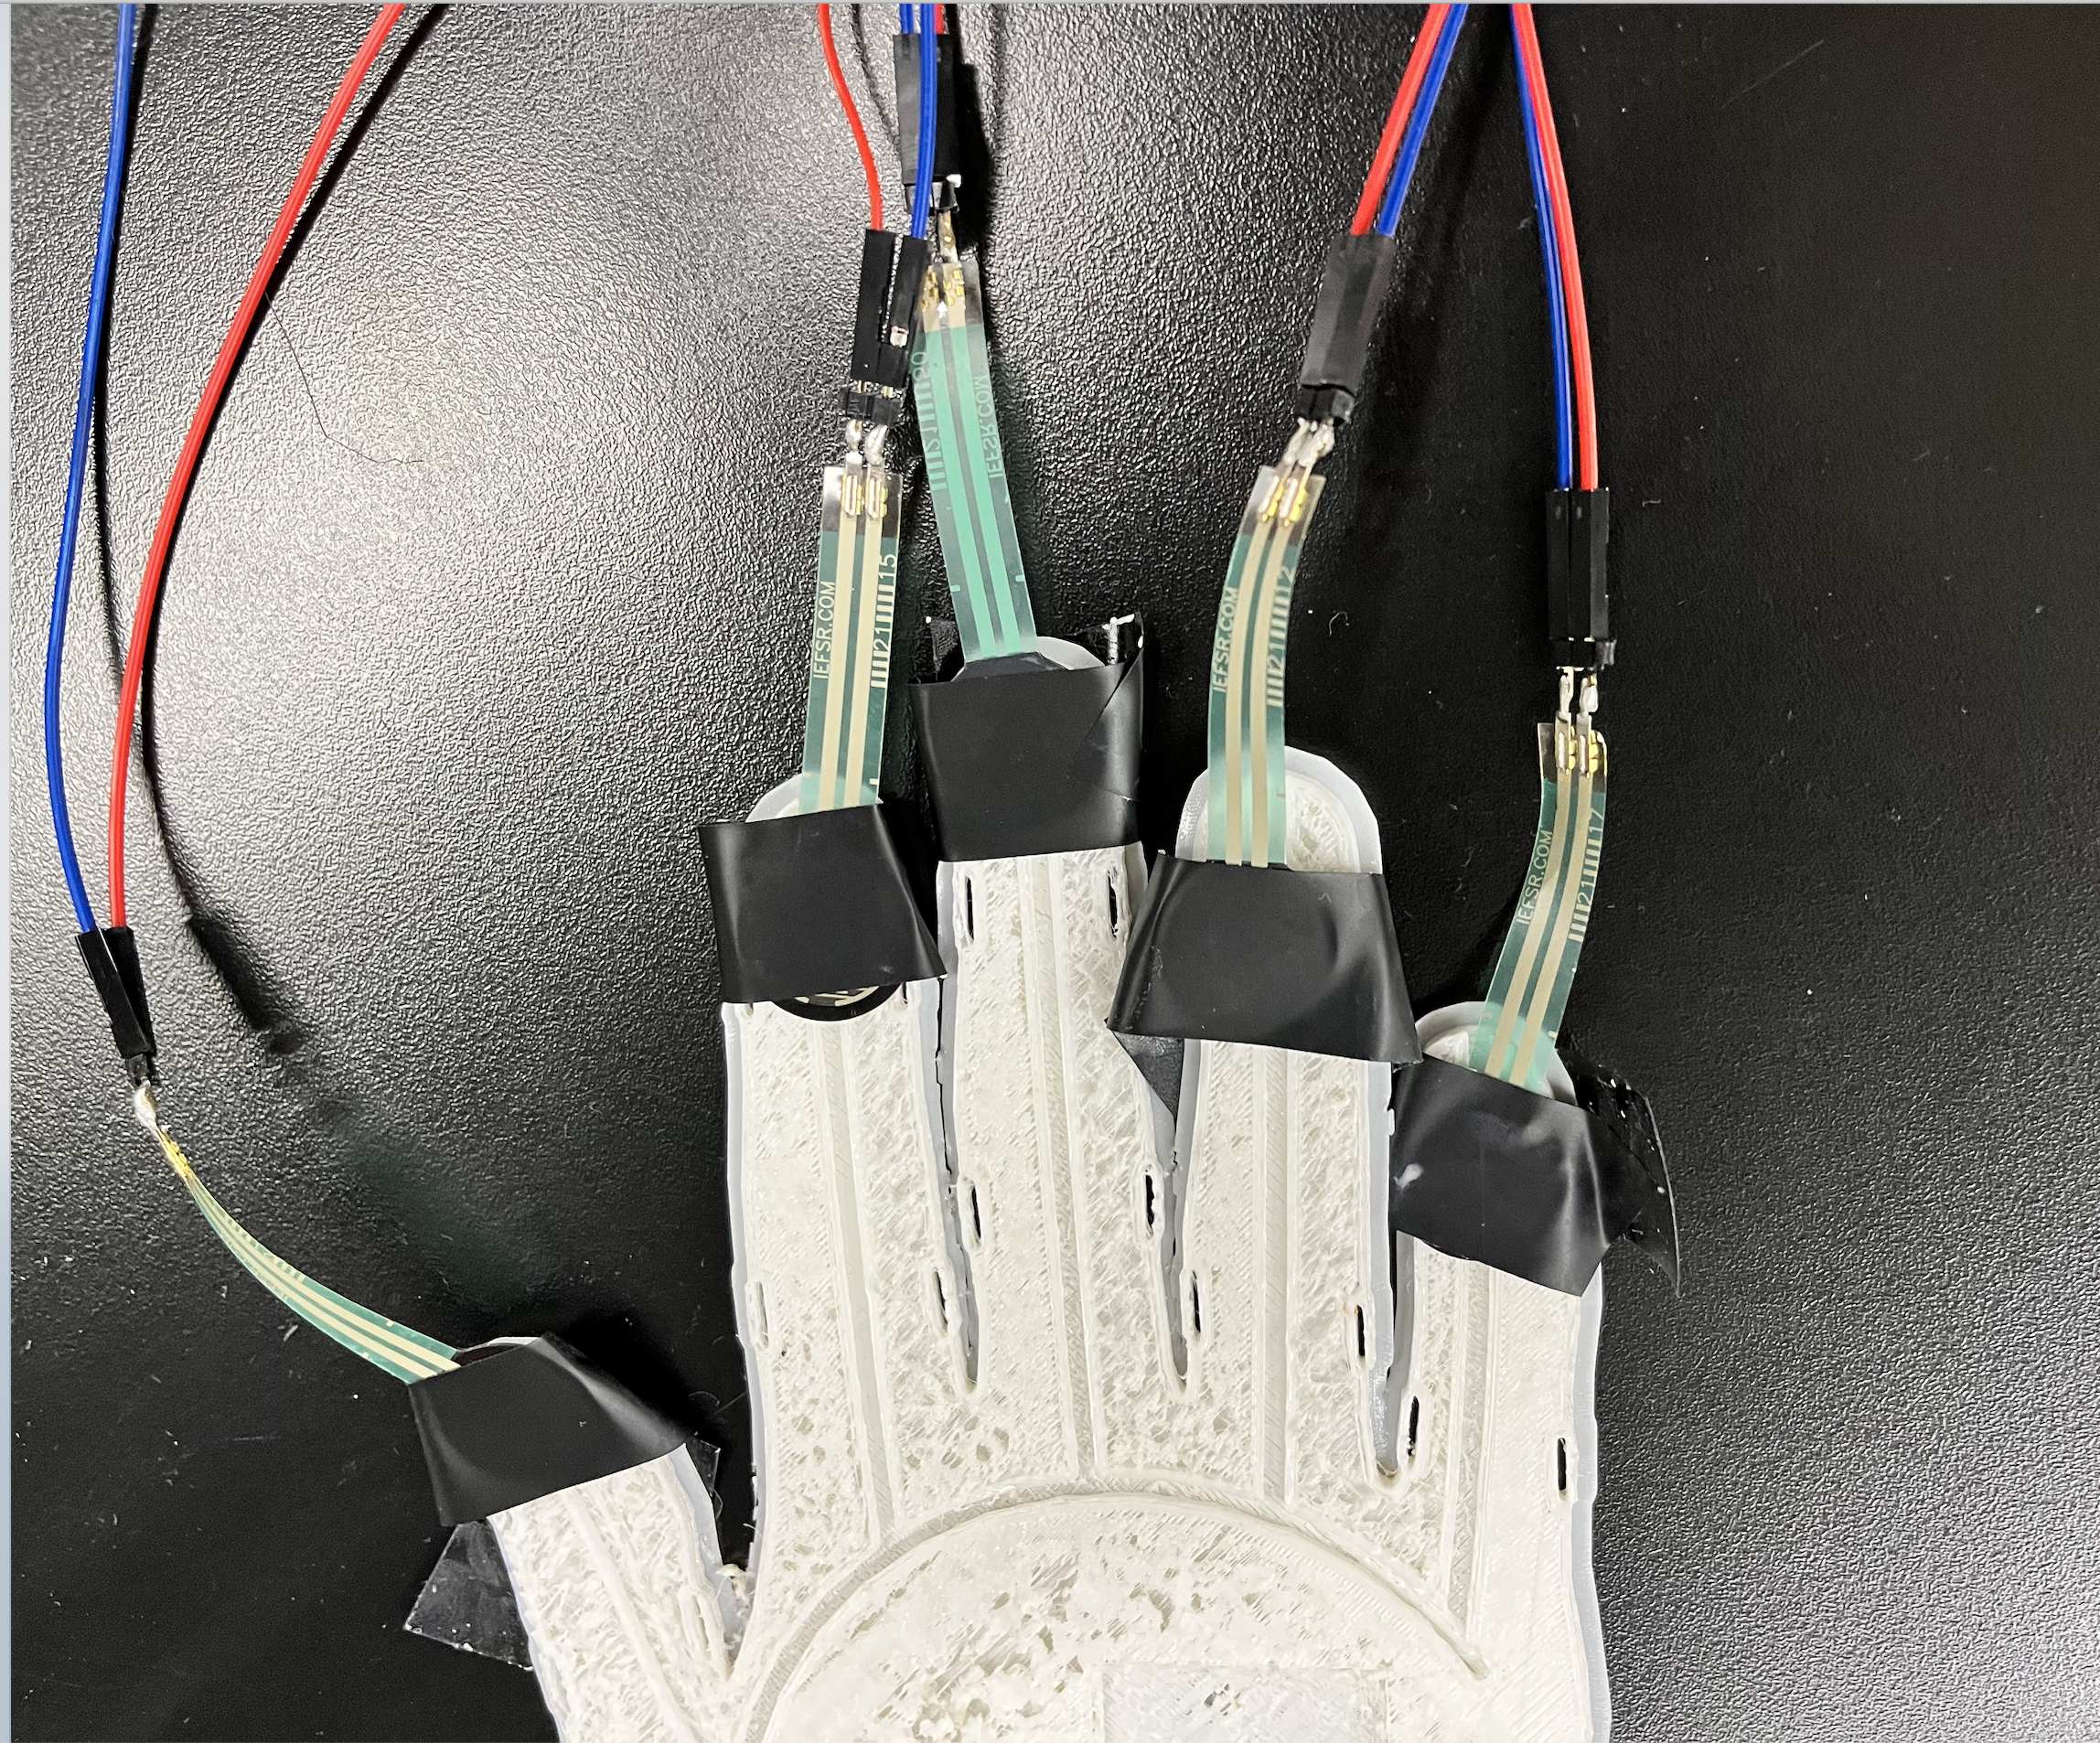
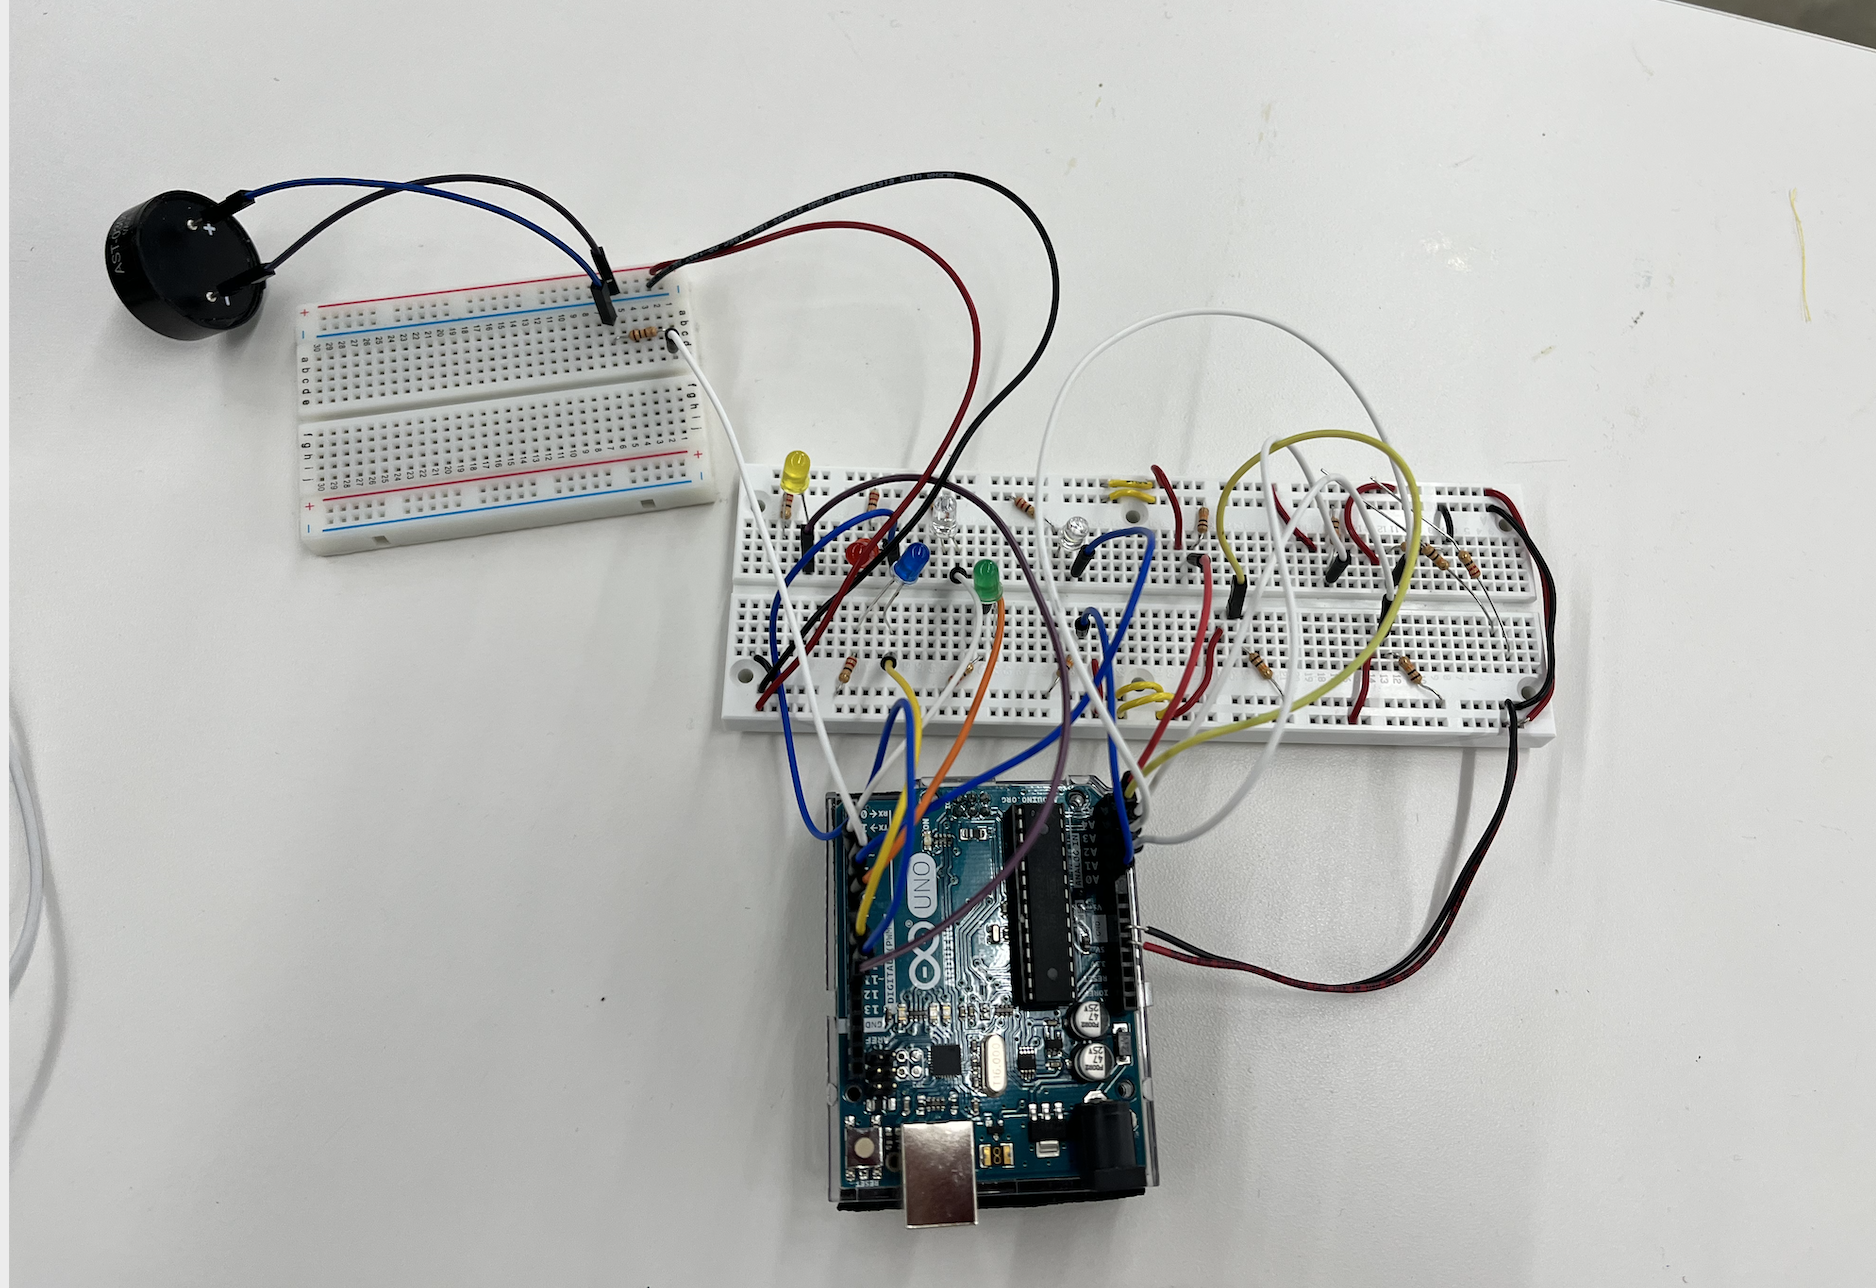
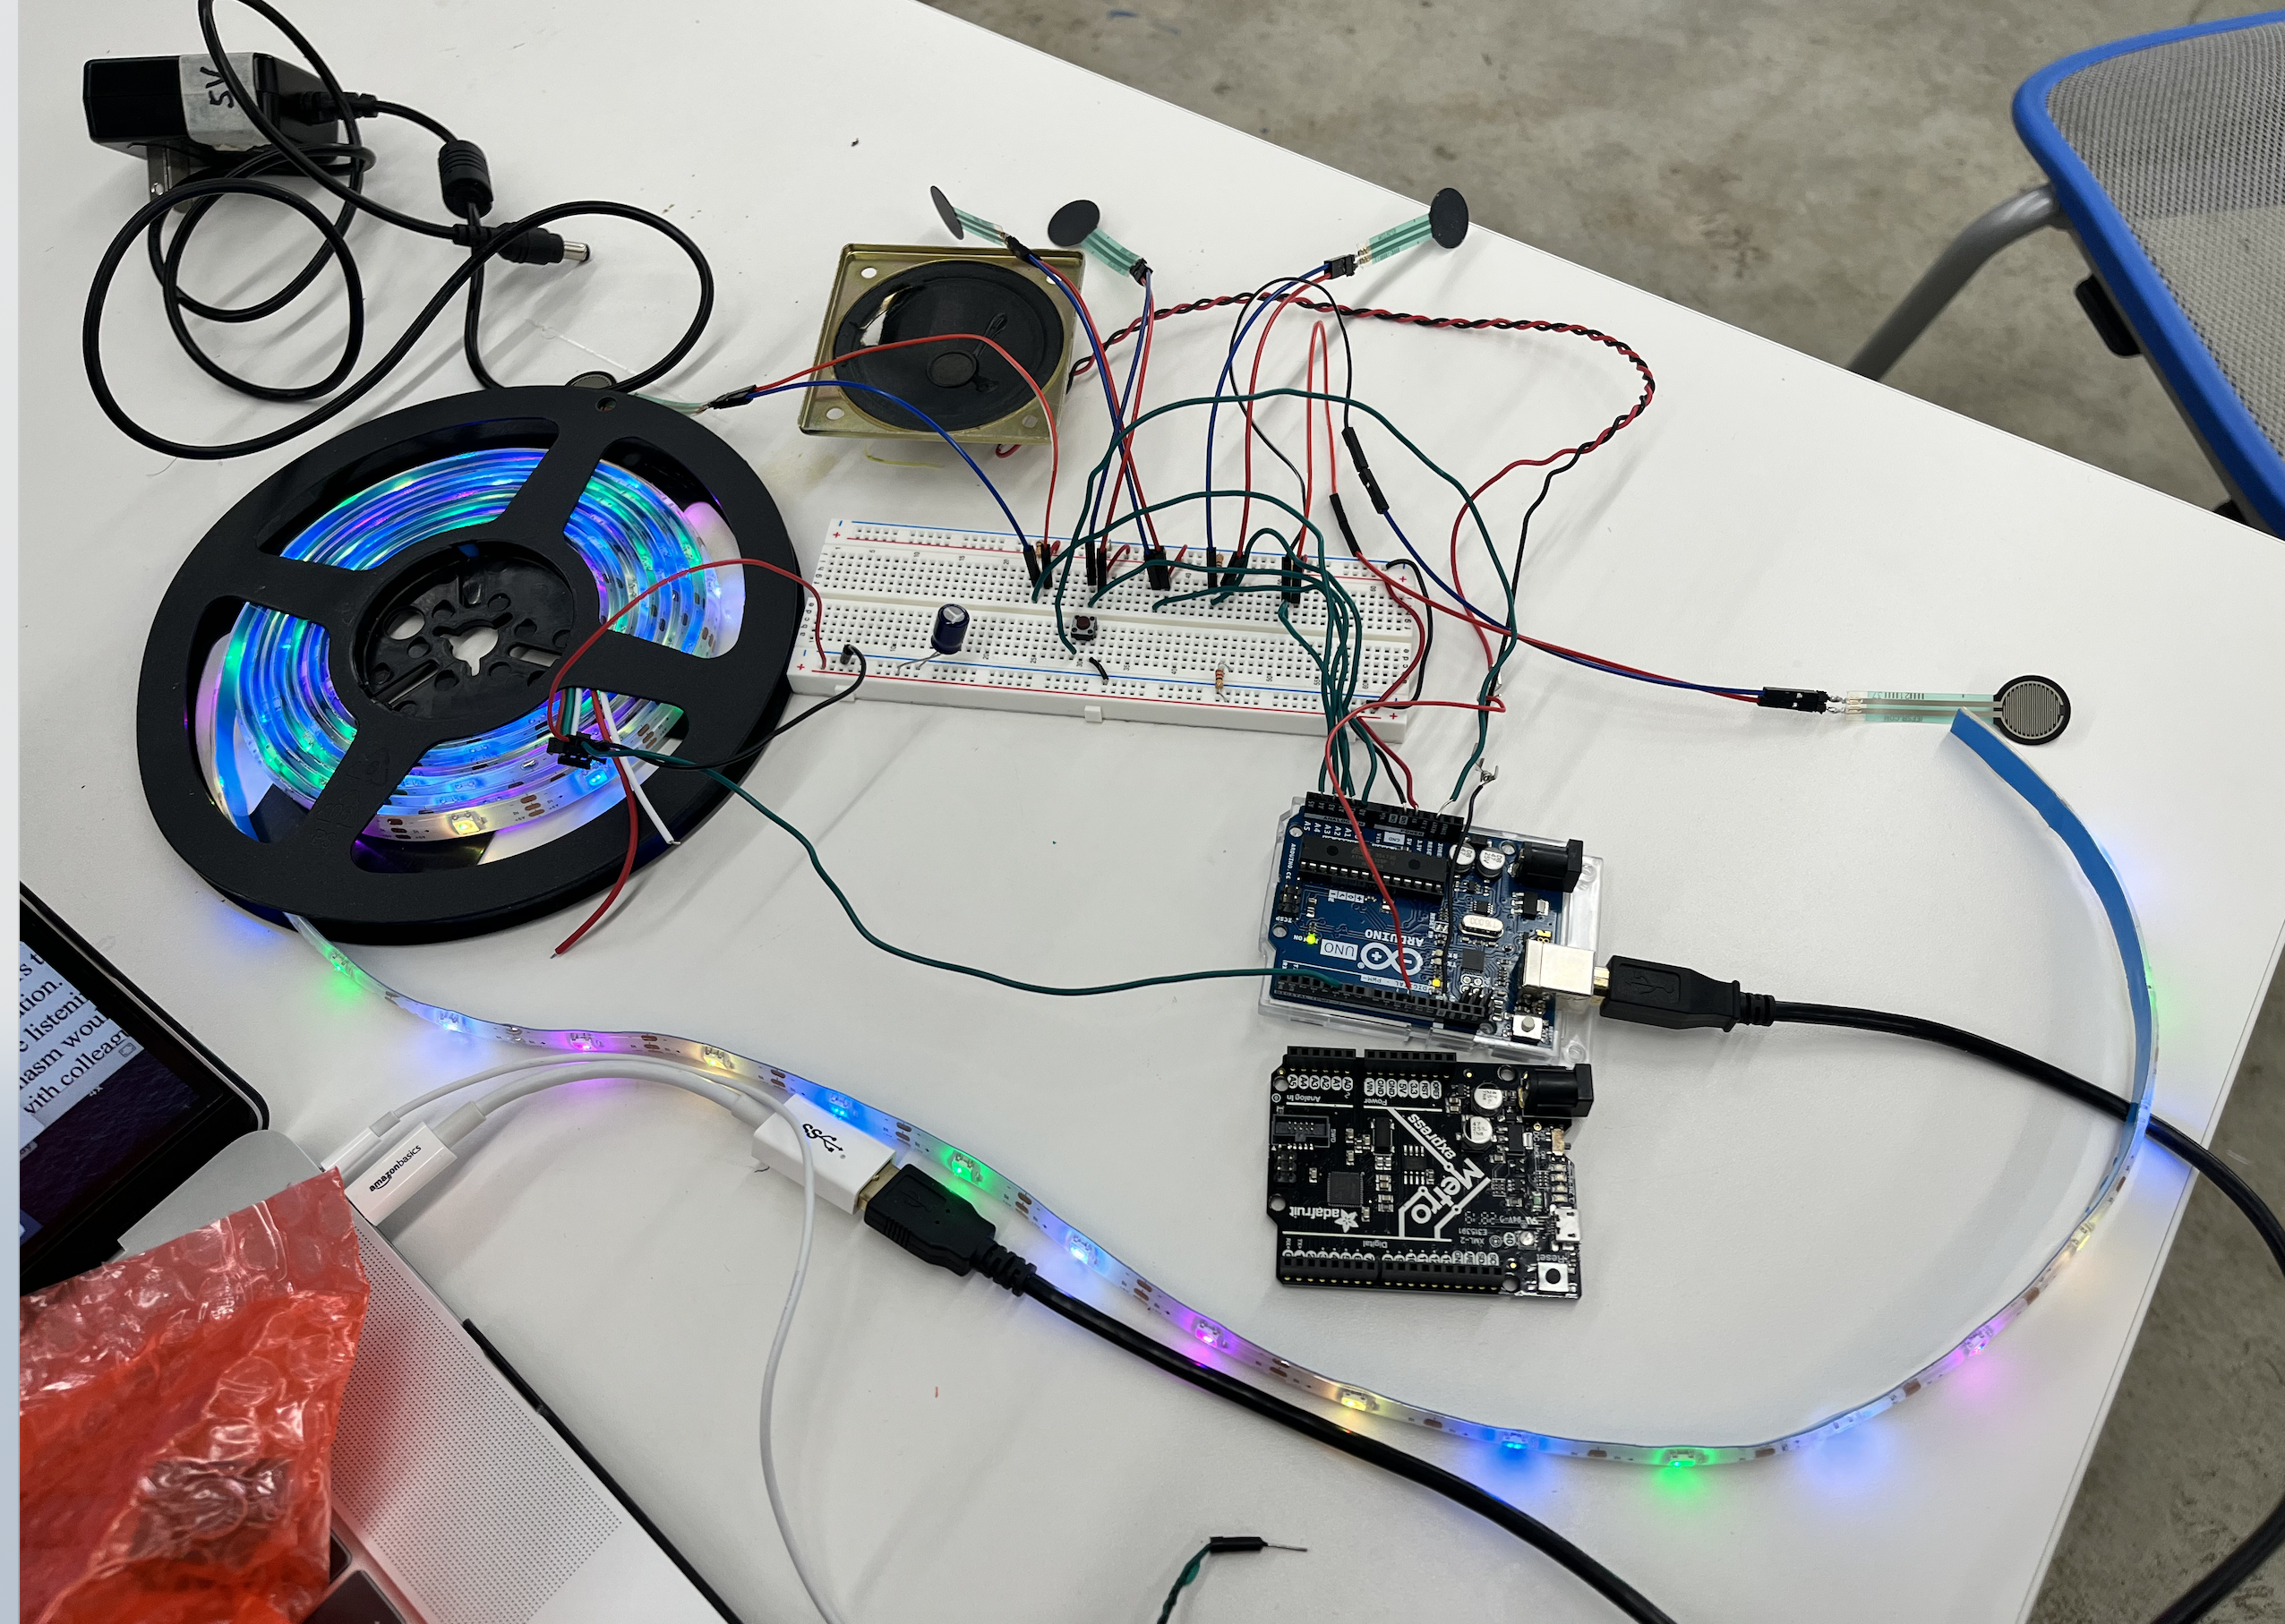
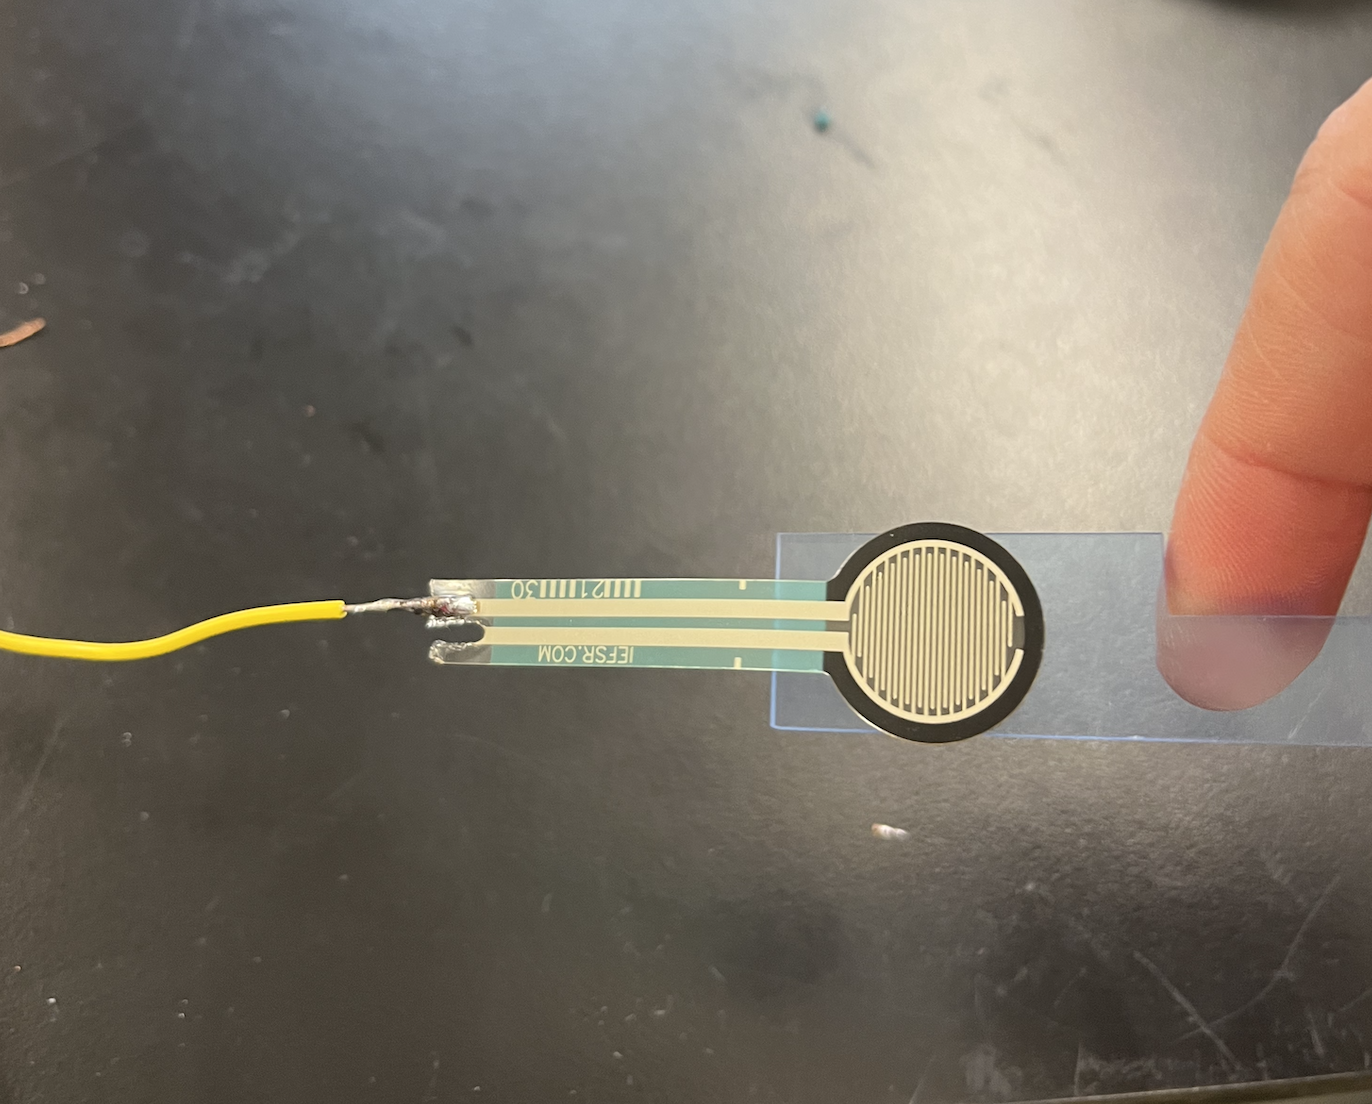
Now it's time for electronics. My input is FSR sensor, and output is LED lights (changing brightness, patterns, colors) and speaker (songs, tones) I first experimented with single LED lights.This is the circuit schematic and I used Serial Monitor to do debugging. I have 5 FSR connected with 10k resistor. I tested and explored different resistors and found 10K to be a good one for FSR. I put FSR in analog pin (from A0 to A4), negative side connected to 10K and then to ground. The positive side is connected to 5V. The arduino reads the analog and map that number from 0 to 1023 (FSR range) to 0 to 255 (LED lights range). Then I send the signal to LED strip. LED strip is connected with capacitors, and a 440 ohm resistors to make sure that it does not draw too much current. The LED strip is connected to pin 5.
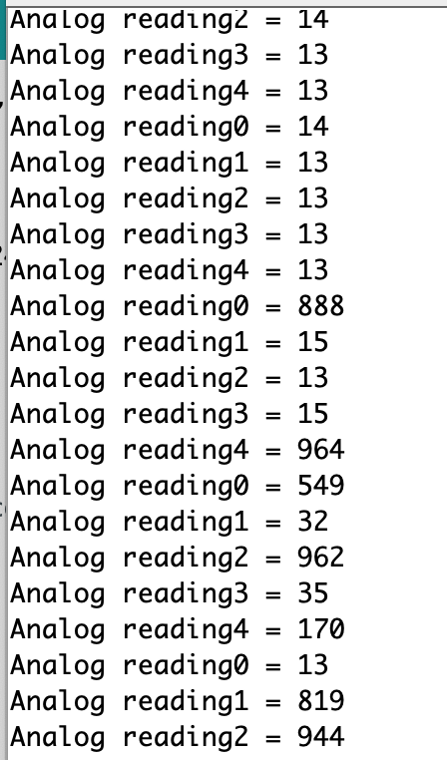
The arduino reads the analog and also controls the speaker. The speaker is connected to the ground, and the positive side is connected to pin 11. I tested the analog reading as showing below from the serial monitor. When nothing is pressed, it stays very low. When it is pressed, it will be more than 500. I tested with 100, 200, 300, 400, and decided to use 500 as the threshold, as it is a decent amount of pressure that works for most people. When I make it 300 or 400, sometimes when we did not pressure it, it automatically turns on (could be due to the 3D printed material). When we set it really high, people have to press very hard (which would not be a great user experience).
Also, my original code isn't very elegant. Nathan suggested that I should be using multi-tasking. So I learned to use Class in Arduino and had 5 different classes (1 for FSR + light, 1 for FSR + sound) I had a lot of trouble with playing song/music and finally was able to make it work thanks to Nathan, Chris, Kaissa, and Gabby's help. It was difficult to see the result from the picture but you can view the code in details here.
However, I also encountered another issue that there is very little memory left for Arduino UNO. In the end, I decided to only play four songs and left a finger for button control. If people don't want to hear this song, they can stop it and switch to a different song by pressing the button. For the button, I tried to use attachinterrupt but it doesn't work with FSR. So I had to add a button.
- Before: Ardudino Code NOT using class
- After: Ardudino Code using Class

Putting all together
Now it's time to put everything together. Let's see how the infinity mirror works!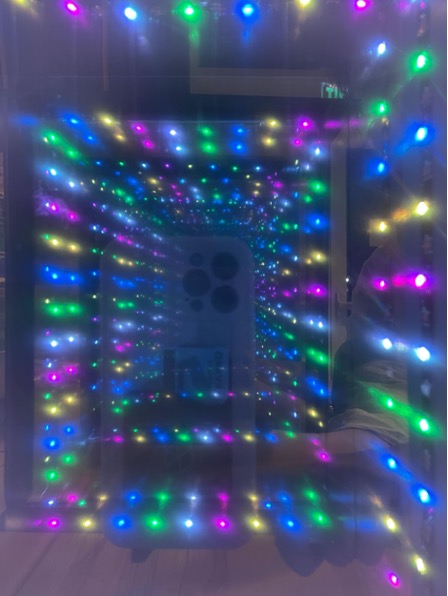
Failed soldering /burned wires
Doing this project, I did a lot of soldering and also due to the amount of LED used in this project, I also accidentlly burned a wire (really badly)
Final codes used in this project
Finally, thanks to all the teaching staff in PS 70: Nathan Melenbrink, Gabby Perry, Ibrahim Ibrahim, Kassia Love, Chris Zhu, and my friend Felicia Liang.
I would not be able to achieve this without everyone's help.